Hello to all visitors to the “Secrets of the Master” site! I immediately apologize for the violation of the frequency of publication of articles. The increasing construction season is taking its toll. Nevertheless, I sprinkled in a little. In this article we will work for ourselves, namely, we will do household chores. I bring to your attention a few examples. Maybe it will be useful to someone.
- Remaking curtain rods.
- Remaking a broken pot lid handle.
- Replacing the front glass on the oven door of a Nord gas stove.
- Repair of the gas control knob of the same stove.
- Reworking the broken handle of the mosquito net frame.
So let's get started.
How to remake a curtain rod.
For example, there was a wall cornice, i.e. was mounted on the wall, and after a little modification it will be mounted on the ceiling.
For work we only need
- drill with a set of drills
- and a puncher for attaching the finished cornice to the ceiling.
First we remove the mounting brackets.
Then we drill holes ø4-6 mm with an even distance from each other, depending on the length of the cornice itself.
Advice. ✔The recommended distance between holes should be at least 500 mm and the distance from the edges of the cornice should be 50-100 mm. ✔You need to mount it on the ceiling, stepping back from the wall at least 100 mm if the curtains are long and at least 50 mm if the curtains are short.
By the way, the ceiling version of the profile cornice is well used in cases where the room has a suspended or suspended ceiling.
Then the cornice can be hidden in a niche behind the box and it turns out to be completely hidden. You can also hide it without making a false ceiling, but do it, for example, like this.
style=”display:inline-block;width:336px;height:280px” data-ad-client=”ca-pub-3518738935631683″ data-ad-slot=”6877683473″>
Everything is on the cornice.
Material
When making holders for frying pans, manufacturers rely on the fact that the fittings must be heat-resistant, because during the cooking process they have to experience high temperatures. And also to prevent burns, the handle is long for a frying pan, so it should also be highly durable.
- Bakelite handles are popular nowadays, as they do not heat up (withstand heating up to 150-260°C) and do not slip. Easy to clean from grease stains. The material is heat-resistant plastic. Sometimes bakelite wrinkles and becomes rough to the touch. This occurs due to heat or direct exposure to fire.
- Metal handles are made of cast iron or stainless steel. Both of these materials are very durable, but heat up quickly, so they are often protected with heat-resistant inserts.
- Silicone handles are just a coating, and the main part is made from denser raw materials. Silicone copes well with strong heat (up to 220°C), is non-slip and soft to the touch.
- Wooden handles are currently not so popular, although this raw material is characterized by strength and resistance to temperatures. Nowadays, pan holders are found in designer works.
How to remake a broken pot lid handle.
Nowadays, pots with glass lids are popular with many housewives. These lids have handles in two versions:
- With built-in thermometer.
- Regular - without thermometer.
But, whether in the first option or in the second option, the handle may break. In order not to throw it away, we remake it.
note
that in most cases, after a breakdown, a fastening screw remains in the cover. It is not always possible to unscrew it. Therefore, using a grinder and a metal circle, we simply cut it off. After this, you need to choose a new comfortable handle. Since I make furniture, I used a furniture handle.
And those who deal with plumbing can use a plastic pipe holder.
Advice. It is advisable to place a rubber or silicone washer between the glass and the mounting screw.
This will guarantee that the glass will not burst when tightening the screw with the handle. The entire cover has been restored and is ready for further use.
One with the dishes
In the recent past, it was customary to make handles directly together with the body . Currently, such dishes are becoming less and less common. This is understandable, because this technology requires the use of strong materials, which, in turn, have a large mass. And as you know, the large mass of a frying pan or saucepan will indirectly counteract the process of cooking and especially washing by hand.
But there are also advantages. For example, this design significantly increases the number of possible use cases . You can bake, for example, pies directly in a frying pan, putting it in the oven without fear, you don’t have to worry about the fastening breaking, because there is none, dirt won’t get clogged anywhere, and such structures have more than enough reliability.
However, if you bake something in the oven directly in a frying pan, you will have to use an oven mitt.
How to change the oven glass yourself.
There is no difficulty in this matter.
✔You must order the required glass from the manufacturer’s service center. ✔But before that, you need to measure the overall dimensions of the cracked glass and name the model number of the gas stove itself.
Watch the video to see how the work is performed.
&feature
Chapelnik (frying pan): what is it?
A frying pan is a kitchen utensil used to grip a frying pan that does not have a handle. The chapelnik always has a hook with an emphasis on a wooden handle. Such a frying pan with a removable handle is in demand today, as it can be used for frying and stewing foods both in the oven and on the stove (it doesn’t matter whether it has an induction type of operation, electric or standard gas).
A chapelnik (frying pan) is a kitchen utensil used to grip a frying pan.
Previously, the concept of a “removable handle” did not exist, so the expression “chapelnik” was used in everyday life. This term was actively used by Russian Cossacks and our ancestors. Today, a more understandable expression is used by modern people in everyday life - “frying pan” and “holder”.
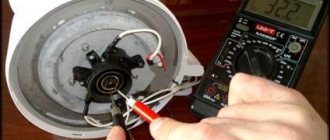
Repair of the gas control knob.
Quite often, handles fall out on many gas stoves.
And as a rule, the locking plates are lost, which prevent idle cranking when the burner is ignited. These spring plates are not easy to find. To get out of this situation, instead of a plate, I used a regular clip from the cap of a stationery ballpoint pen. In many pens this clamp is made of decent spring steel. In short, I cut off a fragment with a hacksaw and inserted it.
The handle does not turn at idle, i.e. works as it should. Another example.
homelach 07/13/201707/13/2017 Category Miscellaneous Comment.
How to repair a broken frying pan handle?
Great frying pan! But the handle at the base burst, and the bolt was so rusty that it was impossible to unscrew! What should I do? What material can be used to attach (and how) a new handle?
There may be several options:
- try to glue the old handle with heat-resistant glue.
- If the mounting screw cannot be unscrewed, use a chisel to split the rest of the handle so that there is free access to the bolt and unscrew it with pliers. As a last resort (if it doesn’t come off), cut it off with a grinder and drill it out with a drill with a drill of a suitable diameter.
You can pick up a similar handle at a flea market and install it instead of the broken one.
- In order not to bother, you can buy a chapel (frying pan, grip) and use it.
If you have time and desire, you can make the handle yourself. For a homemade handle, it is better to choose wood, since it is easier to work with, and the thermal conductivity of a wooden handle is low. Suitable wood species for this include birch, maple, hornbeam, dogwood...
After removing the broken handle, a bracket with an internal thread remained on the frying pan.
See also: Summer snowfall in Yakutia
Select a pin of the required diameter (sold in hardware stores)
and screw it into the bracket. To prevent the handle from turning in the future, we drill a thin hole and secure it with a nail of the required diameter.
For ease of use and to prevent the wooden handle from burning, at a distance of about 5 cm we bend the pin at an angle of about 30 degrees.
We make an aluminum sleeve from the pipe of an old folding bed:
- cut off 6cm.
- We cut one side at an angle of 30 degrees (Fig. 4a).
We drill a longitudinal hole in the wooden handle for a pin and cut one side at an angle of 30 degrees (Fig. 4b).
We put the sleeve and handle on the hairpin.
We cut off the stud, leaving a shank for the nut.
The handle can be secured with a nut and washer, or you can choose, for example, a wing with ears or make a plug with a ring for hanging a frying pan.
In my opinion, the easiest option is to buy a chapel
and don’t be “puzzled” at all by repairing the frying pan handle.
Of course, you need to see the situation, but if the handle itself cannot be repaired, we simply throw it away (it can break).
Apply brake fluid onto the bolt, or cut it off with a grinder, drill it out, etc.
See also: MaxSite CMS 0.40
Next we need to look at what we have left, if there is a thread on the frying pan (instead of fixing the handle, there should be one, because there is a bolt), then you can screw in the pin.
You can use a handle like this from a file
(there are long ones, in the photo 200 mm, almost the length of the handle of a frying pan), you can cut them yourself from a block.
They cut off a piece of the block, rounded the edges, and polished it.
You can use a handle from the same chapel.
To keep the handle on a pin, as an option, drill a hole in the “body” of the handle and insert a sleeve like this with a “female” thread.
(internal thread).
Naturally, the thread of the stud and the thread of the bushing are the same (pitch).
You can simply push the nut tightly into the body of the handle.
The sleeve can also be attached to glue.
That's it, screw the handle into the hairpin.
The pin can be fixed on both sides with nuts (at the place where it is fixed to the frying pan), it will not go anywhere.
To match the depth of the pin into the handle, we make a recess (hole) in the handle.
Of course, you need to correlate the diameter of the stud and the diameter of the handle so that the handle does not crack.
See also: 5 tricks to protect yourself from robbers
If you find an error, please select a piece of text and press Ctrl+Enter.
BraveRobot found more articles on this topic:
- How to secure a hammer to a handle without a wedge
- Reliable tool box made from old cans
- Knife handle made from wine corks
- Small test: reproduce the drawing
- Artist turns everyday things into spaceships
- How to open a package in a supermarket? Seven clever ways to avoid spitting and finger licking
- Five ways to unscrew a screw with stripped slots
- How to get your child ready for school? 10 right things that a schoolchild needs
- Ancient objects of Slavic life: “extinct” gardener, stag, ruble and others
- The most important thing in business is creating a corporate identity?
How to remake a broken mosquito net frame handle.
Now many people in their apartments (houses) have Euro-windows with mosquito nets. The sore spot in the nets is the plastic removal handles, which often break. Of course, you could buy new ones at a plastic window store and replace them. But I didn’t want to waste time on this, and what’s the point in changing the awls for soap if they broke due to the fact that they are made of thin plastic, so instead I used galvanized brackets for attaching the baseboard.
I’m finishing up on this topic and will be preparing to write the next one, so subscribe to new articles.
I will try not to delay the next publications. Sincerely, Yuri Filippov. To be continued.
DIY frying pan handle
Frying pans are often used over an open fire, and the handles often get burned. If the holder is made of heat-resistant plastic, this may result in the release of toxic gases and destruction of the plastic. In any case, urgent reconstruction of the kitchen item is required. There are several replacement options, everyone chooses their own. However, a do-it-yourself handle for a cast iron frying pan will be as durable and affordable as possible. We will tell you exactly how to repair it or create side handles in this article.
Step-by-step instruction
If you have time, opportunity and most importantly, desire, you can do it yourself. The easiest way to make a handle for a frying pan is from wood, for example, birch, hornbeam, dogwood, maple. The algorithm of actions is as follows:
- We select a pin with a diameter that matches the bracket remaining after removing the broken handle. It can be purchased at any hardware store.
- We screw the pin into the bracket so that it does not rotate. To do this, drill a hole and secure it with a suitable nail.
- At a distance of 5 cm, bend the pin at an angle of 30 degrees. This is necessary for ease of use and to ensure that the handle does not burn.
- We cut 6 cm from the aluminum pipe, while cutting one side at an angle of 30 degrees.
- We drill a longitudinal hole for the pin in the wooden holder and also cut one of the sides at an angle of 30 degrees.
- We put a handle and bushing on the hairpin.
- We cut the stud so that there is a tail for the nut.
Now you know how to make a handle for a frying pan. To secure it, you can use a nut with a washer, a wing with ears, or make a plug with a ring.
Important! Economic hands can be applied not only to repairing damaged kitchen utensils, but also to creating new ones. Find out how to do this from our articles:
Frying pans NEVA METAL TABLEWARE Classic
Lever fixation of the handle is one of the most convenient and well-thought-out fastenings, but there is also a drawback: the process of fixing and removing the handle may not always be successful the first time; it requires some skill. In order to unfasten the handle, you need to move the lever counterclockwise until it stops and pull it towards you.
Support the Marrex.ru project
You can thank me:
Share the link with friends or enemies!
Writing a review in Yandex from the Yandex browser has become much easier! In the address bar, on the right, we see a button with the number of reviews, of course, you need to be registered in Yandex, select a rating and you can write a comment on the rating!
Tags: #aminev_video , #repair ,
Page statistics:
Total views in the new design: 4243
Total views in old design: 2060