Kuleshov Vyacheslav
Basically, people looking online for instructions on how to make a wifi adapter with their own hands are aimed at increasing speed, and, in fact, with some skills and old spare parts, you can very well try to make a USB module.
We strongly do not recommend performing any manipulations with the main antenna of the device and soldering anything to it or instead of it - you may not succeed, but you will lose the wireless network module, and you may also damage the soldering nearby and other microcircuits in the neighborhood.
Isn't it easier to buy?
In fact, one of the main questions that I ask myself is why do you need to do everything yourself? Okay, there were times when computer hardware was very expensive or non-existent. But do you know how much the simplest USB adapter costs now? I show the example of a local store:
Is 350 rubles for a ready-made beautiful solution a lot? Understand. What if you look at the same thing from the Chinese brothers?
I immediately found such a solution. But, most likely, if you dig deeper, you can find something even cheaper. Wait a little longer, and everything works fine for you. But for some reason people are drawn to do everything by hand, and fortunately only for personal educational purposes.
External device
If you are simply categorically not satisfied with the way the wireless network adapter built into your laptop, for example, works, then you can try to assemble an external one that connects in the form of a flash drive and simply insert it into the USB port.
Again, it is worth remembering that this will require minimal knowledge of electronics, as well as the ability to use a soldering iron, and, of course, you cannot do without spare parts that can be obtained from broken tablets or smartphones. To understand how to assemble a USB Wi-Fi adapter with your own hands, you can watch several videos attached below.
Also, if you do not fully understand the order of the process or what parts to use, then write down the questions that interest you and contact the amateur radio forums, of which there are quite a few now. Or try your luck by visiting a radio store, where you can immediately purchase some components.
Strengthening the signal
So, let's assume that you have assembled an external device that picks up a wireless Internet signal. Now the question may probably come to your mind, how to strengthen the signal of a Wi-Fi adapter with your own hands, although, of course, this task is also relevant for some ready-made factory devices.
Let’s say right away that if you decide to improve the signal, then you shouldn’t glue boxes covered with foil or attach tin cans - this doesn’t help much and you’re just wasting your time. The best way to do this would be to build a special antenna that will strengthen the signal.
To understand how to assemble it, you need to watch another video that shows how to assemble the desired antenna, as well as where to solder it into the adapter.
We hope that thanks to our article you have made progress in assembling a homemade Wi-Fi adapter and achieving normal signal quality.
Hard homemade
I honestly tried to dissuade you! You’ll save time and won’t lose on aesthetics. And also avoid possible problems with drivers. Now to the point.
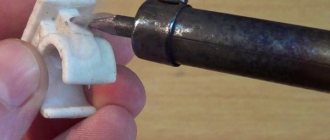
The most common thing adapters are made from are boards from phones and tablets (especially tablets). What's the trick:
- All you need to do is carefully cut out the Wi-Fi module directly on the board.
- The USB connector is soldered according to the pinout.
- Because The chipsets of the modules are mostly the same, and a Windows computer usually recognizes such a module out of the box. In very extreme cases, an additional manual search for drivers is done.
- All this is put into some kind of home-made case. Well, and most importantly, you can safely brag to your colleagues, because... I don't see any other use here.
An example of such an act can be seen in the following videos (I don’t see the point in explaining it in pictures, smart people in this topic already understand everything):
Pinout diagram for a standard USB (usually the same markings on the board):
I dare not detain you any longer. Everything basic and useful that can be honestly expressed on this topic is relevantly stated above. You can leave the rest of your achievements and ideas in the comments below, this can really save another equally interested person from possible problems. See you soon on our WiFiGid portal, helping people!
Manufacturing scheme
What are the differences between 3G and 4G networks: features, advantages and disadvantages
How to make a WiFi adapter from a working module from a non-working tablet was described above. It should be noted here that for a personal computer, a WiFi module can be made with your own hands from a similar device from a laptop. For this you will need:
- open the laptop lid, unscrew the module mount, disconnect the antennas and remove it;
- Install the removed board into a pre-purchased or self-made miniPCIe-PCIe adapter and secure it with fasteners;
- install the adapter into the PCIe connector, having previously connected the antennas using the appropriate cable and connectors (if there is no cable, you can take it from the old laptop from which the module was removed and solder it to the pin antennas);
- turn on the PC and configure the hardware by installing the necessary software.
Note! Often, the chip that powers the WiFi module is of unknown origin, and finding drivers for it seems like a very problematic task. In no case should you use ready-made driver package solutions, because they can secretly install additional software that pollutes the system and takes away its resources. You can deal with the problem using standard system methods; in Windows, to do this, in the “Control Panel” - “Device Manager” section, you need to find the required wireless device, call up its properties and on the “Details” tab, click on the drop-down menu. The “Device ID” section will display the device identification number; you need to copy and paste it into the search engine. In response, answers to queries will be displayed in which you can find the device model, after which you need to go to the manufacturer’s official website and download drivers from there. In Linux, the operation of identifying equipment on the PCI bus is performed using the lspci utility; if you search for a wireless device, you need to enter the command “sudo lspci | grep wireless" and press "Enter", the response will contain all the detailed information.
To make your own adapter, you will need a certain set of tools and materials, and the step-by-step instructions will look like this:
- materials - textolite, metallized on one side, glossy paper (advertising brochure in A4 format from any company), a set of radio components, as well as tin, soldering acid and rosin, acetone, a rag, ferric chloride;
- tools - soldering iron, mini-drill, drills from 0.7 to 1 mm, flat needle file, sandpaper with an abrasive number less than 800, iron;
- from software and peripherals - Sprinter Layout and laser printer;
- archive, which contains a circuit with a printed circuit board, and use a laser printer to transfer the drawing onto glossy paper;
- cut the textolite to size, file the edges, clean the copper surface from oxide with sandpaper, degrease with a cloth moistened with acetone;
- place the paper with the printout with the pattern down on the board installed on a non-flammable, flat surface, and warm it well with an iron (the essence of the process is that at temperature the toner melts and sticks to the metal surface, after cooling it hardens again - a primitive mask is obtained);
- Allow the resulting workpiece to cool well and place it in a container with cold water; after half an hour, the paper should come off easily, and the pattern applied with toner should remain on the board;
- using ferric chloride, etch the board, while following the instructions included with the preparation (the quality of iron and its dosage greatly depend on class=”aligncenter” width=”1200″ height=”676″[/img]
- drill pads (holes for installing radio components) at the designated points;
- Tin the legs of the elements, install them in their seats and solder them.
Note! When performing any electrical work, use a multimeter to look for short circuits and check the ratings of electronic components!
Advantages and disadvantages of a homemade Wi-Fi adapter
This section should immediately begin with the disadvantages of a homemade Wi-Fi adapter; they will be derived from the low quality of the manufactured device. This is due to the fact that in most cases such work is carried out by novice radio amateurs who have a very low level of competence. Parameters such as electromagnetic compatibility, contact bounce, noise suppression, line matching, etc. are not taken into account, which leads, at best, to low efficiency and data transfer rates, and the distance over which the signal can be transmitted is reduced. At worst - to a short circuit with all the ensuing consequences. The advantages include the fact that with proper theoretical preparation and practical skills, you can assemble something useful from the modules of a non-working device that can still serve instead of being thrown into the trash. It should be noted that if you use modules not from old equipment, but new ones, the price of the manufactured device will no longer be an advantage, but a disadvantage.
Note! If the goal in itself is to develop practical skills and consolidate a theoretical basis, it is recommended to use ready-made radio sets. They can be purchased both on Chinese websites and from domestic manufacturers, for example, https://masterkit.ru.
Video transmission via wifi
Modern technologies make it possible to transmit a video signal in good quality over a distance in several ways. However, wireless methods for acquiring images on remote media are most often used. Thus, a video signal via Wi-Fi is transmitted to various electronic equipment through special receiving devices. Various types of computer equipment already contain the necessary receivers, which is an advantage of wi-fi.
There is also a drawback - more difficult access to the network due to the filling of most of the airwaves. During its operation, the wi-fi video transmitter collides with other similar devices, resulting in interference with each other.
Source
How to make a USB Wi-Fi adapter, step-by-step instructions
You can make a Wi-Fi adapter with your own hands using a USB interface in several ways, which, in turn, can be divided into two methods:
- With disassembling the device from which you can remove the wireless communication module;
- By directly connecting a device that has a WiFi module.
The second option will be discussed in more detail below; here is a step-by-step guide on how to make a USB Wi-Fi adapter from a module from a failed tablet.
Note! Such equipment from a laptop will not work, since the mini PCI-E connector is used to connect it. In fact, you can make an adapter from it, but for this you need to use a special mini PCIe - PCIe adapter, purchased or made yourself.
So, to make a portable device designed to connect to a wireless WiFi network via a USB port, you will need to complete the following steps:
What is a Wi-Fi adapter: Video
I have more than 10 years of experience in the IT field. I am engaged in designing and setting up commissioning works. We also have extensive experience in building networks, system administration and working with access control and video surveillance systems. I work as a specialist in .
Sometimes it happens that old and non-working equipment (laptop, tablet, phone or TV set-top box) still has functioning wireless communication modules. They can be equipped with a serial data transfer controller, a PCIe bus controller, have connectors for antennas for the receiver and transmitter, in any case, you can make a WiFi adapter from them with your own hands, which can be connected via a USB port or a miniPCIe to PCIe adapter. This article discusses in detail the options for such “homemade products” and how to incorporate them.
What can a Wi-Fi adapter be made from?
Tablet or phone
In addition to the method described above, when only the wireless module from a non-working device is used, you can use the tablet as a WiFi access point. In general, this can be done with any device running Android OS (smartphone, smart set-top box, etc.). This is done in the following way:
- disconnect the portable device from the mobile Internet (turn off the “Use mobile data transfer” checkbox) and connect to a WiFi access point with the desired SS >Review and configuration of the D-Link Dir-320 modem
As a result of these actions, a new network interface will appear in the “Network adapters” menu on the computer, which will be the gateway between the PC and the WiFi access point.
USB modem
Making a WiFi adapter from a USB modem is generally a fairly discussed topic, but it should be noted that at the same time this is not the best idea. This is due to the fact that there is no manufacturing as such here. To distribute the Internet, you need to organize a WiFi network and specify as a gateway the device that has access to the Internet. Moreover, if the USB key acts as a router, and another router is looking to access the Global Network, it will be very difficult to do anything. Therefore, it is better not to use this option.
How to transfer data via wifi?
Wi-fi transmitter power. The Wi-Fi transmitter power parameter is one of the most important, since it is responsible for the network coverage area.
There are two ways to increase the power of a wi-fi transmitter:
The first is to change the system settings of the equipment, since not every installer sets exactly the maximum values when connecting. The second method is solved by installing additional antennas in the router or replacing the emitting device. Installation of additional antennas may only be possible in certain router models.
Wi-Fi reception and transmission may be disrupted due to the presence of thick walls or if the device is placed in a metal box that has a high refractive index. To get rid of this effect, you need to move the device to the central part of the room. You can connect it to an existing network using embedded twisted-pair sockets.
When there is no internal wiring, you will need to use PLC adapters that output transceiver signals to the electrical wiring and, accordingly, to the router. If the room area is large, wireless wi-fi data transmission will require the installation of additional repeaters that distribute and amplify the signal.