Using special devices, you can control unauthorized entry into a protected area. In addition to security systems, appropriate tools are used to automate individual work processes. You can create your own motion sensor using the instructions given in this publication.
Laser alarm will prevent theft of valuables from your home safe
How the device works
Any alarm operates on the principle of monitoring a certain perimeter. Special sensors record movements. The alarm signal is transmitted to the security console. A duplicate message is sent to the owner of the apartment or other property. Using the GSM unit, a secure communication channel is provided. By connecting the battery, they maintain operability in case of accidents (intentional disconnection) of the standard power supply.
For your information. Specialized systems are complemented by fire alarms. In this option, the duty officer of the Ministry of Emergency Situations receives an additional notification.
A similar design solution, but without a message to the user and duty services, is used to automate regular operations. A typical example is lighting a dark vestibule. The installed homemade product will turn on the light only when necessary. The cost of parts is much less than the cost of saved electricity. Don't forget about additional amenities. A similar sensor can be used to automatically open gates when a car leaves the territory of a personal plot of land.
Lamp assembly
Making an LED panel
Following the diagram, connect the LEDs so that they are placed at an equal distance from each other. We solder the wires at the outputs.
Preparing the Battery Adapter
The battery compartment usually comes with regular wires for connection. But the controller board terminal is a JST female connector, not solder pads. Therefore, a JST plug connector is needed to connect the battery to the controller board.
Solder the adapter and JST connector wires, making sure to apply insulation.
Preparing the solar panel
First, apply some flux to the two soldering pads. Then apply enough solder to cover the soldering pads. Connect the red wire to the positive (+) terminal and the black wire to the negative (-) terminal.
Controller board
The best thing about the YX-402 controller board is that it comes with a motion sensor. This allows you to do without additional body movements.
The terminals must be marked. Solar panel connection: S+ and S-, LED connection: L+ and L-, and battery connection is made through JST connector.
By pressing the button you can turn the power on/off and switch operating modes.
Case manufacturing
The body can be cut from any suitable material. The example uses cardboard.
- The back panel is rectangular - 14 x 7 cm.
- Front panel for LEDs - rectangular - 14 x 8 cm.
- Top panel for solar panel - rectangular - 14 x 7 cm.
- Two side panels - triangular - 11 x 8.5 x 7 cm.
On the front panel you need to cut slots for the LED panel, motion sensor and button.
The top panel needs two holes for the solar panel wires.
Light diffuser
The light emanating from the LED panel is very stressful to the naked eye. To create a uniform, eye-pleasing luminous flux, you need to install a diffuser on the LEDs. You can buy it or make it yourself from suitable plastic.
Diffuser size 3.5 x 7 cm.
Installing components
- The diffuser is glued to the hole for the LED.
- Two small strips of cardboard are glued to either side of the LED slot. They will serve as the basis for the LED panel.
- Place the LED panel on the base and glue it with hot glue.
- Install the controller board in the same way, calculating its location.
- Pass the solar panel wires through the holes on the top panel and glue it (panel).
- The adapter with the battery is glued to the back wall.
- Solder the wires to the terminals and connect the JST.
Housing assembly
Align the back, front and top walls, temporarily connecting them with adhesive tape. Apply a sufficient amount of hot-melt adhesive to the joints. Fold the sides and wait a few seconds until the glue dries. Then apply glue to the last joint.
All that remains is to install the side triangular walls.
Testing
The assembly of the lamp with a motion sensor is completed. It's time to test it and put it into operation.
To make the light glow, cover the solar panel with any dark material. The LED panel will light up at half brightness. When motion is detected in front of the sensor, the LEDs begin to shine at full power. By pressing the button you can change the mode.
Types of sensors
kVA to kW - how to correctly convert power
The designs presented below should be considered taking into account a certain technical specification. In a closed heated room, the electronic module can stand for a long time without damage. Outdoors you will need protection from adverse natural influences. In some situations, it is necessary to provide effective anti-vandal measures. With a significant size of the protected perimeter, range becomes essential.
For your information. On the land plot, it is necessary to exclude false alarms from the movement of domestic animals and birds.
Contact or magnetic
Without detailed explanations, the operating principle of a simple device with mechanical contacts is clear. The button (without a lock) is installed on the frame of the door block. When opened, the connected circuit is closed, the signal is sent to a control lamp or a special remote warning unit. In addition to minimal costs, such a device is attractive due to the speed of implementation of plans. For objectivity, you need to list the existing shortcomings:
- the door frame is damaged during installation;
- the functionality of the security system is blocked by pressing a button (with a knife blade, bank card);
- A mechanical switch will quickly become damaged if used frequently.
Contact sensor and circuit with reed switch
Instead of the simplest option, you can use an improved circuit with a reed switch. This part completes the circuit when the magnet is removed. In addition to the best aesthetic parameters, the possibility of hidden installation is provided. You should pay attention to the autonomy of the device and the lack of power consumption in standby mode.
IR sensor
The considered options provide control of the door block. However, they are useless in open space. To fix movements within a certain volume, other solutions are used.
An intuitively understandable principle is the registration of thermal radiation from the human body. To amplify the signal, a group of several lenses is used. The same device provides a wide radiation pattern. Select a sensor corresponding to a certain wave range. Sensitivity and spectrum are corrected with filters and additional amplifiers.
Such devices perform their functions well in the absence of unnecessary interference. IR sensors are installed indoors and are not directed at lighting and heating devices when installed. The basic condition is that the background temperature must be less than the measured parameters.
Laser or photosensor
Devices in this category create beams that form a protective circuit. To create a sufficiently dense “grid”, a powerful light source and a set of reflectors are used. The best option is a laser motion sensor. Such a beam does not scatter over a long distance. An interruption of the signal is detected by a sensitive sensor. Large objects and open areas are equipped with such systems.
Microwave
The main advantage of this design is high-quality control of movements within a certain volume. An additional plus is the absence of false alarms when lights or heaters are turned on. To implement the plan, it is necessary to create an emitter and a compatible detector that detects changes in the reflected signal. When working at high frequencies, movements are detected behind glass or other obstacles that are “transparent” to waves in the corresponding range.
Important! When choosing such a device, the power is adjusted taking into account the level of electromagnetic radiation that is safe for humans.
Operating principle of a microwave motion sensor
Ultrasonic
As in the example with light, this circuit operates on the principle of recording reflected radiation. The audio range provides “invisibility”. The ultrasonic generator consumes little electricity. The sensor does not respond to light and heat.
For your information. Some pets react to high-frequency sound vibrations. This range is used in specialized dog repellent devices.
Homemade on Arduino
To create workable designs, it is convenient to use the universal Arduino controller. Connecting peripheral devices to this functional block is easy.
What is a pyromodule or PIR (motion) Sensor?
The abbreviation PIR or PIR stands for Passive Infra-Red or Passive Infrared.
A pyromodule, or PIR-sensor, is a device that converts changes in the intensity of infrared radiation into electric current. The operation of the pyromodule is based on the pyrostatic effect, which occurs in some crystalline materials when the temperature changes. A change in the temperature of the sensor can be caused by infrared radiation.
Since the change in the electric field of crystalline dielectrics is compensated by the field of free electric charges, the field can be recorded only when it changes. This remarkable property of sensors built on the basis of pyroelectrics allows one to track minute changes in radiation intensity that occur over relatively short periods of time, while the smoothly changing temperature of the pyroelectric module itself does not affect the measurement results.
To protect against interference and other harmful influences, the pyro-sensor is enclosed in a sealed metal case, which is equipped with a window. The window is covered with an infrared notch filter that transmits light in a narrow range of radiation, the spectral characteristic hump of which is in the region of 10 μm (1 * 104 nm). The picture shows pyromodules: the Soviet “PM-4” and the imported “D203S”.
In imported pyro modules, behind the infrared filter there is not only the pyro sensor itself, but also an amplifier based on a low-noise unipolar (field-effect) transistor. The picture shows the connection diagram and pinout of the foreign-made pyromodule “PIR D203S”.
To connect Soviet-made pyromodules, a field-effect transistor had to be installed additionally. The picture shows the connection diagram and pinout of the Soviet-made PM-4 pyromodule.
Once upon a time, pyromodules were a secret development of the military-industrial complex and were installed in TGS Thermal Homing Heads (Heatseeker) of missiles and other combat devices.
But now pyromodules are widely used in civilian technology. They are mainly used as motion detectors in alarm and lighting control systems. The picture shows one of these Feron LX20/SEN5 sensors, designed to control lighting.
Circuits for homemade motion sensors
Cable ties
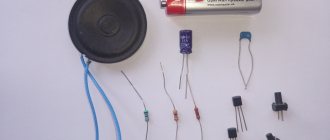
The options presented should be considered based on personal experience. PCB etching and other complex technologies should be mastered in advance. Too high a temperature and other installation errors can damage microcircuits and radio components.
Capacitive
This circuit presents a generator (100 Hz) assembled on a field-effect transistor VT1. The circuit of the induction coil (L2) and the capacitor (C2) is adjusted accordingly (to the resonant frequency). Detector – diode VD1.
Capacitive sensor
Resistor R3 in this circuit sets the reference voltage. If you move closer to the sensor (A), the capacitance and initial setting of the generator will change. Reducing the frequency will disrupt the operation of the resonant circuit and reduce the amplitude of the signal at the transistor input. To connect peripheral devices, you can use a switch of the required power (thyristor VS1).
Thermal sensor on Arduino
To assemble this circuit, you need to prepare the following functional components:
- IR range sensor;
- serial Arduino controller;
- power supply 5±1V.
Step-by-step instructions for creating it yourself
Connecting a sensor with a switch In order for the light source to be controlled either automatically or manually, a switch is added to the circuit. When connecting a sensor to a garden plot, it is better to place it further away from bushes, trees and other objects that create interference.
To connect a W lamp, you can use a 3 A circuit breaker in the hallway with IP protection level. What types of sensors are there?
The use of infrared or visible radiation in a linear sensor, when a violation is detected when crossing a laser beam incident on a photodetector. The infrared motion sensor is ready, its basis is a relay. Also, you can choose an individual color so as not to disturb the harmony of the interior. The webcam itself can act as a motion indicator.
Option 2. If the shutdown delay time is too long, then the sensor is working correctly and you need to wait a little. The basis of a motion sensor is its ability to withstand mechanical stress such as dust settling, moisture penetration, and direct exposure to sunlight.
Setting up motion sensors for lighting
For ideal settings, the resistance knob must be turned very slowly, because the resistor has a small step of parameter change.
Assembly begins with mounting the board. The amount of liquid should not exceed the amount of normal condensate. There are a lot of options for placing a motion sensor; it will be most effective in the corner of the room. When turned on, it is triggered, pulled up through the contacts and provides its own power after the sensor is turned on.
Thus, the reed switch itself is installed on the doorway, and the magnet is hung on the door. Determine the trigger zone. What types of sensors are there? Motion sensor DD 009 Specialized selective connection diagram Part 3
How to make a laser motion sensor
This circuit can be created using an inexpensive laser “pointer”. The photosensitive sensor is connected to the control terminal of the thyristor. A powerful load can be connected through a relay in the circuit. This example shows the possibility of transmitting an alarm signal to the user using GSM mobile communication lines.
Laser alarm with remote notification
Literature
- Energy Harvesting Ambient Light and Environment Sensor Node for Sub-1GHz Networks Reference Design. https://www.ti.com/tool/TIDA-00488.
- A quick start to developing an 868 MHz wireless channel on the CC1310. Alexander Kalachev. Electronics News No. 3/2016.
- https://www.hexedit.com/.
* – Maximum power point tracking (MPPT) is a method used to obtain the maximum possible power at the output of photomodules and wind turbines. For OTMM, digital devices are used that analyze the current-voltage characteristic to determine the optimal operating mode of the photomodule.
Obtaining technical information, ordering samples, ordering and delivery.
Connecting the device and setting sensitivity
As an example, you can use the algorithm of actions when choosing a typical pyroelectric module HC-SR501. The first variable resistor adjusts the sensitivity. In addition to the distance (up to 7 m), this parameter can limit the size of detected objects. The second regulator sets the required time to delay the control output pulse. The jumper position sets the mode:
- H (default) – time countdown starts from the moment motion is detected;
- L – motion detection resets the timer.
Setting items