When it comes to wind generators, the imagination pictures serious high-power installations capable of supplying energy to entire cities. At the same time, it is quite possible to use this technology for applied, everyday purposes. This is useful for illustrating the issue, helping to evaluate the possibilities and prospects of wind energy using a simple and understandable example. The creation of small devices will not solve the problem of energy supply, but it can contribute to the development of technology and awaken interest in this method of generating electricity.
How to make a windmill from a computer cooler with your own hands?
Updated: May 4, 2019
When it comes to wind generators, the imagination pictures serious high-power installations capable of supplying energy to entire cities. At the same time, it is quite possible to use this technology for applied, everyday purposes. This is useful for illustrating the issue, helping to evaluate the possibilities and prospects of wind energy using a simple and understandable example. The creation of small devices will not solve the problem of energy supply, but it can contribute to the development of technology and awaken interest in this method of generating electricity.
Mini wind generator from an old computer cooler
A small model of a wind generator, quite functional and capable of performing useful work, can be a failed computer fan. Almost any cooler will do, but it is best to choose the largest one, since the engine in its current form is not suitable for generating electric current. The reason for this need is that the motor windings are wound with double wire and in different directions, so it creates alternating current.
The most you can count on when making a wind generator from a computer cooler is powering several LEDs , which require constant current. Therefore, it will be necessary to make a rectifier, which will also take a little power. Therefore, the engine is unable to light even a single LED without modifications. For modernization, you will need to make more powerful windings capable of delivering higher voltage.
Important! You should not expect to create a device that can charge a cell phone battery or power a laptop. The energy obtained in this way is only enough to power the LED flashlight. The whole idea is useful from an educational or cognitive point of view.
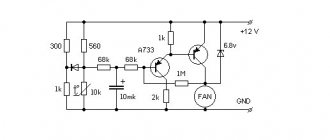
4 pin cooler wire pinout
Here the rotation speed can not only be read, but also changed. This is done using an impulse from the motherboard. It is capable of returning information to the tachogenerator in real time (the 3-pin one is incapable of this, since the sensor and controller are on the same power line).
Manufacturing technology
To convert a computer fan into a wind generator, you will need to perform the following steps:
- upgrade the motor;
- increase the size of the impeller;
- make a stand with the ability to rotate around its axis (adjustment for the wind).
Let's look at these stages in more detail:
Upgrading the motor
In order to rebuild the engine, you will need to disassemble the cooler. This is done as follows:
- remove the sticker from the engine compartment cover in the central part of the cooler;
- carefully remove the compartment cover;
- the retaining ring securing the impeller axis is removed;
- the impeller is removed.
After this, free access to the motor windings appears. They must be removed as they are not suitable for our purpose. The easiest way is to carefully cut them and pull them out of their nests.
Then the windings are wound with thinner wire. The number of turns should be the maximum that the stator can accommodate. The windings are wound at random - the first clockwise, the second counterclockwise, then clockwise again and counterclockwise again. This will provide AC power.
It would be a good idea to change the magnets to more powerful ones, for example, neodymium. This will significantly increase the generator power and stabilize the output voltage.
After this, wires are soldered to the terminals of the windings, to which the rectifier will subsequently be connected.
After completing these steps, the entire structure is assembled in the reverse order. A rectifier is assembled from 4 diodes, and this completes the engine modernization.
Impeller manufacturing
The blades on the cooler are good size for cooling the inside of the computer, but they are too small to work as a wind wheel. In order to ensure the highest possible efficiency of interaction with wind flows, it is recommended to manufacture new blades. You will need to do the following:
- carefully cut off the old blades;
- make new ones from plastic bottles or other products;
- glue new blades onto the impeller.
To make blades, it is best to use plastic bottles or any cylindrical objects. This is necessary so that the blades have the desired profile, allowing the wind to rotate the impeller. Flat sheet plastic is not suitable for making blades.
The size of the new blades should be approximately 2-3 times larger than those that were before. Too large ones complicate the use of the device and do not have sufficient rigidity, and too small ones do not give the desired effect, the whole procedure becomes meaningless.
Attention! The shape should be such that the finished blades are at a slight angle to the vertical plane. All blades must be the same.
Stand
The stand is used to install the device in the desired position and orient it to the wind. The easiest way is to use a piece of tube into which a rod is inserted and moves freely in it. The tube is attached to the stationary part of the device, and the rod is installed on the base or attached to a support, for example, on a balcony.
In addition, you will need an automatic wind guidance device , in other words, a tail. It is similar to the tail of an airplane or a weather vane and is rigidly attached to the windmill along the axis of rotation of the impeller.
The fully assembled device is installed in a suitable place, a flashlight with LED bulbs is connected as a payload, and the windmill is started. The device can be used to illuminate any areas, as well as to acquire skills in making such products.
Verticals
Windmills with a vertical axis of rotation are the most suitable group of devices for self-production. They have a simple, understandable design. They do not require a large number of rotation units and are undemanding regarding wind direction. The capabilities of this group have given rise to a large number of design options, some of which should be considered in more detail.
Sun
The Savonius wind generator is one of the oldest developments, which saw the light of day in the 20s of the last century. The device consists of two blades of a fairly large area, curved in the longitudinal direction. In cross section, they resemble the Latin letter S. At the same time, they are slightly shifted towards each other, somewhat overlapping the working sides.
When exposed to wind flow, one of the blades receives force on the working part, and the second on the opposite side. The shape of the blade helps to cut the flow, part of which goes to the side, and the other part slides onto the working surface of the second blade, increasing the torque.
Daria
Darrieus's design was proposed almost simultaneously with the Savonius rotor. Its basis is blades shaped like an airplane wing and located vertically tangential to the circle of rotation. An odd number of blades is required, otherwise an excessively high counterbalance force will occur. The lifting force of the blades contributes to a high rotation speed, which is 3-4 times higher than that of a Savonius rotor.
There is still no mathematical description of the operation of the device, but developments made on the basis of the design exist and are constantly being updated. There are a large number of models of private wind generators with enough power to power a small home.
Orthogonal
Orthogonal designs are the most efficient of all the basic models of vertical wind turbines. They have high speeds, sensitivity, and performance. The design consists of several blades (usually three or more), located at some distance from the axis parallel to it. The Darrieus rotor discussed above is one of the representatives of orthogonal devices. The disadvantages include high loads on the rotation unit, which contribute to the rapid failure of moving parts.
Helicoid
Helicoid designs are based on the basic orthogonal type model, but with significant changes to the geometry of the blades. They are curved along the circle of rotation, obtaining a shape close to a spiral. As a result, significant stabilization of rotation is achieved, wear of moving elements is reduced, and the structure as a whole acquires durability, strength and reliability.
A smoother rotation mode ensures uniform generation of electric current, which allows the use of devices for direct power supply of some consumers (lighting devices, pumps, etc.). For self-production, the design is quite a difficult task due to the complex geometric shape of the blades.
Barrel raking
This is the “popular” name for a multi-blade rotary (vertical) wind generator. The device has good balance, effectively captures the wind flow, and low noise level. For those who want to try their hand at making a windmill with their own hands, this design option is recommended as one of the basic types of design. The blades are made from galvanized steel sheets, cut along the barrels or other available material.
Frame - welded from a metal profile - angle, pipe, etc. The peculiarity of the device is its invulnerability to strong gusts of wind - when the flow increases, a vortex cocoon is formed around the impeller, preventing wind from penetrating inside the impeller. The flow simply flows around the device like a pipe.
Wind generator Lenz
A special feature of Lenz's design is the use of strong neodymium magnets instead of bearings. They hold the rotation unit in a “suspended” state, which ensures ease of rotation. The absence of friction contributes to the high durability of the equipment. The indicators are very impressive - rotation starts at a wind speed of 0.17 m/s, and the windmill reaches its nominal performance at 3.4 m/s.
Homemade Lenz wind generator, do it yourself
We build a mini wind generator from an old computer cooler
Do you have old and unnecessary computer components lying around? Look there and look for a fan for cooling the processor, the so-called cooler. Eat? Great. Now I will tell you how to make it work in a mode that is not entirely familiar to it. Now it will not absorb energy for subsequent cooling of the processor, but, on the contrary, will generate it. Yes, I didn't make a mistake. I used it as the main element in my mini wind generator. With a wind of 12 km/h, or 3.3 m/s usual for meteorology, it allows you to generate electricity with a voltage of 1.5 - 2 volts and a current of 20 milliamps.
List of required materials
In addition to an old cooler of relatively large size, for work you will need:
- thick plastic bottle;
- wire designed to operate under low voltage;
- small wooden block 1.5 inches in diameter;
- metal tubes that fit into one another;
- epoxy and superglue;
- unnecessary CD;
- tightening clamps.
All of the above can be easily found in your home pantry or purchased at the nearest market.
How to make a mini wind generator with your own hands from an old computer cooler?
Publication date: May 24, 2019
The computer “system unit” gathering dust on the balcony deserves a more worthy use. For example, the capabilities of the old cooler, which recently cooled the processor, are very interesting. With a little ingenuity and patience, you can use it to make a mini wind generator with your own hands. Of course, it will not be enough to power the entire house, but it will be enough to power small appliances or devices. A normal 12km/h wind will easily cause the generator to produce about 2V for a small radio, lamp or clockwork.
Checking the efficiency of the external cooling system
To fully load the processor and video card, the Basemark online service was used. After half an hour of continuous operation of the program at an air temperature of 25°C, the heating of the mini-PC case was not felt by hand.
The processor heating temperature was controlled by the AIDA64 program, and the load was determined by the Windows Task Manager. As can be seen in the graphs, the external cooling system showed excellent results. The tasks of my work on the computer load it by no more than 50%, so now I am confident that even at the maximum air temperature, the processor, memory and other components of the mini-PC will not heat up to the maximum permissible temperature.
We assemble a wind generator with our own hands from a cooler: work sequence
To quickly produce a working device and not waste time on fixing and repairing it, build the generator assembly in the following sequence:
- A computer cooler is “tailored” to its main tasks. Therefore, for its magical transformation into a generator, unnecessary parts must be removed. Remove the rubber seal and the retaining ring hidden underneath it. This will allow you to remove the “extra” cooler blades, since they will be replaced by larger ones.
- On the copper coils of the cooler winding, find the connection points of the wires. These are connectors. One of them has two wires, the others have one each. To the latter you need to add one additional wire, carefully soldering them to the connection.
- The alternating current that will be generated in the new generator must be converted to direct current. This will require 4 diodes. They are cut in pairs to a distance of 1 cm: one pair is at the edge with black strokes, the other is on the opposite side. The long ends are bent so that the shape of the diode resembles the letter P. The cut diodes are soldered. At the same time, a wire of the required length is connected to the fan.
- Now you can test the device. To do this, you will need a household tester or LEDs. Connect them to a cooler, spin it up and see if it manages to generate electrical energy.
After the electrical part is completely ready, you can begin manufacturing the mini wind generator blades:
- The design of the blades is based on the dense plastic of a clean bottle of water, shampoo or household chemicals. After cutting the bottom and top with a lid, the resulting cylinder is cut lengthwise.
- Draw a drawing of the blade on paper. Its length depends on the length of the plastic cylinder obtained from the bottle. An angle of 120 degrees is cut at the end of the blade for subsequent convenient connection.
- When cutting out the blades, pay attention to their complete coincidence in size. Otherwise, it is necessary to align the elements so that they work in the same mode.
At the next stage, the blades are connected to the cooler. The parts are glued one by one to its plastic side using superglue. The curved shape of the blades will provide excellent aerodynamics and rotation efficiency. Therefore, there is no need to align the parts. A wooden block will serve as a support for the finished structure with blades.
A CD should be used to make the shank. A through hole is made in the block along the diameter of the metal tube. If the hole is larger, it can be sealed with epoxy glue. You can also use the adhesive to treat the soldering points of the wires and the connection point between the timber and the cooler. The disk shank is inserted into a small cut at the end of the block and then fixed with thin screws through the through holes at the cut site.
At the final stage of installation, a metal tube of a larger diameter is inserted into a smaller one, already connected to the generator structure. PTFE can be used as a bearing to ensure rotation of the inner tube.
To make sure that the mini wind generator you made from a motor is working properly, carry out final testing. All that remains is to find a suitable place for the new device and install it.
You need to be logged in to leave a comment.
Scope of application
It would seem that it would be easier to make a wind generator using a fan as a basis? However, several obstacles will stand in the way of such a technical transformation. This article will tell you how to overcome them, and what a wind power station made from a fan can be used for.
It’s worth making a reservation right away: you shouldn’t expect that the fruit of your labors will be a unit that can charge industrial batteries or heat buildings. Charging a mobile phone, or operating a small LED illuminator - approximately such tasks can be solved by a wind generator, which is, so to speak, a product of deep processing of a fan.
Why do such externally similar devices require effort to transform into each other? There are technical explanations for this that are worth considering.
Differences
Design features of electric motors and generators
The movement of electrons, an electric current, occurs in a conductor under the influence of a changing external magnetic field. Electric motors are designed similarly, only in the reverse order - a force acts on moving charged particles in a magnetic field, which forces the conductor to change its position in space, i.e. causes the rotor to move. Both in generators and in engines, this same magnetic field is created in the stator or rotor, depending on the model, by permanent magnets or electromagnets (excitation windings). If the motor attracts iron objects, it is on permanent magnets. This option is optimal from the point of view of using it as a generator, since it does not require any modernization.
“Using a motor with excitation windings to generate electricity will be more difficult, because you will have to provide power to these same windings. And this will significantly complicate the design.”
the revs increase, the lamp burns brighter
Having found the ideal point for the placement of the magnet, glue it.
Now you can start the perpetual motion machine with a push of your finger...
Manufacturing examples
From a children's toy battery-powered fan
Making such a wind generator is as easy as shelling pears. The toy uses an electric motor most often of 1.5 or 4.5 volts with independent excitation from permanent magnets. There is a ready-made screw. You need to take out the batteries, connect the wires to the + and − contacts, place the fan in the air flow, turn it on, and you can measure the characteristics of the generated current at the contacts.
In order for such a wind generator to work better, it would not hurt to add power to the propeller blades, for example, with linings cut from a plastic pipe in the shape of petals. Well, you will have to equip the unit with some other elements required for an electric windmill.
The fan will have to be protected from precipitation with a special casing and mounted on a movable frame. The movable fastening of the frame to the mast must include a contact-brush mechanism (without it, the current cannot be transmitted down). The opposite end of the frame is equipped with a stabilizer; its task is to turn the wind generator towards the air flow.
What you can count on if the engine is 4.5V is 2.5...3V maximum, not even enough to charge a phone (usually 5V). But such a device, with sufficient wind, is quite capable of providing power to LEDs, which, for example, can be used to mark the boundaries of an entrance gate or illuminate the boundaries of a garden path.
From the CPU cooler fan (cooler)
This fan most often has a 12V motor, as in the previous example with permanent magnets, and its transformation into a wind generator occurs in the same order.
The differences are that:
- the cooler blades are no good initially - the propeller needs a new one;
- the generated current at a certain wind speed is quite enough to charge an Android or 5V tablet (using a controller in this case cannot be avoided and a regular car charger is best suited).
Installation Rules
It is recommended to install the windmill at a relatively long distance from the house and other structures (20 meters or more). It is advisable to choose an open space for this. In addition, take into account the density of the soil: the length of the wedges intended for stretching the mast, as well as the material for their manufacture, depends on it. If the soil is soft, you need to select a more massive and longer wedge than in the case of hard soil. They must be used at least three. The ideal option, which will ensure the greatest reliability, is to arrange four wedges.
Stretching methods are selected taking into account the length of the mast and the condition of the soil. For tall structures that are installed on soft ground, more stringent requirements are imposed on the wedges.
The lower part of the mast is bolted to a metal stand and concreted
The mast is lowered into the soil to a depth of 0.5 meters or lower, the guy fastenings are concreted, since the soil tends to be loose after rain. This feature can cause them to weaken and pose a risk of the entire structure falling.
If the mast does not lower, then it is necessary to provide a device for lifting to the main elements of the wind generator, which will allow for its maintenance. The means for lifting to a height should be secured to the mast, because it should ensure reliability and convenience during repair work. It is necessary to understand that wind speeds can be high, and therefore it is recommended to build a platform with a welded ladder.
As for the height of the mast, it should be 10 meters higher than the highest obstacle, which is located within a radius of 100 meters.


