Homemade products from a washing machine engine:
1. How to connect a motor from an old washing machine through a capacitor or without it 2. Homemade emery from a washing machine engine 3. Homemade generator from a washing machine engine 4. Connecting and adjusting the speed of a commutator motor from an automatic washing machine 5. Potter's wheel from a washing machine machines 6. Lathe from an automatic washing machine 7. Wood splitter with an engine from a washing machine 8. Homemade concrete mixer
7 country miracle helpers!
Unusual hand gardening tools (photos, videos, drawings)
1. Fokina flat cutter
The flat cutter is a great achievement of the agricultural mind. This is the first truly universal garden tool. Not just for cultivating the soil, but a tool for comprehensive cohabitation with the cultural plant community and soil.
Fokina flat cutter drawing:
Fokina flat cutter “Swift”
2. Ripper Miracle shovel “Plowman”
Ripper Miracle shovel “Plowman” drawings:
A shovel that can be classified as a ripper-cultivator - “Plowman”. The mechanism of the Plowman ripper is simple and quite effective. Raising the earth is carried out by the operation of a simple lever. The main load falls on the legs, which press the working forks into the ground. The lifting of the soil comes from the force of the hands, which relieves the back and is therefore attractive to the elderly and gardeners suffering from lower back pain. Two opposing forks, passing one through the other, loosen the soil without turning it around, providing a loosening depth of 15-20 cm.
Miracle shovel Prokopenko
Advantages of the design of a shovel or soil ripper or potato digger
1.Deep tillage without soil turnover.
2.High labor productivity.
3. Significant physical effort is not required when processing the formation.
4.Available in production.
A special feature of cultivating the soil with a miracle shovel is that the garden is dug lengthwise rather than across. With both outstretched hands, we take the miracle shovel by the edges of the top bar, step on the platform (footboard) and it easily goes into the ground. With a slight movement (can be combined with light shaking), taking two steps back, we move the shovel from a vertical position to an almost horizontal one. After this, we take a step forward, pull the shovel back 30 cm, give the shovel a vertical position, drive it into the ground and repeat the cycles until the row ends. Then we proceed to processing the next row.
Materials: half-inch labor, round timber (or hexagon) with a diameter of 15 mm.
For ease of transportation, a collapsible design can be made.
Miracle shovel Prokopenko drawings:
3. Miracle turning forks
Miracle forks allow you to dig up the ground without putting any strain on your back due to the unique rotary working method. Miracle Forks do not require bending or squatting. Efforts are applied only to the “steering wheel”. At the same time, digging productivity increases 3-4 times.
Miracle forks are adjustable in height over a wide range, which allows you to ideally adjust the tool to your height.
Miracle forks rotating photos:
4. Miracle shovel of the monk - Father Gennady
Miracle shovel of the monk - Father Gennady photo and drawings:
5. Miracle Cleaver
The Miracle Cleaver is a tool for easily and safely chopping wood. You will be able to chop three times more firewood, spending the same time and the same effort as when working with a regular splitter. At the same time, even women and children will be able to chop wood, because the main work consists only of raising and lowering a weight weighing 3.3 kg.
One Miracle Cleaver replaces four tools: a cleaver, an axe, a hammer and a chisel. If you follow the instructions for use, the tool is absolutely safe.
The miracle cleaver allows you to chop even very thick logs. However, it does not require any special skills and is very easy to use.
Miracle cleaver photo:
6. Miracle potato hiller
The miracle hiller is designed for loosening the soil on potato beds and hilling up the sprouted potatoes.
Thanks to an optimally calculated design, the new invention promotes high-quality soil cultivation (loosening and hilling) and the correct formation of the crest of a potato ridge. The distance between the discs is adjustable, which allows you to loosen the soil near the bushes and hill up the bushes.
The miracle hiller will allow you to hill up potatoes without much effort and in the shortest possible time, avoiding the labor-intensive and tedious work of cultivating the soil with a hand hoe. It takes two people to work as a potato hiller.
Miracle potato hiller photos and drawings:
7. Soil ripper "Tornado"
The “Tornado” soil ripper loosens the soil and easily copes with perennial weeds such as wheatgrass or field bindweed.
Soil ripper "Tornado" photos and drawings:
Source: eurosamodelki.ru
DIY miracle shovel
This homemade device is simply indispensable for summer residents - a miracle shovel! The original design of the shovel allows you to quickly dig up a garden with minimal physical exertion, especially useful for people with back problems.
We present a photo of the step-by-step production of a homemade miracle shovel.
- Rod.
- Corner - 45 mm.
- Pipe.
- A pair of 10mm bolts.
From the rod we cut 15 pieces 30 centimeters long. Next, 8 segments need to be sharpened on one side.
We take a corner 60 cm long, measure out exactly 8 parts on it in order to place 8 rods at the same distance. Next, we take another corner 50 cm long and divide it into 7 parts, respectively, into 7 rods.
We weld rods to the corners, and to a corner 50 cm long you need to weld corners 35 cm long at both ends.
We drill holes along the edges of the side corners and make loops from the corner pieces.
We insert and weld bolts into the hinges, insert the hinges into the holes on the corner, and weld the previously made part on top.
From a 15 pipe, cut two pieces 125 centimeters long and bend them slightly.
We weld the pipe sections along the edges of the upper corner and reinforce them with rods.
We weld a handle to the pipes.
As a result, we got a homemade miracle shovel, made with our own hands, with its help you can quickly and effortlessly dig up a vegetable garden.
How to use a miracle shovel is shown in this video.
Source: sam-stroitel.com
Homemade lister hiller
To make a homemade manual or automated hiller for any type of potato, you first need to draw a scale drawing of the mechanism on paper and indicate the required dimensions of the device.
Manufacturing equipment
In order for the work to be done quickly and efficiently, you must first prepare the tool. For this you will need:
- Bulgarian;
- welding machine with electrodes;
- drill with a set of drills;
- hammer.
A grinder and a welding machine are needed to make a hiller
From the materials you need to prepare:
- metal sheet, 2-3 mm thick;
- iron pipe, with a cross section of 20mmx20mm or 30mmx30mm;
- if an adjustable device is being made, then you will additionally need to purchase 4 loops and metal strips (3 mm thick).
Progress
- We cut out the sides of the plow (ears) from a metal sheet. The wider the width of the sidewalls, the more land will be captured and, accordingly, more of it will be poured under the bush. In the narrower part, intended for cutting soil, the width of the ears should be 5-7 cm. For narrow row spacing, ears are made smaller in width than for wide ones;
- We bend the sides and give them the desired shape. The bend radius should be the same for both the left and right halves;
- We weld both halves and clean the welding area;
- We connect the ears together with metal strips. If the hiller is not adjustable, then the strips are welded to the ears; if it is adjustable, then we fix it with loops. It is desirable that the angle between the stripes be 90°, and between the ears – 120°. We weld the other ends of the strips together;
- We attach the nose to the narrow ends of the ears by welding. The angle between the metal strips and the spout should be 150°;
- After manufacturing the working part of the hiller, it is welded to the bracket. Using a bracket, the hiller is then connected to a mechanism, for example, a walk-behind tractor.
DIY miracle shovel
One of the most popular innovative digging tools is the miracle shovel, which consists of twin forks: some are stationary, the other are movable. Mobile forks lift the soil and push it through the teeth of stationary forks. The soil is loosened to a depth of 20-25 cm.
We offer you drawings of the device: it is simple. A participant of our portal, who had previously seen welding machines only in stores, successfully welded such a miracle shovel for herself.
Recommended dimensions of the miracle shovel:
- frame width: 35 cm,
- frame length – 78 cm,
- length of working forks - 23 cm.
According to the experience of operating the unit by the participants of our portal, for its effective operation the ripper must be tilted approximately 25 degrees towards the ground.
A member of our portal with the nickname Mount “slowly sawed with a grinder” on winter weekends and tested this device at the dacha on the May holidays.
I'm shocked: what in previous years I spent several days on, I did in a matter of hours. And the quality of digging is much better: you don’t even need to harrow with a rake. Damp soil sticks to an ordinary shovel with terrible force, but this tool could cope with wet soil, although it worked better where it was drier.
Mount notes that the fork shovel works well on undug soil (although this tool is not intended for virgin soil), and pulls out roots. If you pour peat onto the dug up soil, the unit mixes it with the soil no worse than a mixer.
Digging up beds with this device is very simple: go in one direction, turn, go in the other direction. 10 minutes - and the bed is ready!
And - most importantly - there is no fatigue, as there was from a shovel. At first there were very skeptical remarks from the female contingent about the worthlessness of the device, but after the first 15 minutes of use there was silence.
Our user specifically made this unit lightweight so that it could cope with the most difficult soils, including virgin soil.
Over three years of successful operation, the following advantages were identified in comparison with motor cultivators:
- the miracle shovel does not cut the roots of weeds and thereby does not contribute to their spread throughout the garden, but completely pulls them out;
- You can use it to hill up potatoes: walk along the rows while simultaneously removing weeds, loosen the soil, and then hill up;
- The tool is convenient for digging up long beds;
- there is no need to break up lumps and loosen the dug up soil with a rake;
- The device loosens the soil without turning over the fertile layer.
A similar device called “two shovels” was made by a user with the nickname Dva11.
I looked at the options for shovels on the Internet and in stores and made my own. Due to the large lever, less effort is required and there is no need to bend over too much.
This is an easier option than the previous one, but it also requires effort. Saddle frame made of 15x15x1.5 profile and 4 mm electrodes; The forks themselves are made from a 20-piece pipe and seven teeth from a horse rake (the distance between them is approximately 6-7 cm).
The length of the teeth is 28 centimeters, but due to the fact that the axis is raised by three centimeters, 24 centimeters go into the ground.
A similar tool was put together by a FORUMHOUSE member with the nickname TOSA1970.
It helps a lot when digging, and your back doesn’t get tired like with a regular shovel.
Design properties and types of devices for harvesting potatoes
Many people purchase various kinds of mechanical inventions for these purposes, and some craftsmen, the so-called Kulibins, are only happy to make a potato digger with their own hands in order to save themselves and their loved ones from hard work. Particularly popular among rural workers is the potato digger, which operates on the basis of a walk-behind tractor of any variation, be it the popular “Neva” model, or a mechanical device from another manufacturer. The main thing in this matter is to have a clear understanding of the design features of a homemade potato digger and the ability to create drawings.
Necessary clarification: this mechanical device attaches to the walk-behind tractor to perform the work. Such a self-made unit is capable of cultivating a plot of land both near the house and in the field. The primary purpose of a potato digger is to separate potato tubers from the soil and place them on the ground. Such a device is easy to operate, and it also has a fairly simple design. Therefore, creating it on your own is usually not too difficult. The main thing is that this mounted mechanical device will fit any model of walk-behind tractor.
Many will argue, why waste time and effort if such a miracle of technology can be bought without problems at any outlet selling agricultural machinery and devices. This point of view has a right to exist, and many do so.
However, any experienced gardener knows the main advantages of a digger created at home:
- Such a mechanism is much more practical, since it is designed for a certain characteristic of the soil of a particular area, as well as based on the strength of a specific person - the future happy owner.
- The cost of a homemade device is an order of magnitude lower than that of a finished product sold in specialized stores.
Before starting creative constructive processes for designing a potato digger, you should remember: it is adapted to function on soils with medium and low density. To make a unit designed to work in heavy soils, you cannot do without deep knowledge in the field of mechanics and, of course, physics.
There are the following types of potato diggers:
- The mechanism is of a screening or vibration type - its design mainly includes a ploughshare and a vibrating sieve. This type of potato digger based on a walk-behind tractor operates quite primitively. The soil along with the tuber is undermined by the ploughshare. Next, a stationary conveyor grid is connected to the work, leaving the tubers on its surface, as if sifting the soil through a sieve. This model is rightfully considered one of the most effective in operation, but quite difficult to manufacture.
- Transporter type - it can easily work, for example, on the basis of a walk-behind tractor such as the Neva. The device of the conveyor digger includes a ploughshare and a driving conveyor, which has a special hooking device to support the tubers on the platform and clear them of soil. The conveyor unit for digging potatoes is more practical compared to the vibrating type of potato digger. However, the use of this type of device on soil with a light density criterion is impractical.
- A pointed unit is a simple mechanism in design that can be easily attached to any model of mini-tractor, say, to the same “Neva”. It does not contain movable components; the soil with tubers is cut with a knife. Then the cut falls onto special rods, where the soil is poured back, and clean fruits are laid on the surface of the soil. This type of digger is more effective when used on soil with a low degree of density, where the use of other types of devices is ineffective.
Before starting construction, first of all, it is necessary to know exactly the density of the soil on which operation is planned. Keep in mind that where a conveyor mechanism can function flawlessly, it will be difficult to work with a lancet-type design. On a small farm, it will be most convenient to harvest the potato crop with a relatively small device. Such a potato digger should be comfortable during use and easily hang on a walk-behind tractor.
DIY potato digger
Nobody likes picking potatoes out of holes - this is the most difficult and tedious thing in the whole process of digging potatoes. Mount has made another hand-held gardening tool, a hand-held potato digger, which itself removes root tubers from the holes and also cleans them from the soil!
The advantage of this unit is that you don’t need to shake the ground with a shovel. He stuck his pitchfork under a bush, stomped on the lever with his foot - clean potatoes flew out of the ground.
This tool is convenient for digging all root crops. It is much easier to work with it than with a shovel - you don’t get tired at all!
A potato digger is also used for digging up a vegetable garden. But she needs to dig her garden not along, but across the plot.
Reviews from experienced gardeners
Here are a few reviews from experienced gardeners about methods for weeding potatoes.
Lyudmila, Kemerovo : “I use a Fokina flat cutter and am very pleased, it works better than a regular hoe. I process flowering potato bushes only with my hands. Less risk of damaging bushes. A flat cutter is the most useful tool in this case.”
Andrey, p. Kochki : “I use homemade hedgehogs. They don’t require much investment, and the results are excellent. I made them myself from a hollow pipe. I welded teeth on it from metal rods and secured it to a metal frame. The finishing touch is the wooden handle.”
Tatyana, Krasnodar region : “This summer I planted potatoes under straw. Our soil is the bank of a mountain river (stones, sand and clay). I was pleased with the harvest! The only disadvantage of the technology is that a large volume of straw is needed. Especially if the potato plot is large.”
How to make a flat cutter from a braid
Vladimir Fokin invented his flat cutter after he was unable to use a shovel. This garden tool is capable of performing many operations: loosening, weeding, hilling, mowing, forming beds, etc.
Its main purpose is to remove weeds and at the same time loosen the soil at a depth of 2-5 cm, but without turning the top layer of soil. Supporters of organic farming know that this method of loosening does not destroy beneficial microorganisms living in the soil, and therefore increases its fertility. The Fokina flat cutter is a bracket that is curved in several places at certain angles, its three cutting surfaces are sharply sharpened. The bracket is secured to the handle. It is important to learn how to work correctly with a flat cutter, then this tool will have no price.
Here's how you can check yourself: if your back is straight when working, your body is tilted quite a bit, your thumbs on the handle look up, then everything is correct. If you hold the tool correctly, the physical load when working with it is reduced several times.
Fokin is my father-in-law. Letters of gratitude, especially from elderly people or people with poor health, stood in bags in his home.
A FORUMHOUSE member with the nickname Antol13, based on Fokin’s flat cutter, made his own tool - a super flat cutter Kosar. This super-effective tool is made from a Sable braid that was lying around the house unnecessarily.
Here's how to make a flat cutter from a braid:
- Use a grinder to cut off the stiffening collar so that during operation the flat cutter does not experience resistance and does not cling to the ground. The recommended length of the flat-cutter blade is 17 cm. But it is better to first make the blade longer; after testing, you can always shorten it.
- The recommended attack angle of the flat cutter blade is 35 degrees. If necessary, you can increase it by bending it in a vice with a gas wrench.
- After testing, adjust the length of the flat cutter and the angles of the working surfaces.
- Make grooves on the handle on both sides for better fixation.
- For better fastening and to prevent loosening, make a stainless steel clamp at the top of the tenon.
Tips for use
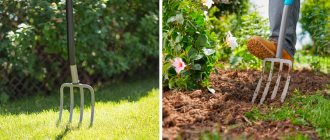
Proper use of forks for their intended purpose can significantly facilitate work on a personal plot.
- First, the teeth must be strong. You cannot dig up the ground with thin teeth, this will only lead to breakage of the product.
- The cutting is no less important. If you need to loosen the soil, choose equipment with smaller cuttings.
- If you move something more authentic.
- An important point: the cutting must be shoulder-length to the person digging. Telescopic forks are considered the best option.
Before purchasing forks, decide what type of work you need them for. This is the most important criterion. Treat your forks with care and they will last for many years in your summer cottage.
Summarizing
All these tools are easy to make with your own hands. They make the toughest jobs easier and increase productivity. Flat cutters and miracle shovels should be in the arsenal of every cultivated summer resident. But they are only suitable for land that has already been cultivated - they cannot raise virgin soil. True, most gardeners do not face such a task.
On FORUMHOUSE you can find more smart tools for cultivating land, learn how to make a homemade tractor, watch a video that shows in detail the device of the “Mower” flat cutter, and videos that talk about life hacks that improve the life of a summer resident.
Source: www.forumhouse.ru
Weeding during flowering
The formation of tubers begins at the beginning of the flowering period . At the tips of the stolons, buds form, from which tubers subsequently grow. This stage lasts about two weeks and occurs at the beginning or end of June, depending on the region and crop variety.
Weeding and loosening of potatoes is completed before flowering begins , since subsequently there is a high risk of damage to the stolons, and, consequently, a decrease in yield.
If weeding is carried out during the flowering period , then do it carefully, trying not to damage the bushes or touch the roots.
Interesting things on the site:
Growing potatoes using the Chinese method
Rules for growing potatoes in bags
Growing potatoes in boxes and boxes
What is different and what can
To be precise, this is not a shovel, but a ripper, since it not only digs, but also breaks clods. The miracle shovel consists of two (sometimes one) slats with pins movably connected. Some models also have a back stop - for easier digging of dense, heavy soil. So in reality it looks more like double pitchforks (see photo below).
Miracle shovel and its components
From the picture it is clear that this tool does not have a shovel as such, but the differences from the classic bayonet shovel do not end there. It also has a much higher handle - it should reach your shoulder. It is also convenient if there is a crossbar at the top - you can operate it with both hands.
The miracle shovel performs three operations at once:
- loosens the soil;
- breaks clods;
- “extracts” the roots of weeds without tearing or cutting them (in any case, damaging them much less);
- Digs root vegetables easily - you can dig carrots, potatoes, etc.
But its main advantage is that it greatly facilitates digging the earth, and the main load falls not on the back, as when using a conventional bayonet shovel, but on the legs (driving the working forks into the ground) and on the hands (turning the forks out of the ground). During work, the back is in a vertical position and is almost not loaded.
Another version of the miracle shovel
The only downside to this tool is the weight. It is really much larger than the bayonet one. But the super shovel can be rearranged; there is no need to lift it. Or rather, it is raised only a few times: when it is placed on the ground at the beginning of the row. Then, by pulling the handle, it is simply tightened a little.
There is another very attractive point in using a miracle shovel - it digs the garden at least twice as fast. This occurs due to the wider working part - up to 50-60 cm. Provided there is little physical activity, this is very good.
How to work
Although this design is not particularly complex, working with it has its own characteristics. First, you need to start from the far edge of the bed, then move back, gradually dragging the forks back. Well, the general procedure is this:
- Holding the handle, place a miracle shovel and rest it on the front ripper.
- Stick the pitchfork into the ground. Drive them in until the back stop touches the ground. If the ground is heavy or dense, additional force may be needed - press your foot on the crossbar of the front forks.
- Pull the handle towards you. With this movement, the forks will begin to move upward. As they rise, they pass through the forks of the front stop, breaking up the lumps.
- Pull the device back a little, repeat all the steps (plug, squeeze, pull the handle).
It's actually very simple. It’s worth trying a couple of times and then everything repeats automatically.
Advantages
They are used for digging up soil; they are much lighter and more convenient than shovels. Working time is reduced.
- No soil sticks to the teeth. Easily enters the ground.
- The shape does a great job of picking up vegetables such as potatoes and digging them out.
- The teeth, when digging, cause less damage to plants.
Multifunctionality.
Constructions
In addition to the option shown above (called “Tornado”, “Digger” or “Plowman”), there are several more variants of miracle shovel designs under different names.
Assembly drawing of a miracle shovel
Soil ripper without front support
This design also has working and support forks, but does not have a front stop. Because it is less bulky and weighs a little less. But the front stop gives increased stability during operation. And the weight when dragging is not so important.
The handle is attached to the working forks, the back stop is welded to the comb of the second forks. Both of these structures are movably connected to each other (even door hinges can be used).
Ripper miracle shovel for easy tillage
The photo shows one of the implementations, which is made on the basis of a corner and a round pipe. When working, the pins are driven into the ground by pressing on the crossbar, and not on the stop, as in most models.
An option called “Digger” is essentially a wide fork with a stop for easier turning and a high, powerful handle.
Miracle shovel "Digger"
The peculiarity of this design is the stop and the adjustable handle. It is fixed with two bolts and adjusted to the height of the working person.
The emphasis is not stationary, but movable. It is fixed to the frame. When plunging the pins into the ground, press on it with your foot, then, without removing your foot, turn it out by pressing the handle of the fork out of the ground.
Digger in action
The physical load during work is low, the work progresses quickly. But this miracle shovel will not work for hard and lumpy soils: it does not crush the soil. She collapses through the pitchfork under her own weight. But this is only possible on loose soils. On clay or black soil it is better to have a second comb with pins.
Are pitchforks good for digging potatoes?
There is even a special type of tool for digging up tubers, collecting and reloading the crop - ball (potato or beet) forks.
Advantages and disadvantages
Advantages of forks when harvesting potatoes:
- relatively light weight;
- slight resistance and soil adhesion when the teeth enter the ground;
- the ability to completely dig up a potato nest;
- separation of soil from tubers by sifting through teeth during digging;
- low probability of damage to vegetables;
- not harming earthworms.
Flaws:
- a tuber pierced by a pitchfork quickly rots;
- when working in an area with heavy clay soil, stronger and thicker teeth will be needed, which will make the tool heavier;
- there is a risk of injuring your legs during work.
When harvesting potatoes with a fork with very sharp teeth, it is better to use tarpaulin boots as work shoes.

