Gardening equipment
Gardening work, even within a modest six hundred square meters, is a rather labor-intensive process that can be optimized using various tools or homemade devices. Our craftsmen prefer to make their work easier with homemade products.
Battery sprayer
Copperfield FORUMHOUSE Member
Operating principle: a small-sized submersible pump is installed inside the tank, the solution from the canister is supplied by the pump through a hose along a rod to the sprinkler nozzle. It works quietly, the pressure is strong. If the trees are tall - the rod is two or three meters, the pressure practically does not drop when the hose is extended. The battery can be attached to the tank; I carry it in my pocket.
Equipment:
- Plastic canister with a wide neck - 10 liters.
- Submersible water pump (19W, 12V).
- Brass sprinkler nozzle.
- Low pressure hose (outer diameter – 9 mm, inner – 6 mm) – 3 m.
- Rod (aluminum pipe, diameter 12 mm) – 1 m.
- 12V battery (from a screwdriver) – 1.2-2.4 A/hour.
The author lists the advantages of an automatic sprayer as ease of assembly, low cost (costs less than a thousand rubles), reliability and a stable, strong spray.
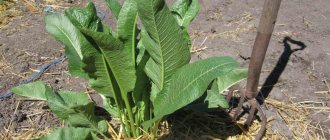
Potato weeder
OlegNF FORUMHOUSE Member
I assembled a weeder for potatoes using the type of flat cutter - with a reciprocating movement, the weed is cut off at the root. Can be processed close to potato stems. Compared to manual processing with hoes, hoes and flat cutters, it is easier and requires much less time and effort.
The unit is assembled from used water pipes and a bicycle wheel, the knife (with adjustment of the reach and angle of “attack” into the ground) is cut from the disk of a grain seeder. After processing the row spacing, all that remains is to go between the bushes with flat cutters. There are plans to install additional spacers on the rods to prevent them from bending backwards.
Device for planting garlic
Vasilich Member of FORUMHOUSE
I came up with it and made it for my beloved wife - so that everything would be beautiful and regular. A perfectionist's delight. We stretch the cord and stick the tool into the ground along it. Using the main pin we get a hole for the slice, the crossbar is a depth limiter; the spike at the end is an indicator of the next hole. The trial test drive showed excellent results - it turns out as intended.
Vasilich did not indicate the dimensions of the punch, since he considers them individual - “everyone has their own concepts of how deep and how often.”
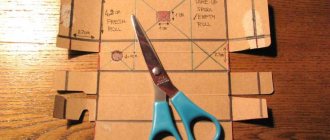
A fun way to make holes for sowing seeds using cardboard egg cells
It takes a lot of effort to prepare vegetable beds. A responsible task is marking and cutting furrows for sowing. They should be smooth and of the same depth along the entire length. Resourceful summer residents offer a homemade device for marking even and neat holes - a cardboard cell for eggs.
Seeds can be lowered into each hole or by skipping 1-2 holes, thus adjusting the distance between plants depending on the crop.
Budget-friendly decorative and functional fencing for flower beds and beds
There are a lot of all kinds of plastic picket fences, ribbons and other fences on sale, but not everyone is attracted to the plastic around their beloved flower beds. Let's see how creative our craftsmen are in this area.
Flowerbeds and beds made of wave slate
Danila78 FORUMHOUSE Member
We have three flower beds in a row - the tree trunk circles are fenced with wave slate. We calculated, hammered 9 sections of steel pipes into a circle, and sawed the slate in three waves. The sheets were installed end-to-end, with emphasis on the pipes, holes were drilled and tied in two places with thick aluminum wire.
The flowerbeds are in their seventh season, no complaints, the slate burst only in one place and that was from a blow with a shovel during digging. Danila78 recommends working in flowerbeds with similar fencing with a hoe or flat cutter. As for lawn care, the trimmer line does not penetrate the slate even with direct contact, and mowing the flower beds is not a problem.
For those who want to repeat, the main reminder.
Danila78
Cutting slate is the most unpleasant thing: it’s better to cut with a grinder with a “stone” disc, but there will be a lot of dust! And you can’t breathe this dust, it’s harmful! So it is best to do this with a gas mask or a very good respirator.
IrinaZb Member of FORUMHOUSE
I'll show you my possessions. Our beds are several years old - they stand firmly, although the corners have not been fixed with anything.
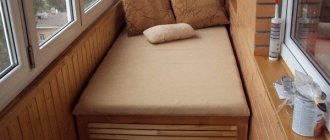
Beds at high groundwater level
Titovetsky FORUMHOUSE Member
I bring to your attention a report on the creation of the garden bed. Our site has a very high groundwater level, so creating such beds is a vital necessity.
Materials:
- board 6000x100x25 mm (grade 2) – 3 pieces;
- block 3000x50x50 mm - 1 piece;
- self-tapping screws
Titovetsky
Time required - about an hour. We cut blanks from boards and timber - 4 pieces of 3000x100x25 mm each, 4 more pieces of 1000x100x25 mm each and 6 legs made of timber, 400 mm long. We lay long pieces, level them, determine the top and bottom, place the legs (along the edges and in the center, at a distance of 1.5 meters), fix the boards to the legs. Similarly for the second pair of long blanks. Next, we attach the end boards, and the bed is ready. We move it to the right place, dig under the legs - the bed sits down, fill it with soil and plant it. We also paint our beds. If necessary, you can make beds 6 meters long.
Based on gabions
sfmsx FORUMHOUSE Member
I bought fence mesh from discards to create a multi-tiered bed. During the process of making the beds, we came to understand the low strength of the mesh and the unsightly appearance of the entire structure. On the other hand, the mesh is galvanized and coated with polymer, resistant to corrosion and rotting. It easily bends into almost any shapes and “containers” that can be filled with various materials within the dimensions of the mesh cells. Therefore, I continued experimenting with the design of the sides for the beds - the first one had granite pebbles with bottle solar lanterns. I took ordinary garden flashlights (with AAA batteries, little finger) and inserted them into a plastic water bottle, they illuminated well.
Fortunately, there was quite a lot of yellow limestone on the site - what was not used for backfilling into the drainage became an excellent filling for the gabions. To make it more decorative, sfmsx painted the stone bright yellow (he added a paint color to the impregnation for the stone), and used birch “pencils” as decoration. The ends of the stumps were treated with waterproofing mastic to increase their service life.
sfmsx
Just like the first time - laying it in a fence mesh. The costs are minimal, labor loss - playing Tetris in the fresh air with stones, coloring. For a temporary experiment (possible life cycle 2-3 years), then easily disassembled and...
Nursery from a plastic bottle
Plastic bottles with a volume of 2-5 liters. Convenient to use for growing flower and green seedlings, rooting cuttings and strawberry tendrils.
In a bottle positioned horizontally, cut out a long window on one side so that there are sides left to hold the soil. In the opposite side we make several holes to drain irrigation water and pour in a little expanded clay or river sand. Next, fill it with nutritious soil, place it on trays and sow seeds or plant cuttings.
These trays are lightweight and easy to carry. Through the transparent walls you can see the degree of development of the root system. Plastic is easy to clean and will last for more than one season. And if there is no place to store the nurseries after release, then it would not be a shame to throw them away, but make new ones for the new season.
Pool blankets
With the advent of plastic outdoor pools, many summer residents have appreciated the beauty of swimming in the summer season without leaving their yard. One of the necessary accessories for a font is a special “blanket” - an awning that protects the water from contamination. But, as with any extras, many are confused by the price of the issue. Those who don’t want to overpay do it themselves.
Floating blanket with drum
RDRik FORUMHOUSE Member
The relevance of this item for an outdoor, as well as an indoor pool, has been confirmed by time - standard awnings from the manufacturer are bulky and indecent, suitable only for preservation for a long period. And a factory-made product would have cost me 36,000 rubles. After monitoring the network, I found a manufacturer of four-layer light-resistant film in 1.6 m rolls, from whom I purchased what I was looking for.
RDRik connected the pieces of film together with soldering - a construction hot air gun and a roller, similar to repairing awnings on trucks. The quality of the seam is “C”, since when soldering the film tightens, but the somewhat compressed appearance does not affect the functionality in any way.
The blanket is ready, it’s time for the drum to wind up/unwind as needed. The shaft is made of a 50 mm metal pipe, installed in bearings on supports.
The usefulness of the blanket is undeniable.
It is important that the blanket does not interfere with the operation of the skimmers - they continue to collect the top layer of water with debris and other “delights” even when closed.
Bubble Wrap Blanket
Fenix14FORUMHOUSE Member
In my pool (polypropylene, homemade, round, diameter 4.5 m) I used packaging film, but there were air bubbles inside. I bought it at a construction hypermarket.
The cutting technology is as follows:
- I started with the outer pieces - I placed a metal corner in the center of the board (about 1 m long).
- I released the ends of the film between the board and the corner by about 5 mm.
- He heated the ends with a hair dryer, fusing them into a thin seam.
- I left the corner until the seam completely hardened (to prevent deformation of the seam along its length).
- I moved the film and repeated the algorithm until the end of the roll.
Instead of a winding drum, there are supports made of pipes.
Phoenix14
I welded “horns” (polypropylene tubes) onto the sides. Before bathing, I simply pull out the film and lay it on them. Since the sides have no sharp corners, the film can be installed easily and without damage. Covering the pool is even easier - whoever is the last to leave the water pulls the cover into the bowl with his hands and straightens it. Everything is easy and simple. The only negative is the flimsiness of the film. But if necessary, if the seam begins to separate, you can quickly solder it using the above technology.
Autonomous watering for a summer residence
The problem of watering moisture-loving plants in the country during the work week can be easily solved with the help of a 5-liter plastic bottle. In the lower part, in a circle, retreating 2 cm from the bottom, make several holes of small diameter.
On a note! The optimal number and size of holes can be determined experimentally, but you can start with four holes with a diameter of 1 mm.
The bottles are buried halfway into the soil before seedlings are planted or sowed. Planting is carried out in such a way that the root system of the plants is in the moisture zone (approximately 10 cm from the bottle). Common scheme: 4 plants around 1 bottle. The lid is closed tightly: this slows down the flow of water and creates an analogy to drip irrigation. Water is poured through the neck with a hose or bucket, but do not add 3-5 cm to the edge.
The method is often used for autonomous watering of cucumbers, which are painful to tolerate even short-term droughts.
Useful tips for your piggy bank
Those portal participants who have completed certain stages of construction and arrangement generously share their acquired experience so that their “rake” can be bypassed by those following.
About garbage
kotayka Member of FORUMHOUSE
After demolishing the junk that remained on the site (sheds, sheds, greenhouses), the garbage was placed under the fence away from the entrance so that it would not be in the way at the gate. He didn’t interfere – for a couple of years. Construction waste was actively dragged there, and soon the pile rose higher than the fence. Shame prompted him to call a garbage truck, but it turned out that the entrance to the pile was already closed. Removal was significantly increased in cost by the need for workers to carry garbage manually across the entire yard. The lack of bedding under this garbage Mont Blanc led to the penetration of broken glass, nails and other unpleasant little things into the soil. Conclusion - remove garbage as soon as it appears. Maybe one or two bags, but at once, without cluttering. And the best bedding is a used banner. For short-term waste storage we now use polypropylene tents with ties. We spread it out, dump the garbage, pull it through the holes into a bag and throw it into the garbage truck.
Dax Member FORUMHOUSE
I have a collection pad for garbage: several sheets of smooth galvanized steel. Concrete waste (concrete leaked out when pouring on top of the formwork) and other sharp/cutting rubbish were poured onto them in buckets, after which they were collected with shovels and thrown into the truck without any problems. And now I also try not to store garbage: at the end of the working day, I put it in bags and take it out.
Mini-greenhouses made from plastic bottles and disposable cups
Another useful use of plastic containers. When sowing seeds of heat-loving crops (cucumber, zucchini, pumpkin) in open ground, there is a risk of delayed germination and even death of seedlings in the event of a sharp cold snap. To solve this problem, gardeners suggest using disposable cups after planting seedlings or seeds.
They already have drainage holes that will serve for gas exchange. To prevent the cups from being blown away by the wind, they are buried 2-3 cm into the soil. Seeds, 2 pcs. Sow in a hole in moist soil and immediately cover with a glass. As a result, the seed and developing sprout are in a greenhouse with more favorable conditions.
The top part of a 1.5-2 liter plastic bottle can be used to cover early cabbage seedlings. Immediately after planting the seedlings, the lid should be closed, but not tightly, so that fresh air can penetrate. Once the plants are established, the covers can be removed completely.
No. 11 – Natural fertilizers that are in every home
Banana peel infusion is a good fertilizer for plants
Didn't stock up on fertilizers? No problem. You definitely have something at home that can feed the crops in your summer cottage. This is waste from the food you eat every day.
- Egg shells are an excellent source of calcium. Just grind them in a blender or mortar and sprinkle them on the ground where the plants sit.
- Tea bags are a good source of nutrients. If you drink tea, “give” the tea leaves to the plants. A tea decoction will help protect crops from fungus.
- Coffee grounds are an excellent source of nitrogen, potassium, and magnesium. We brewed coffee, drank it, and added the grounds to the soil and lightly loosened it into the ground.
- Bananas, or rather their peels, are an excellent basis for preparing a nutritious drink for plants. Place them in a container, fill them with plain water and wait until the mixture begins to ferment (small bubbles appear). Water the plantings with the prepared solution - they will grow quickly.
- Garlic strengthens the immune system not only of humans, but also of plants. Make a special infusion out of it for watering. Just pour 4 cloves of garlic with 1 liter of boiling water. After 20 minutes, the solution is ready: it needs to be added to the water for irrigation at the rate of 1 tbsp. per liter of water.
- Yeast will help speed up growth. Dilute 100 g of raw yeast in 10 liters of water and water your plantings with this solution about once a month.
A quick way to garter tomatoes, peppers and cucumbers in a greenhouse and in open ground
Gartering seedlings takes a lot of time and is very tiring. Experienced summer residents shared their secret: during planting, one end of the twine of the required length is lowered into the hole (the tip can be protruding from the opposite side) and pressed with an earthen lump of seedlings. No knots, everything turns out quickly.
After planting, the other end remains on the ground, and after a week, the rooted plants are simply wrapped with twine and tied to a support. At the end of the growing season, the ropes are simply pulled out of the soil, and the tops are sent to the compost heap.
Potted lamps for outdoor flowers
Another interesting lighting option, borrowed from lighting design, is the installation of unusual garden lamps under flowers. This solution will undoubtedly decorate the garden in the best possible way! Modern LED pots will allow you to create a unique romantic atmosphere worthy of the pen of a talented writer.
In the photo: flowers installed in LED pots
Magnetic bar (strip) – for storing cutlery or tools
In a small dacha you have to save space. A life hack with magnetic strips (or strips) will not only free up space in the kitchen or workshop, but will also bring order to your rooms! They hold both cutlery (including large knives and an ax) and home craftsman's tools equally well.
In the photo: placement of kitchen metal appliances on a magnetic strip
Marking beds with wine corks on skewers
Well-groomed beds are a source of pride for a gardener. Designer signs with the signature of the crop or variety will also help put things in order. Summer residents always engage in “varietal testing” and select varieties “for themselves.” In order not to confuse the varieties after planting, the beds should be marked.
Wine corks on skewers fit well into an eco-garden and at the same time are well preserved outdoors. The name of the variety or crop is signed with a permanent marker on the cork, then a skewer is stuck into the cork and the “plate” is ready.
Slats for mirror
Massive mirrors framed in frames are distinguished by significant weight. It is recommended to use wooden slats equipped with a locking connection when securing them.
Simple and reliable system for securing heavy objects
See alsoHow to make an interior collage
No. 7 - Instead of rubber boots
Bags can replace rubber boots for a short time
Have you gone to the country without rubber boots, but it is not yet possible to buy them? A simple life hack will help you temporarily solve the problem of wet feet. To implement it, you only need two large bags: just put them on your feet.
Of course, such “boots” are short-lived and are not suitable for constant use. But in an emergency situation and in conditions of self-isolation, they will definitely help you out.
Door rubber
If the door constantly opens or closes on its own, it is recommended to use a simple method with an elastic band. You can use any. It is placed on the handle on both sides of the door, turning it over to form a crisscross pattern in the latch area.
The rubber band will hold the latch in place
See also: DIY decorative plates for the wall
Onion on a feather at home in a plastic bottle
Sprouting onions for use in winter and early spring is not a new idea. But how to implement this so that it is both neat and practical?
A 5-liter plastic bottle with holes along the entire height filled with garden soil has several advantages:
- takes up little space, but gives a high yield of greens;
- the bulbs do not feed on clean water, but grow fully in the soil, so the feathers are more aromatic and tastier;
- the filled “bed” is easy to move and does not leave dirty circles on the windowsill;
- the bulbs in the soil are not depleted, so they do not need to be replaced until the soil becomes green.
How to propagate rare potato varieties with “eyes”
The method that our grandmothers used during the war years due to a lack of seed material. Now it is actively used for propagating rare and expensive varieties. A separate eye on a tuber is a full-fledged bud that will produce a viable plant with a root and a vegetative part. All a bud needs to start growing is 5-10 g from the mother tuber.
Mother tubers of seed potatoes are carefully sorted and only healthy ones are selected. The knife must be disinfected (you can wipe it with alcohol). Freshly cut slices with “eyes” are not planted immediately - the cut areas must dry out to prevent infection. For prevention, they are rolled in ash.
Planting is carried out 5-6 days after cutting. During this period, the slices are stored in the shade, laid out in one layer in a wooden box. Summer residents note an increase in the yield and marketability of potatoes from “eyes”.
Advice! Not all buds of the tuber are active, so cutting into slices is best done after germination, when small sprouts appear.
Do-it-yourself repairs inside the house are easy
In order to start renovating your home, you need to carefully think through everything and write it down. In addition to pencil and paper, you will need tools. This does not depend on whether the repair is major or cosmetic. Another factor is knowledge of the process. If you have no experience or knowledge in wallpapering, for example, then you need to read the information about the sequence of work. Without the necessary information, DIY repairs will be of poor quality and done incorrectly. Due to the errors created, all work will become unusable.
So, the beginning begins with the calculation of the material and the sequence of work.
back room
Most renovation work starts from the back room in the house. Initially, the premises are assessed.
- Wiring . Electricity plays an important role and must be used responsibly. If the wiring is in order, then plan the placement of lighting fixtures, sockets, and switches.
Attention. Before planning the placement of sockets and switches, you should take into account the safety of others - small children.
- Window . Old windows should be replaced with new ones - wood, plastic. If you have experience, you can order windows according to size at the company, and do the installation yourself.
- Coating on walls and ceiling. Floors . Before deciding on the choice of material for the walls and ceiling, you need to think about the insulation of the room and ventilation. It is better to replace old wooden floors with new ones made from edged boards.
Attention. The cement floor “takes away” heat. He's cold.
- When choosing drywall , you should familiarize yourself with its positive and negative sides. And also the methods of its installation - framed, frameless.
- The finishing coating also has a number of features. Its application has a certain sequence. Before choosing a finishing coating, think through the design of the room. Will it be a bedroom with a large bed or a children's room.
Living room
Every decision is important for the living room. This is the main room in the house, apart from the kitchen. Here they hold conversations, watch TV, and receive guests. Design, furniture, window curtains, and placement of lighting fixtures are important.
Wet, cold walls are dried and thermal insulation is made. Many thermal insulation materials can be used in conjunction with waterproofing.
Attention. If you do insulation indoors, then thermal insulation outside is mandatory.
Often climate control is installed in the living room. To install it, you need to choose a place so that cool air does not blow on the owners and guests.
Gender assessment is also carried out. Laying laminate, natural boards or parquet is the owner’s choice. The floor should be warm and fit harmoniously into the overall background of the room.
Kitchen
The kitchen is the kingdom of the housewife. Pies are baked here, preserves are made, and tea parties are held in the evenings. This special place requires a clear approach.
- You should consider the location of outlets and their number.
- Level the walls and ceiling. In most cases, moisture-resistant plasterboard GKVL is used.
- You need to properly install the hood and hang furniture you made yourself.
- Think about what the floor will be like – tiles, “warm”, wood.
Attention. When choosing building materials, high humidity is taken into account.
Doing home renovations yourself is easy if you follow the plan. Study the properties of materials and stages of work. Do-it-yourself furniture alterations will be successful if you have experience in working with wood. Creating comfort is the owner’s idea, the goal of the renovation.
Unusual outdoor seating area
A small budget is not a reason to give up and forget about your own comfort. If you don’t yet have enough money to arrange a veranda for relaxation, you can move everything you need outside! An installed fire, small cozy seats, minimalist decor around, blankets - everything you need to organize an unusual relaxation corner!
In the photo: a relaxation area in a picturesque area
Labels for signing varieties of seedlings from juice boxes
When buying seedlings of fruit, berry and ornamental crops at a gardening market or in a private nursery, we often think that we can easily remember which variety is which or hope for a “note” from the seller. As a result, trees and shrubs grow, notes are lost, and simple names are forgotten in a string of others.
We offer a proven method of preserving the name of a variety directly on a growing seedling:
- cut the juice box into strips 3-4 cm wide and 10 cm long;
- make a hole on one side with an awl;
- We thread a string or wire 10-15 cm long into the hole (with its help we will tie the tag to one of the main branches);
- on the inner shiny side we make an inscription in block letters with a gel pen, pressing firmly on the surface so that the inscription is clearly readable;
- Even before planting, we screw the label onto the future stem branch.
In the future, it remains to monitor the condition of the inscriptions and, if necessary, update the labels.
Screen fence made of pallets with greens and herbs
Hedges do not lose their relevance. And here is another option for a combined fence made from pallets. The resulting voids are filled with soil and green, spicy-tasting herbs and flowers are planted, which are well suited for vertical beds. As the plants grow, the windows in the structure will be closed and the screen will be completed.
Our selection of simple solutions to complex gardening tasks will help you plan your work more effectively and make your stay at the dacha more comfortable. Feel free to implement gardening life hacks on your property and remember that any idea can be improved. Join the ranks of inventors.
#10 – Home Remedies for Pests
Wood ash is an excellent remedy against pests.
Another misfortune that awaits every gardener is all kinds of pests. These are insects, rodents, and birds... You have to “fight” with everyone in order to save the fruits of your labors.
If you also find yourself unprepared for invasions, and did not have time to purchase various products in the store, then, as always, proven life hacks that our grandmothers used, without even knowing such a “fashionable” word, will come to the rescue.
- One of the main helpers is ordinary wood ash. It needs to be scattered on the ground next to the plants. Effective against aphids, cabbage mites and flies, slugs, snails, codling moths.
- Nettle is used to prepare an infusion, which aphids fear like fire. Just pour a bucket of water over a couple of kilograms of fresh nettle (preferably just the leaves) and let it sit for a day. Then you just need to spray the plantings with this product, and the aphids will disappear.
- Eggshells help fight slugs. Make small ditches around the plants that were attacked by them and pour crushed eggshells into them. The obstacle will be insurmountable for the slugs.
- Crushed citrus peel works well to repel mosquitoes and aphids.
- Coffee grounds and baking soda with powdered sugar will help remove ants from your home. Mix the first one with soil and apply it to the soil. By the way, this composition is also effective against slugs and snails. You can sprinkle baking soda and powdered sugar in the house along the ant trails. Powder will attract insects, and soda will deal a fatal blow.
- Ordinary plastic forks will help against rats, mice and moles. Stick them around the crops with the cloves up, and nimble pests will no longer get to the fruits.
Plastic forks against small animals
- Aluminum cans from various drinks also help against moles. They need to be put on sticks stuck into the ground throughout the area. If there is wind, the jars will create an unpleasant noise that scares moles away from the garden.
- Scarecrows are still effective against birds. But you can also use a net that is thrown over the plants, protecting them from birds.
Use clear nail polish to secure the screws
Sometimes it becomes necessary to tighten a screw. This is often required for sunglasses. You will need a regular clear varnish. It lubricates the required screw. When the nail polish dries, you can use the glasses.
Cogs will no longer be lost
See also: Do-it-yourself wood cuts for the interior
Use tape and paint to transform your tatty pots into trendy and modern ones.
Take your favorite colors of paint and completely paint the pots
When the paint is dry, use electrical tape to highlight the areas that you would like to paint in a different color, and cover the rest of the space with a bag.
Paint the free spaces with golden paint and when it dries, carefully remove the bag and tape.