History does not give a clear answer to the question of when people began to use bows for hunting and war, but the oldest stone arrowheads found during excavations were about 64 thousand years old. Without losing its popularity, it still serves as a sporting and hunting weapon. In this article we will tell you how to make a bow from a PVC pipe with your own hands.
Homemade bow from PVC pipe.
Preliminary remarks
If you want to try archery, there are several options. You can sign up for the appropriate section, or buy a bow at a sports store, or borrow it from friends. However, not every city has sections, the cost of sports instruments is high, and friends may also not have a bow.
Therefore, the most reasonable solution in this situation is to make a bow yourself. Of course, you can make it using old technology, from wood and other traditional materials. But, again, the manufacturing materials cost a lot, and the process itself is complicated, long and labor-intensive.
Fortunately, the development of technology has given everyone the opportunity to learn how to make a bow from a plastic pipe. The process is also not so simple, but it is quite feasible. It is worth noting that craftsmen make various crafts from polypropylene pipes, which are very original and practical.
The main thing is to have a device capable of heating a plastic pipe with thick walls (from 3 mm). In addition, in any case, you will have to worry about choosing the material for the bowstring.
Making a bow from a PVC pipe with your own hands is technologically sound: polyvinyl chloride is a modern material, flexible enough and at the same time durable to withstand the tension of the string both at rest and before shooting.
From a thicker pipe, with a conscientious and careful approach, it is quite possible to make a bow that is not inferior in performance to crossbows and professional sports products. If you buy a thinner tube, say half an inch, you can make a much less powerful and safer children's bow.
Using a construction hairdryer, the bow material from a plastic pipe is heated to a temperature of about 180°C: this is enough to freely bend the water pipe, giving it the required shape.
It should be noted that before making an arrow bow or any other elements from a PVC pipe, you must familiarize yourself with the requirements for the purchased pipe.
Characteristics of PVC water pipe for adult onions:
- product diameter - three quarters of an inch;
- outside pipe diameter – 26.7 mm;
- the length of the purchased plastic product is about 3 m, but one and a half meters will be enough for one bow;
- the upper threshold of working pressure in the pipe is about 33 atm.
Despite the seeming optionality of strictly following these parameters, bows with the best characteristics are obtained from such polymer pipes; if a pipe of a smaller size, or less strength, or made of a different material is used, it is impossible to vouch for the result.
However, if you want to experiment and have enough time and money, you can, using the general manufacturing scheme, make an ideal bow for yourself that will last for many years. Be that as it may, each amateur creates a bow from PVC pipe at his own risk, for personal use, and only he is responsible for whether the result is satisfactory or not.
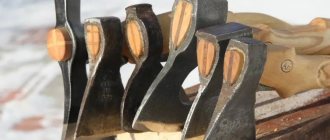
Shoulder gluing
A wedge-shaped notch is drawn on one of the shoulders (exactly on his back). The diagram can be found on the Internet. The cut should be 10-15 cm long. The marked fragment is cut out.
If something went wrong, it needs to be fixed. The second lever is sharpened for a cut wedge. First with an ax or saw, then with a wooden file. It is important to adjust both shoulders so that (when viewed from behind) they form a straight line.
You can help yourself by drawing an axis of symmetry on them. Then three nails are driven superficially along these axes: one near the future connection and two on the griffins.
If all three “coincide” with each other, the arc is straight. Epoxy resins are best suited for gluing. After joining, everything is twisted using carpenter's clamps or rope or twine.
Bow design made of plastic pipe
A pipe bow consists of the following parts:
- The base (handle) is what the bow is held by during preparation and the actual shot.
- The opening (window) for arrows is located in the center of the bow, through which the arrows are launched.
- Shoulders – provide stability to the structure; it would be a good idea to further strengthen them, for example, by wrapping.
- Notches for the bowstring and bowstring - bought in the store or purchased in other ways.
- Arrows are consumables, also purchased or made independently, possibly from the same pipe or from wood and other available materials.
What do you need to know before you start?
Even if you are making a bow and arrow for fun or as a gift for a child, there are certain dimensions that you should consider:
| Arm span | Boom length | Bow length |
| 137-142 | 55-58 | 137 |
| 145-150 | 57-60 | 145 |
| 152-157 | 60-64 | 152 |
| 160-165 | 64-66 | 160 |
| 167-172 | 66-68 | 167 |
| 175-180 | 70 | 178 |
The classic version of the bow consists of:
- The main part, i.e. the handle
- Shoulders
- Bowstring
After production, the bow must be properly cared for. Don’t be alarmed, maintenance is simple and won’t take much time:
- Onions should be stored upright.
- The bowstring is put on only when shooting, and then immediately removed. Before shooting, you need to “spring” the bow and string in order to develop it.
- The bow cannot be overstretched.
- Store only in a dry place, preferably with a case.
The procedure for making a homemade bow
Before starting work, you need to acquire protective gloves for work and a non-flammable fabric that insulates heat well, with which you can bend the heated material without damaging the skin.
So, when all the materials are ready, how to make a bow from PVC pipe?
The manufacturing algorithm is as follows:
- Mark a section of the required length on the plastic pipe using a marker or other convenient tool.
- Mark the center of the pipe body, the areas that will need to be bent in the future, and the places for the notches for the bowstring on both arms to be bent.
- Use a heat gun to heat the first shoulder, flatten it and give it the desired shape.
- Allow the first curved arm to cool.
- Repeat the same steps for the second shoulder, allowing it to cool.
- Warm up the grip area, then bend it to give the specific geometry of the bow.
- Make a notch on each shoulder for the bowstring.
- Cut an opening in the body of the product for launching arrows.
- Pull the string until it reaches the required tension.
- After all work is completed, test the bow in a safe place.
Despite the abundance of tips on how to make a bow from a pipe, and the apparent simplicity of the instructions, the bow cannot always be obtained the first time, so you need to stock up on several additional pieces of water pipe elements in advance.
The most common mistakes made when making a product:
- incorrect heating of the pipe, associated either with insufficient heating and, therefore, the inability to bend the bow, or with overheating of the material and loss of elasticity;
- the use of insufficiently powerful equipment, as a result of which the plastic cools faster than the formation of bends is completed;
- attempts to bend the product without using a hair dryer and high-quality fixation of the future bow;
- overheating - in addition to the problem described above, can lead to cracking of the product during further use.
It also happens that, despite following the rules, the onion still does not come out. There's no need to be upset, you just need to try to make a new one.
Tips for making the perfect bow:
- The bow handle should be made to fit your palm, giving it a comfortable shape.
- You can vary the length, elasticity and other parameters of the bow, arrows and string according to your preferences.
- The cutouts for the bowstring must be treated as thoroughly as possible with abrasive agents so that it does not chafe the tense bowstring. You can tie an additional protective layer onto the notch, and then a bowstring onto it.
- You can also wrap the handle with a comfortable material (for example, leather) for easier grip.
- If you comply with the law, the bow's draw weight should not exceed 19 kg (for unlicensed products - 20 kg).
- Instead of a professional bowstring, you can use polypropylene or fishing cord and other ropes.
- To make it easier to bend the pipe, you can wrap the heated ends with foil and wrap them around a block of wood, then fix them in a vice and leave to cool.
- There's no need to rush. Each wrong action can nullify all previous efforts.
How to make arrows
Young animals are usually taken to make arrows. To make the reed even, you need to hang it on a heavy weight and let it dry in the sun. If the summer is very hot, a week will be enough for complete drying.
You can also take a dry oak log and cut a lot of arrows on it to make arrows. But this method takes a lot of time, since it will take a lot of time to process the arrows.
What to make the tip from
The arrowheads must be made of heavy material; in this case, after releasing the bowstring, the arrow will acquire great acceleration.
Tips can be nail clippings, steel wire or glass pieces.
Using a knife, a recess is made in the wooden base of the arrow and the tip is securely fixed. Typically, homemade arrowheads are tied with thread and then soaked in superglue.
If you want to make very strong tips that will fly big, coat them with epoxy resin.
How to make an arrow stabilizer
Thin plastic sheets or large bird feathers can be used as stabilizers. There are 2 ways to attach: cut the arrow and attach the stabilizer from the inside or wrap it on top.
If you are using large bird feathers, the second method is best. Because splitting an arrow can negatively affect its flight characteristics.
Assembling Composite Combat Weapons
The classic model is best made of wood. Such weapons can be used to hunt hares, pheasants and even roe deer. In order for a hand-made archery bow to really shoot, you need to follow the rules:
- It is better to harvest material in winter or early in the morning on a cool day. Cut down an oak, aspen or beech branch 180 cm long and 10 cm thick. Knots and cracks on the stick are unacceptable. Remove the bark with a knife and treat the ends with oil impregnations.
- Place the workpiece vertically and dry it for a month at a temperature of 28 degrees. The element is sawn into 3 parts: two arms and a handle.
- Steam the onion horns over boiling water for 20 minutes. Scrape off any excess that slides off the sticks with a knife. The shoulders are placed in the stocks. These parts need to be given a rounded shape. The pieces dry for 2 weeks in a fixed, bent position. Wooden elements are treated with wax and left to dry for several days.
- The blank for the handle, 30 cm long, is cut into a rectangle. A pen stencil is drawn on a landscape sheet, applied to the wood and marked with a pencil. Cut off the excess parts with a jigsaw, the blade of which should run strictly along the line. Think over a place for the shelf on which the boom is installed. The surface is sanded with sandpaper and treated with varnish.
- The shoulders are cut with a knife so that at the edges they are narrowed to a diameter of 3 cm. The base of the horns is adjusted to the parameters of the handle. The inside of the sticks is trimmed to create a flat surface that will come into contact with the outer parts of the handle.
- On the handle along the edges on the front side, 2 holes are made with a drill; such holes are made on sticks. The main thing is that the holes on the holder and shoulders coincide with each other.
- Connect the parts with bolts, nuts and washers. If you take into account the thickness of the handle and the diameter of the bow horns, you will need screws up to 13 cm long.
- Suitable strings include fishing line, nylon thread, climbing slings, lavsan or nylon rope. The material is installed in grooves on the edges of the arms and is firmly bound.
Small arms will be elastic. The thread should not be in a weakened state. All elements are in tension. If the bowstring is difficult to pull back, the weapon will shoot far and hard.