An alternative to thermal sensors in the modern alarm market is nothing more than a laser.
Similar systems are used to protect industrial, military and banking facilities. In everyday life, laser alarms have not yet found widespread use, however, if you have the skills to grow from the right place and basic skills in handling a soldering iron, you can make a fully functional sample yourself or order a ready-made model.
Simple DIY laser alarm
Complex purchased security systems and serious alarms are not always needed and not everyone can afford them. Their cost, installation and maintenance are justified in the case of protecting expensive objects. If you need to install a security system in a country house or in a garage, or even in an apartment or house, then the cost of a good ready-made alarm system is often not compatible with your budget. It is better to refuse the cheap security alarms on the market (especially radio-controlled ones - they have long been learned to scan and turn them off without any problems). In this case, it is easier and definitely much cheaper to make a simple homemade alarm system , for example, as one of the options, a laser security alarm.
Today there are many different laser signaling schemes, but, as a rule, such devices have a rather complex design. Not a single homemade circuit of such a device can do without microcircuits and not quite simple wiring. Then there is still setup and startup, selection of capacitors, resistors, etc. You also need to be able to solder microcircuits. It can be damaged by overheating or static and it will take a long time to figure out why the laser does not work. Therefore, we propose to simplify this most dreary piece of the circuit and take a ready-made Chinese laser (in any toy store - it is not expensive - everything is ready - the body, lenses and circuit). Any novice radio amateur can assemble the rest of the circuit.
The circuit in this permanent laser security system reacts to interruption of the beam and consists of an emitter (the laser pointer itself) and a receiver; you can use intermediate mirrors necessary for re-reflection of the beam and a warning device - repeller (siren, light). It is also possible to connect other notification devices, for example, a mobile phone to send SMS or just make a call (Under this number you will have a client - “Alarm went off”). Tests of this system were successful and are still in use today.
DIY laser alarm: Assembly diagram and components
Today, the security systems market segment offers many devices aimed at effective property protection. Installing such devices helps reduce the likelihood of penetration into objects that need protection. The latter are garages, apartments, small country houses and country cottages.
Alarm systems that use lasers are ahead of similar developments in terms of the difficulty of hacking and bypassing the system. Such alarms are classified as expensive. The minimum price exceeds the cost of traditional security systems several times.
As an alternative, it may be suggested to install laser alarms on your own. With this approach, it is possible to acquire an effective security system based on the use of lasers at a relatively low cost. Costs are limited to the cost of multiple devices and additional components.
Below you will learn how to make a laser alarm with your own hands according to the diagram and what components you will need for it.
- Scope of application
- Strengths of laser alarms
- Disadvantages of laser signaling
- Set of components for assembling laser signaling
- Simple diagram of a laser alarm system
- Assembly instructions
- Features of installation at home
- Conclusion
Operating principles of laser signaling
Night camp defense lines
There are several options for overnight perimeter security lines:
1. Alarm signaling the presence and approach of a stranger. 2. Alarm trap for scaring. 3. A trap to incapacitate a potential enemy.
The third option is more suitable for hunters, other hunters and special forces. It includes traps with resulting self-harm and can result in death to an intruder, which is not encouraged by the Law, except in cases of necessary defense. But a pre-prepared trap is difficult to classify as such self-defense. Therefore, in this article we will consider only the first two options.
DIY camping alarm
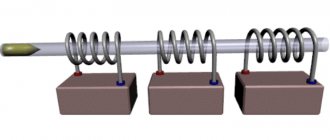
The first signaling line is the simplest. It is installed around the entire perimeter at a distance of 5-10 meters from the tents. To install it, you will need a strong black thread, fishing line (several hundred meters), an empty tin can or glass bottle.
Installing the alarm is simple:
• We stretch a thread at a height just below the knee between the trees around the perimeter. • We tie a nail or other ringing element to the end of the thread and lower it into a jar (bottle). • The can should be placed hanging in a place where it will not be affected by the wind, but not in a tent, otherwise this will immediately tell you where you are.
It is best to throw the jar over a branch. In principle, the simplest tourist alarm is ready. Now any animal or person who catches the thread will set the nail into action. Hitting the walls of a hollow vessel, the nail will loudly announce the presence of a stranger. The thread should be black, because the white thread in the light of the lantern (if it is a person) will seem like a tight rope to the alien and he will see the alarm in advance.
You can make 4 jars according to the number of cardinal directions, securing them in different places accordingly. Then you will approximately know from which direction the stranger is approaching. In addition, you can divide the degree of threat by creating three lines - at knee level (closest to the camp), at waist level (further) and at head level (even further). In this case, activating one or another can will tell you how large an animal or person has appeared within reach.
A moment before death
Travel trap alarm
You can not only be the first to notice an animal on a hike, but also scare it away. For this, the author of www.extreme-voyage.ru uses ordinary inflatable balls. These products are inexpensive, weigh little, and take up even less space. Therefore, nothing prevents you from taking at least a hundred balls with you.
The essence of the action is that animals are usually frightened by sudden noise. A bursting ball in the stillness of the night usually makes a sharp pop, as a result of which the animal begins to break in the opposite direction. Therefore, it is necessary to install the balls on the side of the tents - the animal will not rush towards you.
Scope of application
Laser alarms are usually installed directly in the premises or along the perimeter of the protected object. Complexes of this category are in demand when there is a need for protection:
- enterprises;
- apartments;
- company offices;
- cottages, houses;
- bank branches.
Installation of a laser type of alarm is recommended for objects that are also a place for storing valuables, significant amounts of money or jewelry.
Operating principles of laser signaling
The main components of the security device are a source transmitting laser radiation and a photodetector. The main function of the latter is the reception of the specified radiation. At the moment the laser beam hits the surface of the photocell, the electrical resistance does not exceed several ohms. If the laser beam is interrupted, a rapid increase in the value of the photocell resistance is recorded. Then, through the relay, external executive-type devices are switched on, resulting in an alarm.
Strengths of laser alarms
Laser security systems have a number of advantages:
- high mobility, allowing you to move individual modules and place them in places designated for these purposes;
- the possibility of placing lasers in secluded corners, as a result of which uninvited guests may not realize that the alarm has been activated until the security company’s employees arrive at the site;
- compatibility of laser security system elements with a variety of interior solutions without loss of appearance;
- the possibility of triggering both with and without sound signals (in addition, there is an option to notify an employee on duty at the central control panel of the security agency);
- the ability to assemble a laser alarm on your own, involving the use of improvised means.
Disadvantages of laser signaling
The disadvantages of laser security systems are limited to two positions:
- high cost;
- complexity of installation/configuration.
Set of components for assembling laser signaling
Deciding to build your own laser alarm system involves purchasing certain components. At the stage of creating a simple security complex, it will not be possible to do without the following components:
- laser pointers;
- a photocell, the peculiarity of which is a change in resistance at the moment the surface is exposed to a stream of light;
- a relay responsible for switching with external devices (due to which sound signals are triggered, etc.);
- body parts;
- switching conductors;
- installation tools;
- materials/tools required for soldering.
The above components can be purchased at specialized retail outlets or on the radio market. Individual elements are components for household appliances, and as a result may be in stock. In this case, you will be able to save on purchasing the necessary parts.
On video: How to make a laser alarm with your own hands?
Basic blocks
The laser detector consists of the following elements:
- generator;
- power supply;
- laser;
- relay;
- digital microcircuits;
- photocell;
- sound detector (an LED light can also be used for greater effect).
The laser, power supply and relay are mounted on one side, and the photocell is mounted on the other wall so that the beam hits the lens.
When this type of security alarm is activated, the beam travels in a straight line to the photocell. Since a beam of light travels a long distance and does not scatter, it can be reflected an indefinite number of times using ordinary mirror surfaces directed at a certain angle to each other. This helps create a tangled labyrinth, which is almost impossible to pass without hitting such a “tripwire.”
If an unfortunate thief crosses the beam, the signal does not reach the photocell, resistance arises and the relay is blocked. Thus, the relay transmits the signal to the resistor, and the latter to the detector.
Immediately after a violation in the activation zone, the laser also stops working so as not to activate the photocell again, otherwise the alarm signal will be interrupted. You can completely turn off the alarm only by turning off the power.
To prevent the alarm from being triggered by ordinary sunlight or other light sources, the photoresistor has special insulation.
Simple diagram of a laser alarm system
To implement the circuit below, you will need a laser pointer and an NE555 timer.
A photoresistor irradiated by a laser has a low resistance. When there is no laser beam, the electrical resistance increases rapidly. If this condition is met, a command is received from the microcircuit that turns on the external device. Triggering is confirmed by the sound of a siren.
Assembly instructions
For a laser alarm that you assemble yourself, the simplest model of a laser emitter is suitable. You can get by with either a laser pointer or a toy laser borrowed from a child. The power source for such emitters is three compact batteries that are not designed for long-term operation. As a result, it is necessary to provide the laser with an operating voltage, the supply of which will be supplied by a power supply of a suitable rating. If there is no suitable element, you will have to work on the low-voltage unit. Adding a resistor to the circuit will reduce the output voltage to the required value.
The three-contact relay system is responsible for turning off the laser beam and turning on the siren. You can buy a ready-made sample or make a relay yourself. In the latter case, you will have to remake the relay node of the device that has become unusable.
The relay contacts must be connected to a wired communication line that ensures interaction between the photocell and the sound siren. In this way, it will be possible to achieve the relay operation in the event of an increase in the resistance of the photocell. In addition to the siren, it is advisable to turn on the laser power line through the relay. This step is intended to ensure that the siren sounds until the alarm is turned off by pressing a special button. Otherwise, the sound signal will turn off after an object that has blocked the passage of the laser beam leaves the overlap area.
In the video: Self-assembly of a laser alarm with components ordered from Aliexpress.
What to look for when purchasing a detector receiver
- Most rotary levels have a beam receiver as standard. But for a regular laser builder you will have to purchase it additionally. The manufacturer sometimes supplements expensive models of laser levels with a detector. But in devices up to 10 thousand rubles this is rare.
- If the laser radiation receiver is not included in the kit, choose a device from the same manufacturer. It happens that receivers and levels of different brands are connected to each other. Test the device on site before purchasing to check compatibility.
- Before purchasing a detector, make sure that the level is equipped with a pulse mode. You can find out about this in the instructions, by asking the seller or by looking at the body of the level. The operating mode of the detector is usually indicated by the letter “D” on the panel, located next to the line switch button. After switching on the pulse mode, the lines become dimmer. This feature can also be used to save battery power when the lighting allows you to work with a line of lower brightness.
Features of installation at home
If you need to protect your own home, it is advisable to install laser alarms in places that are most vulnerable to penetration. For one-story buildings and apartments located on the ground floor, balcony and entrance doors are identified as problem areas.
The diagram according to which the laser alarm is mounted must be geometrically correct. Compliance with this requirement guarantees the safety of the facility.
When placing the laser emitter and photodetector, it is important to remember that they must be in line opposite each other. The laser beam must hit the central part of the photocell. It is recommended to place the component that reacts to light in a black tube in order to exclude the influence of external light sources.
The button responsible for activating and disabling the alarm should not be conspicuous. It is advisable to place it in a secluded place. It is also better to lay alarm wiring hidden. This approach makes it difficult for an intruder who has entered the facility to independently disable the security system.
If you have several mirrors, you can arrange a laser stretcher that can cover a large space. Mirrors must be installed between the photodetector and the emitter, observing a certain geometry.
General principle
Laser alarm is a special sensitive device, the simple circuit of which is based on the interaction of a laser beam and a siren. Crossing the laser “tripwire” triggers an alarm that can be heard within a radius of 100 meters . It is intended both as an alarm for security and as a deterrent to criminals. There is also SMS notification or sending a voice message as a notification of danger. Note that perimeter alarm systems rarely use a laser signal due to power loss and dependence on weather conditions.
Step-by-step process for making laser alarms
The first thing you need is a self-contained garden lantern that runs on battery power. In this case, it is a solar-powered street lamp.
Unscrew the top block with the photoresistor and remove the LED.
After this, you will need to prepare a laser pointer (you can buy the cheapest one), a bolt with a nut and a buzzer (beeper).
Laser pointer
Buzzer
We saw off a piece of plywood or board. Glue the nut to the base. We screw the bolt into it.
Next we glue a laser pointer onto hot glue. We install it in such a way that when tightening the bolt, it presses on the laser switch button.
We attach the buzzer to the contacts of the block from the garden lantern, and glue it to the body.
The next step will require a plastic cover. Using an electric soldering iron, you need to melt a hole in the center of the lid. If you don't have a soldering iron, you can drill a hole with a thin drill.
We glue the plastic cover with hot glue to the block from the street lamp - on the side where the photoresistor is located.
The principle of operation of a homemade laser alarm
The laser pointer and the solar battery unit must be placed so that the laser beam hits directly into the hole in the plastic cover.
For example, a base with a laser pointer can be mounted on the wall next to the door, and the second part of the homemade product (with a photoresistor and a buzzer) can be mounted on the opposite side.
We turn on the laser pointer and turn on the unit with the solar battery.
While the laser beam hits the photoresistor, the buzzer does not make a sound. However, as soon as the beam is interrupted, the buzzer instantly goes off.
In this case the buzzer will sound
The author of this idea did it a little differently - he placed a laser pointer and a block with a photoresistor and a buzzer on one wall. And opposite the pointer I installed a mirror.
But it is not at all necessary to do so. The first option also works quite well.
For more information on how to make a laser alarm for your home with your own hands, see the author's video below. Thank you for your attention.
Project code
Below you can copy the sketch for our project and upload it to your Arduino Uno board.
int laserPin = 3; int sensorPin = A0; int buttonPin = 12; int buzzerPin = 11; int laserThreshold = 10; void setup() { pinMode(laserPin, OUTPUT); pinMode(buttonPin, INPUT_PULLUP); Serial.begin(9600); } boolean alarmState = false; void loop() { if (! alarmState) { delay(1000); digitalWrite(laserPin, HIGH); delay(10); unsigned long startTime = millis(); while (millis() - startTime < 1000) { int sensorValue = analogRead(sensorPin); Serial.println(sensorValue); if (sensorValue > laserThreshold) { alarmState = true; break; } delay(10); } digitalWrite(laserPin, LOW); } else { tone(buzzerPin, 440); if (! digitalRead(buttonPin)) { alarmState = false; noTone(buzzerPin); } delay(10); } }
That's all.