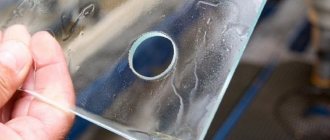
Very often during repair work it will be necessary to make holes in the glass surface. For these purposes, there are special tools: drills, countersinks, diamond-coated crowns. But they are all expensive, so consider this before making a purchase.
Repairs are an expensive proposition. It is sometimes simply impossible to reduce costs as many materials must meet technical requirements and quality must be at the highest level. Therefore, many people prefer to save on tools.
If you have certain skills, you can make your own glass cutter, which will become a faithful assistant when making holes in a glass surface. In fact, constructing it will not be particularly difficult - the work will require ordinary available tools.
Types of glass cutters
To cut glass, a special tool is used, which is known to everyone. It can be of several types:
- roller;
- diamond;
- oil;
- compass.
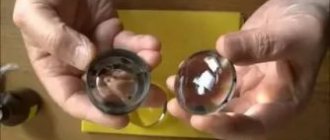
Roller glass cutters have a round cutting tip. An alloy of cobalt and tungsten is usually used to make it. In this case, the number of rollers in one tool can vary from one to six. Unlike other analogues, such a tool is inexpensive, due to which it has received great appreciation.
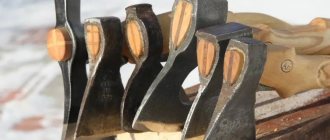
Diamond glass cutters are used by professionals in their field. Despite the high price, it was, remains and will always be the undisputed leader in the field of glass cutting. It is better for home craftsmen to choose a professional diamond glass cutter that has a beveled cutting edge, as it will cut more linear meters of almost any thickness. You just need to store it in a special case. A diamond crystal is used for the cutting tip, and it is known to be the hardest mineral that can be found on Earth. Once you leave a small scratch on the glass, it will crack with the slightest force. Diamond glass cutters require periodic sharpening using a special whetstone.
Oil tools are similar to their roller counterparts, the only difference being that there is an oil capsule in the handle. It is automatically fed to the roller during operation and to the glass surface. This cutter is well suited for solving the question of how to cut thick glass with a glass cutter.
Using a compass is convenient for cutting round or oval shapes. It consists of several elements and looks like a well-known school stationery item.
How does a quick cutter work?
The glass is separated by a working roller with a certain sharpening angle - for quick-cutters it is 138º, although for thinner glass rollers with a smaller angle are used. Resharpening of rollers, the material for which is a hard alloy based on cobalt and tungsten carbide, is impossible. Manufacturers do not disclose the secret of the alloy used, but judging by the conditions of use, it is an alloy similar to domestic brands VK3 or VK5. When the rollers become dull, the working head is removed and a new set of cutting equipment is installed there.
A special feature of quick cutters for glass is the constant lubrication of the cutting area. It is carried out by supplying a special liquid that performs several functions:
- cools the rollers;
- wets the glass surface;
- reduces the load on the cutting edge, promoting wedging of the material.
If there is no working fluid, it can easily be replaced by ordinary kerosene, to which a few drops of Industrial-12 oil (or similar) are added to increase the viscosity.
The main problem that arises when using a conventional glass cutter is ensuring that the roller moves perpendicularly relative to the glass surface. High-speed cutters do not have this problem, since this parameter is monitored by a guide system. Therefore, the master can only carefully set the width of the glass to be cut using the measuring scale on the rod.
How to cut glass correctly
Roller glass cutter. First of all, you need to prepare the work surface and glass. The surface on which the glass is laid must be flat; the glass, if it is not new, must be washed with detergents and degreased with compounds containing alcohol. After which it must be wiped dry and allowed time to dry. It is better to wipe glass with old newspapers rather than with a rag. It is better to lay something soft on the table surface, for example, carpet or linoleum.
To be sure that the tool is working properly, it is recommended to make a test cut on an unnecessary piece of glass. If the result is a thin white line, the glass cutter is working properly and is ready for work, but if the groove is thick and filled with small glass chips, it is better to change the roller.
Now you can start cutting glass. First of all, you need to mark the glass. To do this, use a ruler and a square; the line can be drawn with a marker on the glass, or drawn on the table, after which two marks are made on the edges of the glass and aligned with the line on the table.
When cutting glass, the roller glass cutter is held strictly perpendicular to the surface of the glass, and with slight pressure a line is drawn, and only once. Next, the cutting line is aligned with the edge of the table, or matches are placed under the cut along the edges.
Oil glass cutter. To cut thicker glass, oil glass cutters, which are a type of roller cutter, are used. The only difference between an oil glass cutter and a roller one is the presence of a container for oil, which is supplied to the roller during cutting, which makes it possible to make a deep cut.
Diamond glass cutters. Preparing the working surface and glass is similar to when working with a roller glass cutter. The cut with a diamond glass cutter is made with light pressure, almost without effort. The diamond glass cutter should be held like a pencil, that is, with a slight tilt. The result is a thin and almost colorless line. To break the glass, simply tap lightly along the cut line on the reverse side, or place a thin strip under the cut and the glass will break under its own weight. If the glass does not break, then making a second cut in the same place is not recommended. It is better to shift the markings a little and make a new cut.
Cutting steps
The work is carried out in two steps:
- creating a scratch in the form of a groove on the surface;
- breaking into parts by bending force.
Technology for creating a groove using a glass cutter
When cutting, the tool is held with the hand in a vertical position, with the index finger placed on top of it.
The glass cut is made from the far edge to the near one. The speed of movement of the glass cutter should be uniform, the pressure on the glass should be the same. The cut is made only once.
By the quality of the scratch you can immediately judge the correctness of the cutting:
- a thin, transparent line from the roller indicates the sharpness of its edges and the correct cutting technology;
- a deep white cut is a sign of improper work by the craftsman or wear of the cutting part.
How to properly scratch
When cutting a groove, loads are created that work to shear the surface layer.
They cause deformations that form microscopic surface, lateral and deep cracks.
The correct cut is ensured only by those microcracks that are directed into the depth of the material - the middle ones. All others are not needed. They must be avoided.
The cutting quality is affected by:
- cutter sharpening angle;
- roller diameter;
- pressure on glass;
- position of the cutting organ.
How does the roller sharpening angle affect the cut?
As an example, let’s look at the designs of three cutters designed to work on industrial glass cutters of automatic robots.
The direction of the forces pushing the surface layer apart when creating a scratch is always perpendicular to the pressing plane. A sharper roller deflects the acting force more widely from the normal to the surface, creating a smaller area of stress penetration.
To cut thick glass, use a tool with a wider sharpening angle, and for thin materials, use sharp ones.
On factory models of glass cutters, the sharpening angle is already created to work with standard glass used for domestic purposes.
How does the roller diameter affect the cut?
Smaller dimensions allow better scratching of the outer surface of the workpiece. However, the designs of the glass cutter have already been adjusted at the factory to optimal performance, and the home craftsman will not be able to change anything here.
The tool is purchased ready-made with standard roller diameters. As they lose their sharpness, which rarely occurs in everyday life, the dull part is simply replaced with a backup one.
How does pressure on the roller affect the cut?
The depth of penetration of a scratch into the glass depends on the applied cutting force. When choosing a sharper cutter for thin material, you should take into account that it is dangerous to create a high load with it, because you can simply crush the material.
To make it easier to cut the workpiece when performing such work, always ensure that the glass is clean and treat its surface with special liquids that:
- lubricate the roller;
- provide a hydraulic cushion;
- reduce the effect of the Rebinder effect, reducing the strength of the outer surface;
- wedge the material.
At home, you can easily get by with kerosene for these purposes. It is convenient to apply it manually with a piece of rag or use a specially designed glass cutter.
How does the roller position affect the cut?
The picture with the sharpening angles of the cutter makes it clear that the roller must be guided strictly perpendicular to the glass surface.
Its deviation from the normal will lead to lateral displacement of the median crack and incorrect chipping.
About the number of cuts
There is a misconception among beginners that one scratch is not enough and that several repetitions must be done. They say they will deepen the crack. So such masters use a glass cutter several times in the same place.
This is a gross mistake: with each movement, repeated deformations of the material and additional cracks are created in all directions. They reduce the overall strength of the workpiece and can lead to improper fracture during bending.
Fracture methods
After a cut with deep cracks is made on the surface, you will need to divide the workpiece along this line. This operation is performed in four ways:
- manual bending;
- using matches or thin sticks;
- on the edge of the table;
- by tapping method.
Manual bending of the workpiece
The glass is taken by the edges near the cutting line with your hands, squeezed tightly with your fingers and an opposite bending twisting force is created, directed outward from the groove made.
This is quite enough to accurately separate the workpiece from the main sheet. This method is used by most glaziers.
Bend on matches
Matches or thin, even wooden sticks are placed in one line on the table. The glass is placed on them with a cut line so that the scratch is located on top.
Place your palms evenly over the surface and break the glass with a sharp downward movement. The magnitude of the force is determined experimentally, starting with small values.
The fracture is smooth and of high quality.
Bend on the edge of the table
Glass with a scratch is placed on the edge of the working surface of the table with the cutting line facing up. Combine it with the edge of the stop.
With the palm of one hand they press the glass surface to the table, and with the other they grab the protruding edge and with a sharp downward movement separate the workpiece.
The method is well suited for beginners.
Tapping method
The glass is placed on the edge of the table, extending the cutting line beyond its limits. Hold the part to be cut with one hand. Using the glass cutter head, precise blows are applied to the place where the middle cracks form. They gradually expand and deepen due to the loads created.
The peculiarity of the method is that the impact should not develop lateral cracks caused by deformation of the glass during cutting. They will create an uneven chip and ruin the workpiece.
During the application of blows, the expansion of the chip is visually observed.
If the break doesn't work out
We must be prepared for such a situation. It can occur due to lack of experience or technology violations.
The damaged part on the protruding side of the unbroken edge can be carefully removed using the slots on the side of the glass cutter or pliers. The edges will be sharp and jagged. They will have to be ground down with an emery stone.
The correct cut on glass is created through skills developed based on an understanding of the design features of glass and the technology of the glass cutter.
What tools to use?
Many of us are accustomed to thinking that glass can only be cut correctly and efficiently with a glass cutter. But what to do if you need to cut a piece of glass urgently, but you don’t have this tool at hand? There is another unusual, but no less effective method that helped our great-grandfathers get out of this situation. Such a tool is ordinary scissors, available to any owner. Let's look at each method in detail.
Option 1: glass cutter
The technology for cutting glass with a glass cutter is quite simple. To do this, you must comply with certain conditions and choose the right glass cutter. Today, the choice of this tool is quite wide, which allows you to turn work into pleasure.
- Diamond glass cutter, time-tested and remains a leader in its field to this day. Glass cutters with a beveled cutting edge are suitable for home use. This tool is designed to cut glass up to ten kilometers and is suitable for any thickness of the material used. From time to time, such a glass cutter needs to be sharpened on a special whetstone.
- Roller. As the name suggests, the cutting part of such a glass cutter is made in the form of a roller made of a durable cobalt-tungsten alloy. The number of rollers can be from one to six.
- Oil. This tool works on the principle of a roller glass cutter, with the difference that a reservoir with oil is built into its handle, which is automatically supplied to the roller. Suitable for cutting thick glass.
To learn how to choose a good glass cutter, watch the video:
So, having dealt with the glass cutter, place the glass on a flat surface. Mark the glass and get to work. To make the task easier, you can use a ruler. It is worth considering the point that the line must be drawn the first time, otherwise a repeated attempt will lead to cracking of the surface. When cutting glass with a glass cutter, you need to apply equal force along the entire length of the line.
Option 2: ordinary scissors
Cutting glass with scissors like paper is not a fairy tale, but a completely everyday reality. For this purpose, you will need the scissors themselves (sewing scissors are best for this) and a tank of water (preferably hot). It is necessary to apply markings on the glass in advance, and then elementary physics comes into play: scissors create a microcrack, and the capillary effect completes the process. Of course, the result obtained will differ from that achieved with a glass cutter, but if necessary, this method can help out significantly.
Types of glass and features of work
Cutting ordinary glass does not pose any difficulties. Not only glass cutters, but also ordinary tailor’s scissors do an excellent job with this task. But what should those who have set themselves the task of obtaining a glass product with a more complex configuration do? To do this, it is worth familiarizing yourself with the properties of some glasses.
- Tempered glass products . In fact, it is impossible to cut tempered glass at home - it loses its properties. If you want to purchase an item with elements of this material, it is worth considering cutting it in the early stages. In addition, work with it must be carried out by professionals, since the hardening process of the resulting product can only be carried out under certain conditions.
- Fluted glass . This patterned glass is especially popular in glazing doors or creating decorative interior elements. Unlike tempered glass, you can cut such glass yourself. Working with it is not much different from working with ordinary glass, the only difference is that the cut is made from the smooth side. A roller glass cutter is best suited for this.
- Acrylic or organic glass is a transparent plastic created on the basis of synthetic resins. No special tools are required to cut it. At home, a metal saw, cutter and other tools used for edge processing do an excellent job of this task. In addition, a regular stationery knife can handle glass whose thickness does not exceed 2 mm.
In any case, it is worth remembering that working with any glass must be accompanied by compliance with certain precautions. The presence of thick gloves and safety glasses are the main conditions for ensuring your own safety. It will not be superfluous to take care of the arrangement of the workplace. Since working with glass involves the presence of fragments, cover the work surface with any material that you won’t mind getting rid of. Feeling safe will allow you to achieve the best results.
DIY glass cutting
Initially, you need to take measurements of the new glass. As a rule, if new glass is cut, for example, for insertion into interior doors or window frames, then it is made a couple of millimeters smaller on each side than the dimensions of the technological opening for it. Once the dimensions of the new glass have been taken, you can begin preparing and cutting the glass yourself.
To cut glass, you need a strong and level tabletop base, preferably wooden. There should be no dirt or debris on its base, due to which the glass could be damaged and burst during cutting. It is best if the glass does not move around the table while cutting it. Otherwise, you need to do everything to prevent this, put it on the table, for example, a piece of thin plywood or thick cardboard.
Before cutting glass with your own hands, its surface must be “crystal” clean. Even the slightest accumulation of dirt or dust is not allowed. Otherwise, when running a glass cutter along the glass, you can “run into” such an area, due to which the line of movement of the glass cutter will change and the glass will be damaged. Therefore, if necessary, before cutting the glass is washed with soapy water and wiped dry with a soft cloth.
To cut glass with your own hands at home, you will also need a flat wooden strip of suitable length according to the size of the glass being cut. The process of cutting glass at home is not too complicated. First, the glass is prepared, as mentioned above, then it is laid on a flat and durable base.
After this, marks are placed on the edges of the glass where the cut should be made, and a wooden strip is placed exactly along them, serving as a guide for working with the glass cutter. Then, from one edge to the other, pressing the glass cutter tightly against the wooden batten, an incision is made. It is better if it is one, clear and even, exactly along the bar.
After making a cut with a glass cutter, you can break the glass by sliding it to the edge of the table, aligning it with the cut. While holding the part of the glass located on the base of the table, the other part must be lightly pressed down with your hand. If the glass cutter is sharp and the cut is made correctly, then the glass should burst strictly along the cut.
If this does not happen, then it is necessary, starting from the middle of the glass, by carefully tapping along the cut line to make a crack appear in it.
The question of how to cut glass correctly is best solved by carefully preparing for it. It is best to take it and practice several times in cutting glass of different thicknesses on unnecessary pieces, and only after that move on to cutting glass with your own hands for installation and replacement.
Glass selection and preparation
If we consider all possible areas of application of glass, then it is used in the greatest volumes in the glazing of buildings. If you decide to use this material specifically for the purpose indicated above, then the following recommendations will probably be useful to you.
To purchase truly high quality glass , it must have the following characteristics:
- Blue or green end color.
- The absence of light transmission defects in the form of stripes when examined under light. This can only be observed in those products for which the cooling or rolling technology was violated. When using such glass, the image will always be distorted.
- There are no scratches or other damage on the surface of the sheet.
It is also necessary to select the correct thickness of the glass sheet. To do this, the following must be taken into account.
If the length of the maximum side of the frame is less than 600 mm, then it is best to choose a glass sheet with a thickness of 2.5 mm. For frames in which this parameter exceeds 600 mm, a larger thickness is recommended - up to 3.4 mm. Please note that frame and glass performance will change over time due to temperature. To correctly calculate the dimensions, cut the glass sheet 3-5 mm smaller than the dimensions of the installation site.
Pay special attention to preparing the sheet for cutting . It won't take you much time.
- Only dry and clean glass can be cut. Therefore, before starting work, be sure to wipe the surface with a damp cloth, let it dry, and then wipe it again, but this time with a dry cloth.
- Old glass is not as strong as new glass. Therefore, after carrying out the above operations, we advise you to additionally wipe it with a rag soaked in turpentine, and then dry it thoroughly.
How to cut glass without a glass cutter. How to cut glass without a glass cutter? 3 practical ways
Life can sometimes surprise you with a completely unexpected problem. For example, how can you cut glass without a glass cutter if you suddenly don’t have one at hand and the work needs to be done urgently? Not everyone has it on their list of necessary tools.
You don’t want to buy it for a one-time job - cut a new mirror once in your life, and then the tool will lie around for years without being used. For example, in the evening, young football players knocked out your glass with a ball. You fill the hole with glass from some interior space, but it is slightly larger in size.
Meteorite72 is the best online store for LED lighting! Products of the highest quality, impeccable service, the widest range, excellent prices, guarantee. View products >>>
What to do? Glass cutters clearly don’t work anymore; running around your neighbors in search is not a guarantee that you will find them. So, we have to remember traditional methods of dealing with fragile material.
How to cut glass without a glass cutter? Several methods have been invented to solve this problem. Each of them gives quite high-quality results.
We hope that our tips will be useful if the necessary tool is missing or lost among other things.
{banner_content}The method is not universal and is only suitable for thin glass, with a thickness of no more than 3 mm. But almost the simplest one. In addition, it allows you to cut not only in a straight line, but also in a shaped way, if you need glass of a certain shape (for example, an insert in a door). Another drawback is that you won’t be able to cut a piece that is too large. First of all, take a piece of the same glass and try cutting it. If the glass cracks during operation, it means it is tempered, and this method is not suitable in this case. If everything is in order, then let's get started.
Mark the desired outline on the glass with a marker. Or a line is drawn if you just need to cut off the excess. Some craftsmen advise cutting out a template from cardboard and sticking it on the glass. In our opinion, this is not the best idea.
Firstly, the paper will get wet, and its tatters will interfere with your work.
note
Secondly, problems may arise with the glue: water-soluble glue will not hold the template, and water-resistant glue will then have to be removed from the surface with something - extra hassle.
Water is poured into a wide basin. The edge of the glass to be trimmed is lowered into it. The deeper the piece is immersed, the easier the process will be - water pressure helps. Take strong scissors like tailor's scissors, dive under the surface, and trimming begins. The sensation is more difficult than when cutting paper or fabric.
Rather, they resemble working with cardboard. This also creates crumbs, so it’s best to wear safety glasses when cutting in case it bounces if you haven’t immersed the glass deep enough in the water.
Gloves won’t hurt either, and they will, perhaps, be even more useful than glasses, since you won’t notice the fragments in the water, and they cut badly.
Many people do not believe that scissors cut glass, and are very surprised, having tried it, that this is really possible.
In cases where the glass is thick or so large that it does not fit into the basin, it is suggested to use a soldering iron. Some people used a wood burner for similar purposes. And those who are especially poor have access to tools—even a hot nail.
Although it will take a very long time to tinker with cutting glass, since you need to constantly heat it up.
The glass is placed on a flat surface. The cutting line is outlined. Here, by the way, figured cutting is also available. At the very beginning of the line, on the edge of the glass, a neat not too deep cut is made with a needle file or file
You can tear the edge with a grinder (only extremely, carefully, at the lowest speeds!) or even scratch it with a nail. The soldering iron turns on. When it warms up, it is inserted into the incision. The soldering iron is moved slowly, without much pressure, along the drawn contour
If the line is straight and you are not sure that you can draw it straight at such a low speed, apply a metal ruler and move the soldering iron along it. A thin crack appears behind the tool along the drawn line. To separate two pieces of glass, put on a thick mitten (a kitchen mitten will do at home) and carefully break off the unnecessary scrap. If you have a figured cut, it is better to move the soldering iron as slowly as possible so that only fractions of a millimeter are left to break off, and the openwork is not damaged when separating the pieces.
Tabletop glass cutter
To work you need to prepare:
- wooden board;
- glass cutter;
- small diameter plastic pipe;
- self-tapping screws;
- metal ruler;
- furniture guide;
- L-shaped bracket;
- epoxy resin;
- wood varnish;
- several neodymium magnets;
- a piece of felt.
Let's get started:
| Illustration | Instructions |
| Step 1. Preparing the base To begin with, you can open the wooden plank, which will serve as a platform for the cutter, with varnish. This will make the product more attractive and protect the wood. | |
Step 2. Creating videos
| |
| Step 3. Processing the glass cutter Remove the handle from the glass cutter and drill two holes in it for further attachment to the board. | |
| Step 4: Preparing the Guide Make another hole in the standard cabinet rail. Expand it with a large-diameter drill to “sink” the head of the screw. This is done so that during operation the self-tapping screw does not scratch the glass. | |
| Step 5. Installation of pipes Screw the prepared pieces of plastic pipe to the base. The distance between them will depend on the size of the bottles you want to trim. | |
| Step 6: Installing the glass cutter Attach a glass cutter to the side of the board. Using a “test” bottle, determine its optimal tilt and position.
| |
| Step 7. Installing the guide Attach the guide to the front side of the board using self-tapping screws. | |
| Step 8. Preparing the Ruler So that while using the cutter you can conveniently determine the size of the segments, you can install a ruler on it. Cut the ruler so that its length is equal to the length of the guide. | |
| Step 9. Installing the ruler Using epoxy resin, glue the ruler to the guide and place some weight on top. Wait for the resin to dry. Using a ruler, you can cut glass circles of the same width. | |
| Step 10: Create a Lock Slider To prevent the bottle from moving during operation, you can make a locking slider. For this:
|
The magnets will slide freely along the ruler, but at the same time will not allow the bottle to move during processing.
How to use the cutter
Your homemade cutter is ready. Now is the time to check its operation (for the first time, you should try cutting off an unnecessary bottle).
Before fully using the machine, you should practice a little on unnecessary bottles
Source: obustroeno.com
How to cut ceramic tiles with a glass cutter?
If the tiles and the glass cutter match each other in properties and characteristics, you can proceed directly to cutting.
Preparing for work
First, you should decide on the number of tiles and purchase ahead of time a little more elements than the calculated area. This will allow you to perform a training cut and protect against defects. You will need the following set of tools:
- glass cutter;
- a strong ruler or triangle 2-3 mm thick;
- device for marking - marker or pencil;
- thin strip of wood;
- device for grinding - file, needle file, drill with a grinding attachment.
Since it is recommended to use a roller glass cutter to cut tiles, you will need roller lubricant. Among the preparatory work, we can mention the obligatory soaking of the ceramics. Water will fill the smallest pores and cavities in the material, the tile will become less fragile and will not crumble when cutting. The minimum soaking time is 1 hour, the optimal time is at least 3 hours.
Markings on tiles
After calculations for laying the tiles are determined with the configuration and dimensions of the product. The markings are applied with a marker on the glossy side. The marker can be replaced with a soft pencil or felt-tip pen.
It is necessary to take into account that a glass cutter will not take a strip less than 1 cm wide, and it will not be possible to break such an edge after cutting. Therefore, experienced craftsmen recommend leaving an allowance of about 1 cm - it is better to grind off excess ceramics than to cut the element again.
Performing ceramic cutting
Step-by-step instructions for working with ceramic tiles:
- The tiles are laid with the glazed side facing out. Measure and mark the correct distance from the edges.
- Pressing a ruler or square to the cutting line, use a glass cutter to make an even groove. The ruler should be pressed along its central part, and the glass cutter should be pressed with moderate force and as evenly as possible so that the depth of the groove is the same along the entire length of the tile.
- There is no need to cut through the entire thickness of the tile; the remaining layer can be easily broken by hand.
Fracture along the cutting line
Craftsmen distinguish two ways of breaking cut tiles:
- Place a strip or nail under the groove from below, press on the central zone and split;
- Place the ceramics on the workbench so that one of the edges hangs from it - it will be enough to simply press on the hanging part with your hand.
If there is a need to break off a narrow ceramic strip, you should use pliers.
The fracture will be smooth only when a single clear cut is made on the surface. It is prohibited to move the tool along the element several times.
The work is completed by grinding, which will allow you to obtain a smooth edge and remove burrs and chips. Coarse sandpaper, a grinding stone or a file will come to the rescue.
Homemade quick cutter for glass: manufacturing materials, step-by-step instructions, photo examples
A one-time cutting of glass to replace broken glass usually does not raise any questions. All that is required for the job is a ruler and a regular glass cutter. However, if it is necessary to cut glass in large volumes, for example, when arranging greenhouses in the country, it is necessary to find other ways of performing the work.
And this is where a device like a quick cutter comes in handy, as it can significantly speed up and simplify the process. The question remains of how to make it yourself, so as not to spend extra money. The author of one of the channels knows everything about this. And now we will analyze the whole process in detail.
What can be used as a material for making a quick cutter?
Parts from an old aluminum frame can be used as material for such a device.
Here you need to prepare an aluminum plate, a piece of frame that is adjacent to the glass (its shape resembles a T-shaped), a profile tube and a U-shaped element (the profile tube should fit into it). The latter often has to be purchased.
At the same time, it cannot be said that such elements can be found in any store - you will have to try. Or read to the end of the article, understand the essence of the work and try to replace the U-shaped element with something else - this is an option.
PHOTO: .com These are the parts you will need to make a quick cutter
Algorithm for making a quick cutter for glass
In the process of making a high-speed cutter, there are many points that will not be very clear when explained in words. Therefore, in today’s review we will try to provide the reader with as many photographic examples as possible. Using them, it will be much easier to understand the essence of the work.
The first thing you need to do is assemble the base of the quick cutter. To do this, part of the aluminum frame is connected to a smaller U-shaped part at a right angle. You can connect them using bolts or simply use a rivet gun.
PHOTO: .com The quick cutter base is ready, you can move on
Manufacturing of cutting element
There will be many nuances in this work. You need to understand that the cutting element must move along the handle of the base. In this case, there must be a fixation at a certain distance from the crossbar.
First you need to take a small piece of aluminum tire (about 4 cm) and drill a hole in it. Subsequently, the hole needs to be processed with a file so that a nut of 10 fits into it. When the nut is pressed in, the aluminum shank will turn into a retainer.
PHOTO: .com The retainer should look like this
The U-shaped profile is also cut to the size of the retainer. This will be one part of the retainer, the back. The cutting part of the device will be attached to the front working part.
PHOTO: .com U-shaped profile is cut to fit the tire with nut
Cutting part of the runner
The second half of the working part of the quick cutter is made from the same U-shaped profile, cut to the size of the first. A slot is made in the center into which a head from a regular glass cutter purchased in a store is inserted.
PHOTO: .comThis is how the profile is combined with the glass cutter head
All that remains is to prepare a couple of metal plates and fix the cutting head on the profile using the same rivets or bolts, so that it can be changed if necessary.
PHOTO: .comThe second part of the working quick cutter runner is almost ready
Both halves of the runner are ready. Now you need to think about how they can be connected to each other.
PHOTO: .com The parts are assembled, all that remains is to connect them
Assembling the runner
A pair of plates can be used to connect these elements. Fixation is also done using a rivet gun.
PHOTO: .com This is roughly what a working slider will look like
Getting rid of friction: installing rollers on the support bar
When moving a quick cutter along the edge of glass, difficulties may arise due to friction of aluminum on the surface. This means that it is necessary to think over the roller system. As such, you can purchase small bearings at the auto store that are designed for sliding doors.
PHOTO: .comSmall bearings in auto stores cost 20-30 rubles
These bearings are bolted to a crossbar on the outer side of the profile along two adjacent sides. The pitch of the bearings is selected individually, but here is the case where “the more often the better.”
PHOTO: .com The bearings can be bolted or you can use a tube, which will have to be flared PHOTO: .com This is the kind of bar you should end up with
Assembling a quick cutter from prepared parts
When all the elements are prepared, you can assemble the quick cutter together. The crossbar is fastened with bolts or rivets, the working element is put on the handle.
PHOTO: .com This is what an almost finished quick cutter looks like
The working element must be fixed in the desired position. To do this, a bolt is screwed into it, which will fit into a nut that was previously pressed into a piece of aluminum tire.
PHOTO: .com The fixing bolt is screwed into the pressed-in nut
Checking the functionality of the quick cutter
It is worth applying centimeter markings to the handle along which the cutting element moves. When everything is put together, you can start checking. The master can verify from personal experience that working with such a device is much easier than with a conventional glass cutter.
PHOTO: .comQuick cutter in operation - everything works flawlessly
Finally
Making a device like a quick cutter with your own hands is a difficult and tedious task. Therefore, for the sake of processing a couple of glasses, it’s not even worth undertaking such an activity.
But if the amount of work to be done is impressive, then it is worth spending some time on making a quick cutter. Subsequently, this will save time on the main work.
Whether a home craftsman should start making a quick cutter or not will have to be decided in each specific case separately.
A little theory
Glass production is based on melting and subsequent cooling of minerals of various compositions. After completion of the technological processes, a transparent, relatively durable structure is created. It normally withstands mechanical loads uniformly applied to the entire plane, but does not withstand local impacts well.
Conventional cutting relies on scratching with the hard, sharp edges of a glass cutter roller. They reduce the strength of the surface and at the same time form microcracks, which, under the influence of operational loads, for example, gusts of wind, snow pressure, lead to destruction during operation.
During casting at the factory, a high-quality glass edge is created without any defects that reduce the mechanical characteristics of the sheet. Let's consider how it is formed with a conventional construction glass cutter or its industrial automatic analogue.
Properties of tempered glass
Before tempered glass is processed, its basic properties should be considered. These include:
- The structure is characterized by high mechanical strength. Due to this, they can be used for glazing balconies and loggias.
- Strength and hardness allow the material to be used in the manufacture of furniture and other products.
- To improve ordinary glass, heat treatment is carried out in a special furnace. The medium is heated to a temperature of 670 °C.
- The thermal resistance indicator increases significantly. In the manufacture of various devices that are operated at elevated temperatures, tempered glass is often used. When heated, the hardness indicator remains unchanged.
Application of tempered glass
As the results of ongoing research show, the strength of tempered glass is 7 times greater than that of ordinary glass.
That is why it is quite difficult to damage the material and carry out mechanical processing.
Instructions for using a glass cutter
Let's figure out how to cut glass with a glass cutter at home. For convenience, we will divide the entire work process into several stages.
Preparatory activities
Such events influence a lot. Preparation depends primarily on the glass you choose to cut. The purchased material should be wiped from dust using an old newspaper so that no streaks or lint remain on the surface. Used glass requires more thorough preparation. First, you should wash it using special products. After this, the surface is degreased, the glass is dried in a closed room so that dust does not settle on its surface.
Cut glass
Many people also refer this process to the preparatory stage, but we will highlight it as an independent type of work. It is no secret that there is no absolutely waste-free production for this type of work, especially if the ultimate goal is to obtain a product with unusual geometric parameters. But if you first calculate and outline how to cut glass with a glass cutter, you can minimize waste. Experts recommend combining the longest side of the glass with the long edge of the workpiece. At the same time, you should not rush to throw away the remaining trimmings - they may be useful in the future.
Cutting technique
All that remains is to find out how to properly cut glass with a glass cutter. To do this you will need a flat surface. To prevent small glass fragments and other debris from disturbing us, the table is covered with soft material, the thickness of which reaches 3–5 mm.
Now - attention! Only one cut is made - it is prohibited to use a glass cutter in one place a second time.
If the tool is roller, more pressure is exerted on it than on a diamond tool. Correct cutting is accompanied by a characteristic crunch. Closer to the edge of the glass, the pressure weakens so that there is no chipping and the cutting edge of the tool is not damaged. After this, a flat strip is placed under the glass, and a break is made along the cutting line. It is recommended to first tap the line with the handle of a glass cutter to deepen the cracks and facilitate the breaking process. If you need to break off a narrow strip, you can use pliers or a glass cutter handle that has special grooves.
Frame installation technology
Before starting installation, it is necessary to prepare a place for attaching the cut workpiece. Its working surfaces must be completely cleaned of old nails, paper clips, and putty. It is important to ensure a uniform plane of glass contact to all edges without distortions.
Any unevenness found is leveled and filled with putty. It is not difficult to buy or make it yourself.
Types of putties
Putty with chalk
Compound:
- drying oil - 220 g;
- ground chalk - 810 g.
Putty with chalk and white
Compound:
- drying oil - 180 g;
- ground chalk - 600 g;
- dry whitewash - 200 g.
Cooking technology:
- chalk is poured in a slide;
- a notch is made on top;
- pour drying oil and/or white into it;
- mix the ingredients until it forms a dough.
How to fix glass
At home, two installation methods are used:
- on putty;
- glazing bead
It is convenient to hammer in the nails for fastening the glazing bead not with a hammer, but with the side surface of a chisel. The blows are applied by making an oblique cut while sliding along the glass.