Quote from krustal
Read in full In your quotation book or community!
Entertaining tops.
Experiments, competitions, making A top is a children's toy that, when rotating around its axis, maintains a vertical position, and when the rotation slows down, it falls. In addition, when rotating a painted top, you can observe the optical effects of mixing and even decomposition of colors into components.
How to make a topDIY games and toys Currently, there are about a thousand different types of tops of various shapes. We will tell you how to make the simplest (classic) paper top. |
Materials: Cardboard, paint, toothpicks or even better skewers, glue (PVA) or plasticine.
Tops do not have to be made of cardboard; you can use thick paper or thin plastic. You can try to make a large top from a CD, or a top whose axis is a pencil or felt-tip pen - then you can see interesting traces of rotation.
Manufacturing process: On cardboard or thick paper, draw several circles using a compass, approximately 5 cm in diameter. Color according to the diagrams and cut out. If the child does not yet use a compass, you can use a round glass or coffee cup as a template, the main thing is then to find the center. You can make one circle a template - find the center there by folding it in half and in half again, pierce the middle, and then apply it to the painted circles and transfer the center to them.
In the center of the circle, make a small hole with an awl (toothpicks break), into which a toothpick or cut wooden skewer (necessarily with a sharp end) is inserted. We fix the stick with PVA glue (it takes a long time to dry) or a piece of plasticine (it will be faster here). It turned out to be a top.
These are the tops that we made from thick paper, drawing a pattern with watercolors and inserting toothpicks and skewers.
: Making a top
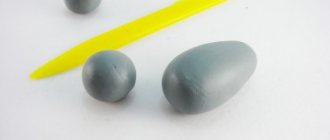
Next we make the top. Cut the pencil approximately 40mm long. It should have a pointed end. Wrap electrical tape around the pencil to increase the diameter to fit inside the ring magnet.
Place the ring magnet on the pencil with the north pole facing down (towards the pointy end of the pencil). To increase the weight of the top, put several plastic washers on it.
Subsequently, you will have to experiment with the weight and height of the center of gravity of the top to make it work as it should. This may take a very long time.
Experiments with color
The simplest top schemes are by sector. The circle is divided into an even number of sectors and painted, for example, yellow and blue or yellow and red. When rotating we will see green and orange respectively. In this experience you can see how colors mix. Here you can experiment with the number of color sectors.
If you divide the top into seven parts and paint them (very pale with watercolors) in accordance with the arrangement of colors in the spectrum, then when you rotate the top, it should turn white. We will observe the process of “collecting” colors, since white is a mixture of all colors. This effect is difficult to achieve; my daughter and I didn’t succeed; apparently we painted the top (in the photo) very brightly. Maybe we didn’t get the white color, but we got a beautiful rainbow effect, and even with some kind of three-dimensionality.
Here are some more standard top coloring options. When rotated, interesting gradient fills are obtained. You can download and print tops for experiments using our diagrams. To do this, click on the picture to enlarge.
The most interesting patterns come from spiral patterns. They look especially fascinating when the rotation of the toy slows down.
Toy starter spinning top
Although this is not necessary, it is better to turn the starter on a lathe; you can use a metal lathe from a warehouse in Moscow, which will also work. The simplest way to make it is to cut it by hand. For the starter, you need a blank with a cross-section of 22x35 mm and a length of about 175 mm, in which two holes are drilled at right angles to each other. Having secured the workpiece on the lathe between the centers, use shallow passes of a chisel (to avoid scoring) at the end with holes to round the corners. Then the actual round handle is turned.
1. First, grind the lower part of the top and the axis. Lastly, the tip is sharpened. It is not done by making deep passes with the tip of an oblique chisel.
2. The starter is a handle with two mutually perpendicular holes. Perpendicular holes are drilled before rounding.
3. The outer side of the workpiece is turned and painted, then, after turning the concave side, the disc is cut off.
Small disc tops.
Turning “fighting” discs is fast and interesting. Having turned a 50x50x125 mm cylinder from a workpiece, a hole about 75 mm deep is drilled in its end.
Then, using a semicircular chisel, give the end a slightly convex shape and cut off the disc at a thickness of 3-5 mm.
To cut the disc cleanly, the last pass to the drilled hole is made with the tip of an oblique chisel. Usually four discs are made for the participants in the game and painted in different colors.
Do-it-yourself baby spinning top from what’s at hand
The top is a toy very familiar to everyone from childhood. Even in Soviet times, the “spinning top” was popular, which, by and large, was the very top. Today the toy is no less popular, although it has undergone many changes. A spinning top can not only bring a lot of fun and joy to children, but will also help improve hand motor skills. There are a lot of games on the Internet that you can play with a top, both homemade and purchased. Making a toy with your own hands is a great way to establish contact with children, spend time with them and play, and besides, a child will appreciate something made with their own hands much more.
A spinning top is a simple toy that can be made from ordinary things. Let's look at some interesting ways:
- Toy made of paper or cardboard;
- From an old disk;
- From products;
- Made of wood.
A top is made from paper in a few minutes, it is short-lived, but at the same time you can make a great variety of such toys to play with in a large company. For this we need:
- Mug or glass;
- A sheet of thick paper or cardboard;
- Toothpick;
- Paints;
- Pencil;
- Scissors
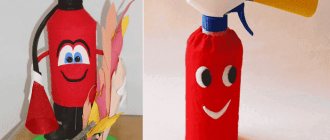
To begin, place the glass on a sheet of cardboard or paper and draw a circle with a pencil. In order for the circle to turn out even, there is no need to rush this work. Then we cut along the contour, and several such shapes can be cut at once. It’s better to immediately paint the top’s caps with different colors, here your imagination can run wild in any way you like. You can use beautiful stickers, markers and much more. After the paper has dried, pierce the circle in the middle with a toothpick. We get ready-made fun for the child and his friends.
In order to make a top from an old disk, you will have to spend a little more time, but the top will last much longer than a paper top. For such a toy we will need:
- Old CD;
- Good glue;
- Paper;
- Paints;
- Felt pen;
- Scissors.
Place the disk on a sheet of paper and trace its outline with a pencil. You need to do this twice to cover the disc on both sides. Then we cut out two circles strictly along the contour. You can color them with paints or colored pencils both before and after cutting, it all depends on how convenient it is to work and how complex the design you want to see. If you paint paper shapes before cutting them out, be sure to wait until they are completely dry before using scissors. After the figures are ready, use glue to glue them onto the disk. Now we take a felt-tip pen and insert it into the hole, which will have to be widened using scissors or a knife. The disk top is ready!
To make a top from something edible, any hard round cookie and a toothpick are best. All you have to do is pierce the cookies with a stick, and a great toy is ready. You can play it if you expect to lose, then the losing tops are eaten.
To make a top from wood you will have to work hard, as it requires preparation, special tools and skills. Its principle is as simple as in the previous versions. A medium-sized circle is placed on a stick, although there is little work for children here - only coloring or pasting afterwards.
In any case, the toy will bring a lot of bright emotions.
Tags
purchased. Make a toy this make these to make a top
make circleschildrencraftscraftscommentsarticlesandrotationnecessarilywithcardboardsimplecreativitymaterialsanswerkidsdrawingsstepclassessidethangroovedmaintoysiteworktoolredonlyinterestingrunanyideasfieldwhitemostsizewhichcutclassessimplescissorsourhomepaintphotodevelopmentseethankyouglue templatesplay with a cutter like this here educational drawn cut out topic cutting garden ink cutter chuck not protrusion
DIY spinning top toy
With their hypnotizing rotation, tops attract the attention of people of any age. A sharp tug on the cord will cause this three-inch top to spin for over a minute and a half.
Select blanks
For the top itself, select a maple blank 32 mm thick and cut a circle with a diameter of 80 mm from it. Glue a disk 6 mm thick and 50 mm in diameter to one side of it for clamping in a lathe chuck, aligned in the center. While the glue is drying, cut out two blanks measuring 19x19x102 mm for the axle and handle. (We chose cherry, painting it black after turning.) On the handle blank, make a 2mm hole in the middle of the thickness, 32mm from one of the ends. Set these two pieces aside.
Round shoulder turning
Tools: 10 mm wide groove cutter, straight scraper, thin cut-off cutter, narrow scraper.
Rotation speed: 1200 rpm.
Clamp the 50mm disc into the jaws of the chuck. Using a grooved cutter, grind the maple blank to a diameter of 76 mm, then trim its end. Use a pencil to mark a circle with a diameter of 45 mm at the end of the workpiece, then place marks on the periphery, retreating 10 mm from the end (photo A) . Using a straight scraper, form a protrusion on the workpiece, delimited by two lines (photo B) .
Use a narrow cutter to cut a 5mm groove down the middle of the lip height. Slightly round its right edge with a narrow scraper (photo C) . Install a drill chuck into the tailstock quill and make a 6mm hole with a depth of 22mm in the center of the protrusion. Finish sand the lip with 220-grit sandpaper.
It's time to make the point
Tools: parting cutter, grooved cutter 10 mm wide.
Rotation speed: 1200 rpm.
Reinstall the workpiece by clamping the protrusion made in the jaws of the chuck. Separate the temporary disc from the free end (photo D).
Place a dot in the center of the end with a pencil. Working from the center outwards with the grooved cutter, form a cone of the point to the edges of the workpiece. Sand the cone with 220-grit sandpaper. Remove the top from the machine.
Axle turning
Tools: grooved cutter, narrow grooved cutter, parting cutter.
Rotation speed: 1200 rpm.
After making copies of the axle and handle templates, attach them with spray adhesive to a piece of construction paper. Cut out the templates along the contour lines.
Install jaw set No. 1 into the four-jaw chuck. Take the axle blank and secure it in the chuck. Use a rake cutter to grind it to a cylindrical shape, then unfold the workpiece, clamp it by the cylindrical part, leaving 76 mm on the outside, and grind it to a diameter of 16 mm. Mark the five areas shown in the picture and make ring lines with a pencil. Using a parting cutter, grind the right section to a diameter of 6 mm. Taking a narrow grooved cutter, round the end and grind the neck (photo F) . Then use a cut-off cutter to grind the extension between the neck and the end to a diameter of 11 mm.
Using a narrow cutter, grind a smooth thickening on the left side, checking the shape using a template (photo G) . Using a cutting tool, reduce the diameter of the upper end of the axis (the left section of the workpiece) to 6 mm. Carefully adjust the outline until it matches the template, then sand the axle with 220 sandpaper and separate it from the workpiece.
Grind the handle the same way as the axle
Tools: grooved cutter, narrow grooved cutter, parting cutter.
Rotation speed : 1200 rpm.
Clamp the handle blank into the chuck so that the hole is right next to the jaws. As with turning an axle, grind the workpiece to a cylindrical shape, then ream it in a chuck and grind it to a diameter of 16mm. Measuring from the center of the hole, mark eight sections on the workpiece as shown in the figure.
Using a narrow cutter, first round the right end of the workpiece, then grind the necks. Using a cutting tool, reduce the diameter of the handle on both sides of the hole to 11 mm. Round the outer edges of the necks, making smooth transitions to the thickenings at the ends of the handle.
Same as in the previous step, mark the left end of the handle with a cutting tool, reducing the diameter to 6 mm. Using a narrow fluted cutter, round off the left end, sand the handle with 220-grit sandpaper, and separate it from the rest of the workpiece.
Now the finishing is done and you are ready to launch!
If necessary, sand any areas further with 320-grit sandpaper, then begin finishing. After giving the axle and handle a black color using dye, we applied three coats of semi-gloss nitro varnish from an aerosol can, sanding the dry layers in between with a 320 grit pad. Thread 90cm of waxed cotton thread through the hole in the handle and tie a couple of knots at the end to prevent it from being pulled out. Wind the free end of the thread into the groove on the protrusion of the top, insert the axle into the hole, sharply pulling the thread, unwind the top and remove the axle.
Do not stop!
Don't limit yourself to a three-inch top. For fun, our craftsman, Brian Simmons, glued maple scraps together into a blank with mahogany inlays, then machined it into a 180mm diameter top with a three-inch overhang. The axis, handle and projection height are the same as in our project, but the thread is 1220 mm long. The only factor limiting the size of the top can only be the capabilities of the lathe.
When spinning this larger version of the top, we watched as the dark mahogany inserts disappeared as we spun quickly, gradually reappearing as the spin slowed down. Try gluing blanks with your own patterns.
You might be interested in:
Wooden children's toy - bulldozer...
Crane toy…
DIY backgammon game
DIY doll bed…
Modular origami. Yula. Master class with step-by-step photos
First post and it's completely pointless. 14, bitch, I lived with my wife for 14 years. 13 of them were all fine, mutual understanding, support for each other, the children are growing wonderfully, the house, the lawn, the swimming pool, the resort in general. In 2020 I planned a major renovation, I thought for a long time because... The investment is very significant, my wife said we can handle it together, I did it in full - essentially from the box, we redid everything, heated floors, new plaster, electrics, new appliances, washer, dryer, dishwasher, furniture, etc. I measured every little thing so that it would be comfortable to live. 5 months of my labors and a lot of money, we were very pleased with the result, we moved to a new old house with great pleasure, not regretting our decision... but, several months passed, I began to notice my wife’s somewhat inappropriate behavior , constantly on the phone, some vague long correspondence in the evenings when I was supposedly sleeping. The lover thought, really, dammit..., One day this summer he couldn’t stand it, he got into her phone (there was always trust and fingers and codes knew each other) and he really freaked out: my wife took out loans and invested a bald bastard in a financial pyramid and that was the moment of these scams freaks, after a major quarrel, I warned her to save her personal data and fucked everything off her phone (I created the account). There were 2 reasons for this: my card linked to the phone was worth 400 kilo rubles and the fear that all sorts of scammers would crowd the pyramid scam even more and it was necessary to cut off all Bitcoin wallets, passwords, etc. After all this I was just hysterical, I turned out to be an asshole, a freak, an unworthy man, and, in general, a purulent fagot, she threatened me with divorce, I was pretty fucked up then, to be honest. I calmed myself down, we talked, I said we’ll handle it, don’t worry, everything seems to have improved somewhat. When trying to recover the phone data, an old correspondence in WhatsApp with her brother was preserved, where she discussed with him all the passwords and accounts of this pyramid, it turned out that her mother and father and brothers with their wives were hooked, her mother withdrew her savings and invested in this x. , and everyone screwed up! And the threat of divorce was to make me piss. Another quarrel, once again I try to persuade myself to calm down. Further, after the final scam of this office, I began to listen to coaches of pseudo-psychologists like Mark Barton, who carry that heresy. She started working two jobs instead of asking me for help. I don’t care about the children - all their communication is on the trip before and after school, my wife is almost always not at home. Yesterday I asked how much you need to be happy, she said 50 kr. I asked, will you be home? , will you be my wife? (in every sense) she said - perhaps. I replied that it smelled like prostitution. That’s when my inner beast kicked in, and from then on everything went in the same direction. It feels like I started to hate her... My wife moved out and took the boys, but they weren’t very happy to go to my mother-in-law, today I took them, talked, hung out on the street, cleaned the house, cooked food, did homework, and went to school tomorrow. I told my wife not to come, I don’t want to see her. I'm getting ready for divorce. The bitch is really fucked up at heart
Bad, Lots of letters