The Eiffel Tower, the symbol of Paris, does not give peace of mind to those who in one way or another dream of France, study France, and are interested in this country. The world-famous building leaves no one indifferent: you can either admire the tower or not perceive it at all, but you can’t say that you don’t care. The architectural composition fascinates and repels, excites minds and simply doesn’t like it, delights and defies understanding. Handicraft masters also do not stand aside: she inspires many to make crafts with the Eiffel Tower . If this is “your” topic, if you believe in the power of visualizing desires, if you think that such a project will bring you closer to your dream of visiting France, then this article came to you at the right time, and you should try to make the Eiffel Tower with your own hands . We offer you a small selection of ideas - enjoy and choose the one that resonates most inside, which makes you want to put aside all current projects and do just that.
How to make an Eiffel Tower craft - 5 master classes:
Case with Eiffel Tower
Did you know that the Eiffel Tower, which has stood in Paris for more than a hundred years, was originally built for only 20 years? The project was proposed by Gustav Eiffel as an exhibit for the next World Exhibition in Paris, was implemented in 1889 and... and still stands. Most likely, the cover you sew with your own hands will not last you more than a century, but, rest assured, it will bring you no less pleasure.
How to make a DIY phone case with the Eiffel Tower - master class from Аspoonfulofsugardesigns
Here's what I got
Thank God, Kirill became interested and plays with the locks as intended. And also a lock-box, an excellent solution where you can dump all the numerous small toys in the evening. By the way, Kirill himself does this before going to bed: “Kiryusha, the animals and the soldiers are tired. Put them in a lock. It’s time for them to sleep and it’s time for you to sleep.” Hooray, so you can get to the cardboard!
Work on mistakes:
- I did everything quite sloppily. Approximately.
- It is best to paint the castle yellow, brick or light gray, because... Decorative elements look bad against a dark background.
- It is better to choose coats of arms that represent a shield - without unnecessary small details, because again, it doesn’t look good, and you’ll get tired of cutting it out.
Sources:
https://fb.ru/article/145787/kak-iz-bumagi-sdelat-zamok-kotoryiy-ponravitsya-vsem https://myhobby.guru/svoimi-rukami/igrushki/kak-samostoyatelno-sdelat-zamok-iz -bumagi-ili-kartona.html https://yaninblog.ru/semya/ot-0-do-3-let/razvivayushhie-igry/kak-sdelat-zamok-iz-kartona-svoimi-rukami/
Eiffel Tower using quilling technique
It is interesting that at the time of its creation and official opening in 1889, the Eiffel Tower (which, by the way, took 2 years, 2 months and 5 days to build) was the tallest building in the world - 324 m. Only 40 years later it was surpassed by the Chrysler skyscraper " If you like such numbers and records, you can set your own - and make, for example, the tallest Eiffel Tower using the quilling technique.
How to make the Eiffel Tower using the quilling technique - an idea from Allthingspaper
Manufacturing process
There are two rooms in my workshop, both covered with different drawings. There is an airship, it is made by analogy with the V-4, there are many models of power lines - I’m working on them now. This is already part of life, I am constantly in the workshop, sometimes I can go home at four in the morning - it’s good that I live nearby.
I make a large tower in a week, but a small one... There is one section and 10-15 supports. Well, what should they do? An hour, maybe. The material that I selected, the method of its manufacture, in theory, could be patented. But the fact is that there is no business, there is no market and there are no competitors. Paying for a patent for which there is no demand is completely pointless.
Eiffel Tower using isothread technique
Cool and very interesting fact - the Eiffel Tower is built from ordinary puddling iron of the highest quality, almost 9.5 tons of wrought iron were needed for the construction! In total, almost 20,000 individual parts had to be put together. What do you think, if you decide to make the Eiffel Tower with your own hands using the isothread technique, how much material will you need? Be careful - don’t take 20,000 m, you will have nowhere to hang such a panel!
How to make the Eiffel Tower using isothread technique - master class from Thethingsshemakes
Monetization
In total I made 34 towers - I give them away, sell them, give them away. Now they all live in different places: three are in the Arsenal, three more were given to friends, one is in the Technical Museum. For me it’s like half a hobby and half a business; there are no regular orders. Of course, I can order all the parts in China, collect many of these towers, and even order a run of 3D models. But I found my niche, it is manual. I select the materials myself, assemble the tower according to the drawings, hit it with a hammer, and level the planks. I even have an Instagram account dedicated only to work. Only once did I post a photo of myself bungee jumping from a bridge, because one of my subscribers is an Italian extreme sportsman. Sometimes people write and order towers - for someone’s birthday or just because.
Source
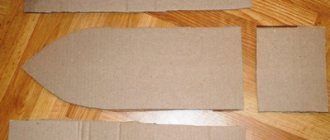
Eiffel Tower made of cardboard
With the advent of a mass of automated and modern methods of painting various surfaces, the Eiffel Tower is still painted... with ordinary brushes. Technical progress, apparently, has taken other routes, and the miracle of engineering is updated manually every 7 years. It’s interesting that the structure is painted with bronze paint in three different shades - and thanks to the perspective, it seems that the tower is one color. What color will you paint your craft?
How to make the Eiffel Tower out of cardboard - master class from Thethingsshemakes
We create a medieval castle from polystyrene foam with our own hands
Become the owner of a medieval castle, and why not? So I thought, sanding the eleventh layer of varnish on my favorite box, with one eye watching Alisa Luchinskaya’s webinar, and with the other, at the mesmerizing views of the Loire castles from National Geographic.
No, you can, of course, purchase a prefabricated version of the castle at a children's toy store. However, the Internet shows that at a cost of several thousand, it will look like a large plastic toy. And so, like any normal decoupage artist, I decided: I don’t know why, but I really need this. Four years have passed since then, and I, finally, thinking about the topic of the next master class, decided to share with the people my experience in making dreams come true, that is, in building a castle on a summer cottage.
View of the castle at night
For a castle consisting of three walls with towers, I needed the following materials:
- Polystyrene foam - 5 sheets measuring 100 x 60 cm x 3 cm
- Insulation for pipes "foamolin", diameter 110 mm - 4 pcs x 1 m
- Decorative plaster based on colored chips - 1-2 large jars
- Small stone or marble chips - 1 kg
- Acrylic primer or putty for towers - 2 cans
- Acrylic paint to match the plaster - 1 can or jar
- Dark acrylic paint (black or brown) - 1 spray can or jar
- Plastic flower pots (for roofs) – 2 pcs.
- Glue for foam plastic (for example, “Moment Installation”) - 2 large tubes
- Long screws (for flagpoles) - 2 pcs.
- Polyurethane foam + gun - 2 cans
Tools:
- Thin knife - 1 pc, screwdriver - 1 pc
- Meter ruler, short ruler, felt-tip pen or marker
- Narrow paint brushes - 4-5 pcs.
- Spatula - 1 pc.
- Large painting brushes for painting teeth – 2 pcs.
- Electrical tape - 1 piece
- Modeling mass (black or brown) - 1 package
Stage 1. DRAWING THE DIAGRAM OF THE FUTURE CASTLE
First you need to determine the components of the future castle - the number of walls and towers. I offer schemes of three types of walls that can be combined in any quantity. I decided to start with three walls and six towers - three round and three square. You can start work from any wall.
Lock diagram
Stage 2. WE MAKE WALLS
WALL 1 . To make it, we need two sheets of polystyrene foam (preferably white) and two plastic flower pots.
WALL 1 diagram
This is what it looks like finished:
WALL 1 ready
On one sheet of foam plastic we draw a diagram of the wall with a felt-tip pen. This will be a load-bearing wall. The height of the towers is equal to the height of the sheet. The width of each tower is equal to the width of the flowerpot (roof) minus 1 cm. The distance between the teeth should be at least half the width of the tooth. The height of the walls and the middle part is approximately two-thirds of the height of the towers. Along the edges of the wall, you must leave 5 cm of the wall free from teeth. You will then hide this part of the wall under the tower. Carefully cut everything out with a knife. In the middle part we cut out the gate. We do not cut out windows on the towers.
On the second sheet of foam plastic we draw blanks for the towers - 6 pieces, 3 for each tower. The size of the blanks is equal to the size of the towers. We cut out windows on four blanks. We don’t throw away the cut out pieces; they will come in handy later when painting. We glue the tower blanks on top of each other on the load-bearing wall in the place marked for the towers - we glue two blanks on the front side of the wall (we glue the blank with windows on top), we glue the second blank with windows on the end side of the load-bearing wall. Moment Montazh glue can be used as glue. If you intend to use a different glue, be sure to first check on scraps of foam to see if the glue is corroding the foam. The same goes for paints. The result is a wall with two towers, each of which is 4 sheets of foam thick. There are blind windows on the front and back walls of the towers. The windows need to be painted inside with dark paint. You also need to paint the inside of the gate arch and the gate itself. If the side walls of the towers turn out to have protrusions due to a discrepancy in the sizes of the blanks glued to each other, it is necessary to trim the towers on the sides, aligning the side walls.
We try on the “roof” on the towers. The flowerpot should fit freely onto the tower and extend onto it by 1-2 cm. Please note that after painting the dimensions of the tower will increase by 5-10 mm. Therefore, if the “roof” is difficult to put on the tower, then the tower also needs to be trimmed.
After the dark paint has dried, you can make a “lattice” on the gate. To do this, using a ruler, a screwdriver or scissors, we make deep grooves in the form of a lattice on the painted gate so that unpainted light polystyrene foam can be seen through them.
Let's move on to painting the walls. We start with the teeth. Despite the fact that I, like every decoupage artist, have more jars of paint than jars of cosmetics, for the walls I had to buy a large bucket of decorative plaster based on colored chips. Painting the teeth with plaster is the most labor-intensive operation, so the teeth must first be painted with paint to match the plaster, and the plaster itself can only be placed on the front and back sides of the teeth. You can generally not cover the teeth with plaster, but paint them with spray paint in a contrasting dark color, as we did on the third wall.
So, first we paint the teeth with paint to match the plaster. We use spray paint to paint each tooth on all sides. Let it dry. Then we cover the front surface of WALL-1 with decorative plaster. During this time, it is better to cover the window openings with pieces of foam plastic so that the plaster does not get inside the windows. The brush should be quite hard and clean. After painting, if possible, the brush should be washed off the plaster and placed in water. It is better not to use one brush more than twice due to adhering plaster. We are not painting the side walls of the towers yet. We will paint them last. We leave the WALL-1 blank to dry in the sun for two days. After two days, we turn the wall over to its back side and also cover it with decorative plaster. While it dries, you can work on the other walls.
WALL-2 . To make it we need two sheets of foam.
Scheme of WALLS-2
This is what it looks like when finished (the outermost tooth on each side then had to be cut off):
WALL-2 before painting
This wall is a variation of the first wall. Only here the tower is in the middle, and the gate is on the side. In addition, the battlements, as well as the tower, are cut from another sheet, and the windows are made through. The windows on the right side of the wall are filled with tabs painted dark. The windows on the left side are through. The height of the walls and tower is equal to the height of the sheet.
So, on the first sheet we mark the gates, windows and place for the tower. We cut out all the windows, including those on the tower, and paint the cut out pieces of windows a dark color. Then we paint the openings of the windows and gates, as well as the gates themselves, in a dark color. After applying the plaster, you will need to insert the dark pieces of windows on the right side of the wall back into the openings. We leave the remaining windows empty.
From the second sheet we cut out two blanks with windows for the tower. We make the windows at the same level as the windows located on the tower, on the load-bearing wall. Separately, we cut out two or four blanks for the battlements for the right and left parts of the main wall. We glue the tower blanks onto the front and back sides of the load-bearing wall, aligning the window openings. Then we also glue the teeth - on both sides of the load-bearing wall. I glued the teeth on only one side of the wall, using only two blanks, since I initially planned to make an extension behind the second half of the wall. The tower was made of three layers. The thickness of the tower can be increased by using an additional overhead wall glued to the front side of the tower (as we did when making WALL-1).
WALL-2 after painting (top view)
Don’t forget to leave the edges on both sides 3-5 cm free from the teeth, which will then be hidden under the towers, and make rectangular cutouts for joints measuring 3 x 1.5 cm along the edges on the back side of the wall.
We paint the teeth with paint to match the plaster. After the paint has dried, we cover the front side of the wall with decorative plaster (the teeth do not need to be covered with plaster). Then we sprinkle the part of the wall around the gate with fine stone chips and, patting, press the crumbs into the plaster. You can also sprinkle the second half of the wall with crumbs. After that, we leave the entire structure to dry for a couple of days, while we ourselves start making the third wall.
WALL-2 is ready
WALL-3 . To make it, we will need one whole sheet of foam plastic and pieces of sheet left after making WALL-2.
Scheme of WALLS-3
This type of wall is quite simple to make, but despite this, it looks impressive. Three retaining walls and teeth are glued to the main sheet. The teeth are painted with acrylic paint in a contrasting color. After painting with plaster, the wall is covered with a thin layer of stone chips.
The teeth on this wall have a more complex structure - the upper row is formed of wide teeth (3x3 cm), and the bottom row is made of narrow ones (4x1.5 cm).
Rice. 010. Teeth pattern
We cut out the teeth from strips 10 cm high. To do this, the strip needs to be divided into 3 parts - 3 cm, 3 cm and 4 cm high. On the first strip 3 cm high, we cut out teeth measuring 3 x 3 cm, the distance between the teeth is 1.5 cm. On the bottom strip 4 cm high, we make a triangular cut at an angle along the length of the entire strip, leaving a strip 1 cm thick at the bottom. After that, on the bottom strip we cut out long teeth measuring 1.5 x 4 cm. The distance between the lower teeth is no more than 1.5 cm Then we paint the teeth with paint using a spray can and a thin brush, carefully painting between the teeth. The teeth can be painted either to match the plaster or in a contrasting color.
Then, from the remaining foam plastic, we cut out three retaining walls in the form of triangles or trapezoids, the height of which should be at least a third and no more than half the height of the wall. We glue the supports and teeth to the main wall. Do not forget to leave 3-5 cm free from the teeth on both sides, which will then be hidden under the towers, and make rectangular cutouts for joints measuring 3 x 1.5 cm along the edges on the back side of the wall.
We lay the structure face up and cover everything except the teeth with decorative plaster:
We cover WALL-3 with plaster, after which we sprinkle the entire surface with small stones, carefully pressing them into the plaster.
This is what it looks like when finished (the outer teeth also had to be cut off to hide the edge in the round tower):
WALL-3 in finished form
While the third wall is drying, you can paint the back side of the first two walls with plaster, if their front sides have already dried by this time. Lastly, we paint the sides of the towers, placing the walls at the end. Let each side dry for two days.
Several such walls can be made. I limited myself to one. This completes the production of walls. Now you can start working on the corner round towers.
Stage 3. ROUND TOWERS
To make round towers, you can use any thick pipes of the required diameter that can be processed with a knife, for example, “shells” for pipe insulation made from foam plastic. If they are not available, then you can use foam insulation for pipes with a diameter of 110 mm, which is sold on any construction market.
Round towers before painting
To make three towers we will need four meter-long pieces of foam. From each of the four pieces we cut cylinders 8-10 cm long and cut teeth half the height of the workpiece. We cut the ring of teeth along the height and glue them on top to each of the three towers, wrapping them around the main part of the tower. We cut off the missing pieces with teeth from the fourth workpiece. While the glue dries, secure the seams with electrical tape for a better fit.
Next, on each tower we make longitudinal cuts along the length of the tower, equal in height to the height of the walls (60 cm) and in width - slightly more than twice the thickness of the walls. The width of the cuts can be increased after painting, when you insert walls into them.
For variety, one or more towers can be decorated with an additional cylinder with tall narrow windows. The overlay is made from the remaining fourth piece of foam.
Round tower with escutcheon
While the glue dries, paint the windows on the tower with black paint, cover the towers with acrylic primer or putty. And only after that, in three or four steps, we cover the towers with plaster, turning them 90-120 degrees. Initially, I neglected the puttying stage, but four years of the castle being exposed to snow and rain convinced me that it was in vain. The plaster from the foam towers slid off like a stocking. We had to redo it: cut off the towers, putty and paint again. So, don’t be lazy, we putty the penplin, and only then apply the plaster. Carefully paint the teeth.
While the towers are drying, you can start decorating, namely, making small parts for the towers and walls, such as roofs, flags, coats of arms, cornices, and small windows. The number of details depends only on your imagination and patience. You just need to keep the proportions.
Metal buttons and stripes can be used as a coat of arms. Flags can be made from colored self-adhesive film. We cut out a double flag, wrap a long screw under the cap and glue the sticky pieces together. We screw the screws into plastic flower pots. I didn't paint the pots, I just highlighted the indentations with black paint. The “coat of arms” was secured above the gate using glue.
Adding coats of arms and flags
Masonry elements can be added to rectangular towers and walls. For this I used black modeling paste. You can also use plasticine, but the advantage of the modeling mass is that, unlike plasticine, it hardens in air.
Wall-2 without decorations
Adding masonry elements and a roof to the tower
I made the roof for the middle tower from half a black paving slab.
When all the towers and walls are dry, you can begin the most important stage - assembling the castle.
Stage 4. ASSEMBLY THE LOCK
Despite the fact that the design of the lock allows it to be moved to any place, it is still better to assemble the lock on the site where it will stand.
Castle area.
The site for the castle must be prepared in advance. It should be level and preferably without a slope. At this stage my husband helped me. We decided to place the castle next to the pond, so our site had a slight slope towards the pond, which added additional difficulties for us when installing the castle. In order for the castle to stand level, it was necessary to cut the walls from below at an angle; fortunately, foam plastic, even covered with massive plaster, is easy to cut.
Having installed and connected the walls to each other, it is necessary to tighten the entire structure around the perimeter with a rope or cable, and then “glue” the walls at the joints with polyurethane foam. After the foam on the joints has dried, remove the rope and begin installing the round towers. To do this, we put the towers on top of the corners of the castle, inserting the walls into the longitudinal cuts made in the towers. If the cut is small, we enlarge it to the required size so that the towers fit snugly against the walls from the outside. The missing part of the towers on the inside of the castle can then be formed using polyurethane foam. We press the edges of the cuts tightly against the walls of the castle, supporting each tower with stops if necessary, and fill the towers from the inside with polyurethane foam, making small protruding slides on top. In addition, you can use polyurethane foam to form the missing parts of the towers on the inside of the castle. To do this, we form a protrusion of the desired shape from foam at the junction of the walls, and after the foam hardens, we cut off the excess with a knife and plaster it. We limited ourselves to covering the internal joints of the walls with plaster.
After the foam has dried, carefully cut off the excess foam protruding above the towers with a knife so that a flat area is formed on top of the tower under the battlements, which we also cover with plaster.
Filling the towers with polyurethane foam
Then we remove all the remaining foam in the places where the towers adjoin the walls and paint over them with plaster. After this, the castle must be covered and allowed to dry for two to three days until the plaster is completely dry.
The castle is ready
Castle - front view
Now you can move on to the last stage - illuminating the lock.
THE FINAL STAGE. LOCK LIGHTING
Undoubtedly, a castle built with your own hands will decorate your site at any time of the day. But it will look most impressive in the evening if you add special lighting.
Lock lighting
For illumination, you can use solar-powered diffused light lamps that need to be placed inside the castle. Then, through the through windows and open gates of the castle, located on the second wall, a weak light will flow at night, enlivening the castle and giving it mystery. And directional solar lamps, built into the “stones” and installed outside, will illuminate the walls from all sides.
But to illuminate the front wall, it is better to use a stationary directional light fixture, into which a color-changing light bulb is screwed in. And then the effect will be extraordinary.
And in conclusion, a few more practical tips for those who decide to repeat my feat.
1. At the stage of assembling the castle, it is very important to press the edges of the towers against the walls along the entire length of the tower when the foam hardens. To do this, you can use vertical boards supported by other boards. Otherwise, dents or, conversely, bulges may remain on the tower. If you make round towers from polyurethane foam shells, and not from soft foam, such problems should not arise. In addition, the towers must be covered with putty and primer before painting, otherwise the plaster may peel off.
2. Since covering small parts with plaster on all sides is a tedious task, you can not cover the battlements on the towers with plaster, but paint them with paint - either to match the plaster, or, conversely, in a contrasting color - red, burgundy, brick or black, like we did on the third wall.
Teeth painted with black spray paint
But in this case, it is advisable to paint the remaining battlements located on the walls the same color as the battlements on the round towers. On the first two walls we covered the crenellations with plaster, and on the third with contrasting acrylic spray paint. It took 20 minutes to paint the teeth and 8 days to cover the plaster, as each of the four sides took two days to dry. We finished the upper part of the teeth with plaster on the finished castle.
3. If after applying the plaster the parts of the castle dry in the open air, during rain it is necessary to cover them with film. Otherwise, the resin from the plaster is washed out and leaks out. After the final painting we forgot to cover the lock. It rained during the night and white resin fell into the water. We had to clean the pond unscheduled.
4. Do not strive for perfect smoothness and evenness when covering walls and towers with plaster. On the contrary, irregularities and “potholes” will give your castle a natural look. The main thing is that the white or pink foam does not show through in the potholes. For a greater effect of “aging” the walls, you can paint the walls and towers dark gray or dark brown before applying plaster. Most importantly, before painting, do not forget to make sure that the paint does not corrode the foam!
5. When working with plaster, use a spatula and thin paint brushes. Don't skimp on brushes. It is extremely inconvenient to work with a brush with adhering plaster, and it is almost impossible to wash it off the plaster. That's why we didn't use the same brush more than twice.
6. Roofs for towers can be made from any bendable material in the form of cones or pyramids. I decided not to bother and use plastic flower pots of suitable size.
7. Don't get carried away by the abundance of small details. From a distance they are still not visible, and require considerable labor costs. And do not forget to maintain proportions when making small parts. A disproportionately large window or flag can visually reduce the entire structure.
I hope that this master class will convince you that becoming the owner of a castle is not so difficult, and a castle built with your own hands will become the center of attention on your site and will not leave your guests indifferent.
Required materials and tools
To make a tall or small tower you will need the same materials. The principle of assembly is to print out the templates and glue it at the seams. The size depends on the sheet of paper on which shape the template is drawn. You will need:
- paper;
- scissors;
- cardboard;
- markers;
- cutting board;
- breadboard knife;
- PVA glue or pencil;
- paints;
- markers;
- cardboard boxes.
It is better to use thick album material so that the craft holds tightly. Such tools are easy to find in every home, especially if there is a child in it. Children often do handicrafts at home and in class. This helps them develop creatively.