I think many owners of their homes had a feeling that something was missing. Someone is tired of being crowded with a large family in a small house. Some people dream of having their own garage. And others even want to have a bathhouse and a luxurious veranda in their home, where they could relax after a busy day.
The best option for enlarging a house is foam blocks. They seem to be created for building walls with your own hands: lightweight, easy to install, unlike traditional materials (brick, cinder block). We will now tell you how to make an extension to a house from foam blocks.
Extension to a wooden house
Features of laying the base of the extension
A special feature of laying the base of the extension is the connection of the new foundation with the old one, with the base of the house. My house stands on a strip foundation, therefore, under aerated concrete extensions, we lay a strip foundation. Despite the fact that the walls will be made of gas blocks and lighter in weight.
- In the old base I drill holes with a diameter slightly larger than the reinforcing bars that are planned to be used for the tie.
- The depth to which the holes need to be drilled is (ø reinforcement 12mm × 35 = 420 mm). Length of reinforcement drilling depth × 2 = 840 mm.
- I determine how many rods of a new foundation are needed: 5 reinforcement rods per quarter of one meter square of the foundation wall.
- I hammer the rods into the holes and weld nuts onto the free end. During the work, this end will be filled with concrete in the new foundation and will provide a strong bond.
Next, I begin the construction of the reinforcing frame for the base of the extension to the house made of aerated concrete. For this I will need reinforcement bars (ø 12 mm) and a welding machine. Next, I make a sheathing of boards and begin to fill the foundation with concrete.
- Cement – 1 part M-300.
- Clean sand - 1.9 parts.
- Average crushed stone – 3.7 parts. Instead of crushed stone, you can use washed gravel.
Cement consumption is 320 kg per 1 cubic meter.
The base is filled with concrete mortar for an aerated concrete extension to a wooden house. I let it sit for about 20 days.
My extension has the following parameters:
- Base perimeter = 30 meters
- Foundation depth = 1.6 meters.
- The height of the foundation in the above-ground part, that is, above ground level = 0.4 meters.
- Width = 0.6 meters.
- Concrete grade M-300
For work I needed:
- Concrete = 36 cubic meters.
- Cement = 11520 kg.
- Sand = 21 tons.
- Crushed stone = about 40 tons.
- Reinforcing bars 600 meters
- Boards for formwork (with a thickness of 25 mm) = 6.6 cubic meters.
Premises requirements
When planning an extension, it is worth considering in advance the purpose of the future premises and the features of its operation.
If you are planning to add a bedroom or living room, then the room should have:
Compliance with these requirements will make it possible to connect the room to the heating system of the house and ensure a comfortable temperature in it.
If you plan to build a kitchen or bathroom, then before building the foundation you need to take care of the connections: water and gas supply, sewerage. Insulation of walls, ceilings and floors, as well as waterproofing are no less important points.
To build a veranda or open terrace, you will not need to provide communications. A solid foundation with waterproofing will be enough to prevent moisture from penetrating into the room.
When installing a boiler room, the annex must be connected to the sewerage system, have a sufficient area (at least 15 cubic meters), as well as a reliable ventilation system. Free access to the heating unit is an important safety requirement. The boiler room cannot be attached to a wooden house in a place where there are doors or windows - only blank walls can be used.
If you are going to add a garage, you need to provide exhaust ventilation (natural or forced). This will protect your home from exhaust gases from the garage, as well as from other unpleasant odors. In addition, the garage must be provided with a water supply and drainage system, electrical wiring, a fire alarm system and heating (if year-round living is expected).
A porch is another option for an extension. May have several steps, be built from wood or blocks, and must be equipped with railings for safety.
Cost of materials:
- Cement M-300 (50 kg) = 220-240 rubles.
- Sand (1 ton) = 800 rubles.
- Crushed stone (1 ton) = 870 rubles.
- Reinforcement (1m) = 25 rubles.
- I had prepared reinforcement bars 30 cm long in advance.
- Then, every two or three rows of brickwork of the old building, I made holes with a hammer drill into which I inserted these rods for the aerated concrete extension to the brick house. The depth of these holes should be half a brick.
- I started laying new walls from the corners.
For better adhesion of the blocks to the solution, the lower part of the block was moistened with water. To prevent further collection of capillary moisture. On the first layer of masonry, a waterproofing compound was laid in two balls. I strictly ensured that it was perfectly level both horizontally and vertically.
Errors were leveled using concrete mortar. The thickness of the solution between the rows is approximately 2 mm.
Now I need to make a reinforced belt:
- I make it on the wall itself.
- I make a wooden template and lay out the required size reinforcing bars.
- I weld these rods together.
- I align horizontally and also along the axes.
- I cover it with blocks cut to size.
The reinforcement of the base of the extension is laid at the bottom of the foundation, but so that it does not touch the ground itself. To prevent further corrosion. It must be filled completely with a monolith.
To make a distance of 2 mm when laying walls, you need to use a special adhesive solution for laying.
With the extension parameters specified above, the extension to the house is made of aerated concrete. I did the math: I have one front door + one window. I added the thickness of the masonry + the thickness of the mortar. And with the size of aerated concrete blocks 19*29*59. I needed 1002 pcs. blocks.
When digging a pit, you must strictly ensure that its walls are strictly vertical to the bottom, and the bottom of the pit is perfectly flat.
When making a cushion under the base of the extension, it is recommended to water the sand and crushed stone to make it easier to compact.
openings for windows and doors
Upon completion of the construction of the extension, it is necessary to make the formwork removable or permanent. Removable formwork is lighter, so I chose it. To install it, I used a ready-made block in the shape of the letter U. I installed blocks with a sawn base into the opening itself. Its length is about 20-25 cm.
U – the block was placed on glue. Then the frame from the reinforcement of the extension to the aerated block house photo was very rigidly attached using spacers. Next, the U-block was moistened with water and the structure of the openings was strengthened with concrete mortar.
Final works include roof installation and finishing work:
- To cover the extension I used well-dried pine beams.
- Beams and extensions to the house made of aerated concrete blocks (video) that were prepared in advance were raised onto the walls.
- I treated the beam pillows with an antiseptic.
- I put roofing felt on the anchor and fastened it to the beams in which I had previously drilled a hole. I tightened it with nuts and washers for safety.
- I lined the bottom with plywood and boards. The space was filled with thermal insulation material.
Tips from builders
Adviсe:
- the roof of the extension must be placed under the roof of the building;
- roofing material must be laid on the finished flooring;
- first you need to make the roof sheathing;
- The roof of the extension can be installed in various ways.
You can build the roof for the extension yourself. This will require building materials, tools, as well as your free time.
There are two types of roofing for an extension (single-pitch, gable). The pitched roof has a simple design, which is why it is very popular. You can carry out calculations using programs or online services.
Results
Thus, we have examined step by step how to make an extension for a house from an aerated block. I hope that everything turned out right for you and that your new premises will serve you for decades!
Foam concrete is one of the latest developments in the construction industry. This material has many undeniable advantages and is very popular. Its cellular fractional structure has low thermal conductivity, which allows you to avoid spending money on additional insulation. Light weight and dimensions larger than brick or sawn stone (standard foam block size is 600x300x200) can significantly save sand and cement during construction.
Due to their unique porous structure, foam blocks have good sound insulation. These same properties create the effect of a “breathing” wall, which protects the extension from condensation, which causes the formation of mold or mildew. For the production of foam concrete blocks, environmentally friendly natural components are used.
Planning and drawings of a foam concrete extension to the house
First of all, decide on the location of the extension, its size and height. It is important that the roof of the structure is slightly lower than the roof of the house.
- Provide and plan communication routes. This must be done at the initial planning stage, otherwise you will face the problem of laying them after the walls are built.
- It is also necessary to provide for the possibility of an expansion joint occurring at the junction of the extension and the main structure.
- The doorway in the extension can be arranged in the place where the window is located on the outer wall of the house, or it can be cut through the load-bearing wall. In this case, take into account external loads.
Cinder block calculator
Even when construction is carried out by professionals, it is still worth knowing how to correctly calculate how much materials are needed. The simplest and most reliable way to calculate the required amount of building material for masonry.
Calculation of a cinder block for a house or garage:
- Multiply the length of the walls by their height.
- Subtract the area of the doorways from the amount.
- Now you need to calculate how many cinder blocks will be needed for one square meter of masonry:
- We multiply the length of the block by its width: 390 * 190 = 74,100 mm2.
- We convert the resulting figure to m2. This turns out to be 0.074 m2.
- We divide 1 m2 by the result obtained: 1: 0.074 = 13.5.
- After rounding, it turns out that 14 cinder blocks are needed per 1 m2.
- Multiply the square of the house by 14.
- If the house is 200 m2, then 200 * 14 = 2,800 cinder blocks are needed for its construction.
Arrangement of the foundation for the structure
It is easier to build an extension to a house from foam blocks with your own hands than from traditional materials. The foundation for an extension made of foam blocks is made using the tape pouring method from concrete or from the elements of the future structure themselves.
- The depth of the base depends on the height and weight of the extension. For a small building, it is enough to dig a trench 50 cm deep and up to half a meter wide around the perimeter. When laying a foam block foundation, it is important to pay attention to the insulation and waterproofing of the underground part of the structure. The foundation is subject to the influence of groundwater and temperature changes.
- Moisture absorbed into the material in winter can freeze and contribute to the destruction of the base, and the condition of the walls depends on its strength. At the start of construction, at the zero cycle, work on insulation and waterproofing begins. For insulation, polystyrene foam, mineral wool, penoplex and other materials are used.
- Laying of heat-insulating boards is carried out immediately at the time of waterproofing. The dried foundation is coated with water-repellent mastic. Thermal insulation slabs covered with hot, about +70°C, bitumen are attached to it. There is no need to attach them additionally. When filling the trench, the earth will press the insulation to the base. Elements of thermal insulation material should protrude approximately 50 cm above ground level.
- There is another type of foundation insulation - polyurethane foam. This is a new and more expensive product, but its use solves the issue of maintaining temperature and implementing waterproofing at the same time. Using a special machine, polyurethane is sprayed in a layer of up to 5 cm onto the surface of the foundation. A coating of this thickness corresponds to 12 cm of ordinary polystyrene foam.
These materials successfully cope with the task of insulating and waterproofing the house and prevent the formation of cold bridges, which, in turn, protects the living space from the formation of mold and mildew on the internal walls.
Design
Design is considered an important point during construction. If the extension will be carried out with your own hands, then it is advisable to use the services of architects who will correctly create the design, since the appearance of the additional structure must correspond to the main structure.
When preparing a project, you must also do the following:
- accurately calculate the load of the new building on the ground, because the type and strength of the foundation will depend on this;
- determine possible lighting options, for example, if it is a veranda, then the required number of windows and a doorway should be provided in it;
- resolve the issue with the entrance to the extension, because most often in such cases only one door is designed, which subsequently serves as a connecting element for the additional and main structure; if desired, you can also make two separate entrances: one to the street and the second to the house;
- think about how electricity, sewerage and water supply will be installed; If the structure is being completed as a living space, then it will be necessary to install heat and sound insulation.
Construction of walls for an extension from foam blocks
Roofing felt or rubemast can be laid along the frozen and established perimeter of the base. This layer, laid at the level of the dew point, prevents the penetration of moisture above the floor level.
- When laying the first row of foam block walls, ordinary cement mortar is used. Construction, as usual, should start from the corner. 3-4 horizontal rows of foam concrete blocks are laid out and time is given for them to set. This ranges from an hour to three to four, depending on the cement adhesive composition used.
- At the points where the extension adjoins the wall of the house, connecting mortgages are driven in. For them, scraps of metal rod or reinforcement with a diameter of 8–10 mm and a length of about 30 cm are used. The rod is driven into the wall up to half its length, and its protruding part must fit exactly into the seam between the foam concrete blocks.
- When erecting walls, constantly check the horizontality of the rows and the verticality of the structure with a level and plumb line. The last row of the wall is made taking into account the laying of rafter beams for the roof. It is possible to make a gable or single-slope roof, as well as a cascade roof for the extension.
Conclusion
As you can see from the article, when building an extension there are a large number of nuances that cannot be predicted by an inexperienced person. Therefore, if possible, it is better to contact a specialist.
The video below in this article will help you understand some of the nuances of masonry.
Later I will tell you about the following work done. And now I’m asking for help with the outbuilding itself (hence the combined house):
- I plan to make an extension in the form of a warm veranda (to be used as a living room and kitchen until November or severe cold) and a terrace (such a letter G encircles the house). There will be a metal stove on the veranda. I attach it to the entire structure
- Dimensions of the extension: veranda length 9 m, width 3 m, height 2.5 m (on one side it is adjacent to the cinder block house). Terrace dimensions: length 5 m, width 3 m
- For the foundation I plan to use screw piles (6 pieces, 89 mm in diameter, with a head of 150*150, painted, filled with concrete) and the existing foundation of the house (100 mm protrusion)
- I plan to make the veranda walls from 150mm*150mm timber. “Shaggy” timber, natural moisture. I want to plan and chamfer the inside for use as a finished wall. Insulation-jute
- For the roof of the veranda, I plan to connect new rafters from the veranda to the existing rafter system of the house. The roof is planned to be made of metal tiles. The roof is planned to be warm
- Metal tiles will also be used for the roof of the terrace.
- The logs on the veranda are planned from 150*150 timber, every meter apart, with a subfloor and mineral wool insulation, eventually laying laminate flooring
- Three windows are planned. Dimensions width 1.5 m, height 1 m. Plastic windows
- Windows and doors will be placed in frames with a height reserve (for shrinkage of the timber)
- In the future I plan to insulate the walls with insulation and make a facade for the entire house
- On the attached diagram I have highlighted the premises under construction in red.
Please help me with the following questions:
- Will this structure fall apart when using a combined foundation?
- Is it possible to tie the veranda rafters to the existing rafter system of the house, taking into account the different functioning of the foundations and the shrinkage of the timber?
- Is the choice of timber optimal in terms of price/quality ratio for a warm veranda?
- How to insulate the junction of a timber wall to the wall of a cinder block house?
- Is it possible to install plastic windows in a frame without waiting for the frame to shrink, if you leave a margin of 7-10 mm, temporarily insulating it with tow?
- Is it possible to use metal rods as dowels (my father-in-law is very insistent, saying “we’ve done this many times, no one has complained yet”)? I want to use wooden ones. What happens if we install metal dowels?
- Will the log house wall be too thin if I use 100*150 timber and plan it on one side?
- How to insulate and make steam and hydro insulation of the roof of the veranda and the house (in the house, there will be an attic under the roof) so that condensation does not accumulate?
- What else should you pay attention to?
The active phase of construction is approaching, I’m really exhausted. I'm really looking forward to some good advice
About 15 years ago, my brother bought a small but very comfortable brick house in the Tambov region. Everything in it suited the new owners, except for the hallway, which was too small, and a canopy over the entrance would have been nice.
The beds are wonderful, soft. The best part is that if you die, you'll just wake up next to him, although you'll drop all your stuff where you died and have to get it back. To make one, like the bottom row of your crafting grid with boards, then in the middle with wool and pull out your resulting bed!
To kill sheep, keep hitting the sheep or hitting them with your tool until it falls down. Shaving requires scissors, which can be acquired by smelting iron ore into iron ingots and then stacking them diagonally in your inventory grid or crafting.
- Wool can be acquired by killing or shaving sheep.
- Now select the scissors and climb onto your sheep.
- Sheep shearing would leave you with a bald but live sheep and 1-3 wool.
Place it on the floor. Grass is good, but not for interior spaces, so dig out the first layer of mud blocks from inside your home and replace them with whatever material you want.
Therefore, it was decided to add a small room to the house from the entrance, which in the future could be used as a hallway, and the entrance to it should be protected from precipitation by a canopy.
External and internal finishing of walls made of foam concrete
- Foam concrete itself has all the necessary technological properties for the construction of any structure. When creating extensions from foam blocks, the external walls only need decorative cladding.
- External walls can be plastered; the solution adheres well to foam concrete blocks and does not crumble during the operation of the building. A good option is to decorate the building with siding. It all depends on how the outer covering of the structure will be combined in style with the main building.
Interior decoration is done as in a regular house. A layer of plaster is applied, which is then putty for painting or wallpaper. Consider interior design options with plasterboard or wood paneling.
Before embarking on any construction activities, it is necessary to clearly define the purpose of the structure being created. Even an extension to a house made of foam blocks is not built on the principle of “later we’ll adapt it to something else.” This approach will in almost any case lead to the need for rework. Despite the numerous features, there are general principles for organizing construction. It all starts with the choice of the main material.
For any type of room you need to decide
with the type of wall material. There are parameters that are important for all objects:
- strength;
- ease;
- weather resistance;
- ease of processing and installation;
- low thermal conductivity;
- high heat capacity;
- short shrinkage time.
Most building materials satisfy only some of the requirements and fail to cope with others. Thus, wood has the highest heat capacity, but is unstable to moisture and takes a very long time to shrink. Brick is strong, but heavy and requires qualifications to lay it.
One of the materials that has all these qualities is foam concrete. It fits well with other materials, which is important for the construction of an extension. It also has another undeniable advantage - low price!
You can even make foam blocks yourself right at the construction site. This does not require any qualifications. In general, the technology consists of supplementing the process of conventional concrete mixing by connecting a foam generator. The resulting solution is lighter than the traditional one. So pouring into molds only becomes easier.
This method allows you to save money and space for
storage, and also avoid purchasing an excessive number of blocks. Manufacturing time may be even less than that spent on procurement and delivery. In this case, blocks of complex configurations are created literally piecemeal.
For these reasons, it is advisable to choose foam concrete for the walls of most buildings. Having decided on the basic material, it is necessary to move on to a clear understanding of the desired image and its formation in the form of a project.
Size matters
In some cases, a large building is not justified, in others it is a necessity. How to understand what size of your future home will be optimal? To do this, you need to take into account not only the number of people who will live in it, but also their age and activity. Here's what experts advise on which home to choose:
- For an elderly couple purchasing this type of property for a relaxing stay, a one-story building and a minimum number of rooms will be enough. In this case, its maintenance is as economical as possible, making housing easier to maintain;
- If your family consists of 3-4 people, including two working people who also do housework, then everyone needs their own bedroom. Otherwise, a problem may arise in the form of overcrowding, but if there are more rooms, they may remain idle, requiring cleaning and heating. In any case, there should be some room in the house where the whole family can spend time together - a kitchen, a living room;
- Consider the needs of older people and small children, if any in the family. In addition to the fact that they need separate rooms, housing should be comfortable and safe for them. For example, you should avoid steep stairs and glass decorative elements;
- Do you plan to frequently receive guests who would like to spend the night with you? If so, it is worth providing guest bedrooms for them.
You can choose the size of the house taking into account the number and employment of family members. The more people will live and visit in it, the larger the size and number of rooms it should have, but the possibility and ability to maintain and maintain it must also be taken into account.
Extension project
The design process for self-construction can be divided into 3 stages:
- Creation of an architectural image.
- Determining the features of a specific performance.
- Preparation of sketches or drawings of all structural elements.
Foam blocks allow the production of buildings of any configuration. So architecture is defined by adherence to a single style of the resulting building.
There are no fundamental restrictions on the type of finish. It is created similar or even identical to the external surface of the main house. At the same time, its own resistance to atmospheric influences makes it possible to postpone the cladding of external walls. This may be due to seasonal difficulties, a temporary lack of materials on sale or funds to purchase them.
Forming the technical part of the project exclusively for construction on your own is not difficult to do on your own. It is important to understand the basic principles and follow them carefully. Taking minutes to think through the details of a project can prevent significant time wastage during construction.
It is advisable for yourself to create a list or table of any format. It is recommended to write in it:
- all possible functions that may be required for the use of a particular room;
- design features necessary to ensure them;
- necessary materials and their quantities;
- start and expected duration of execution;
- personal notes, in particular the possible need to discuss specific features or alternatives with specialists.
The main functions taken into account are traditional:
This list contains the most important parameters to consider, but is not exhaustive. For this reason, even at the stage of compiling it, you can consult with any experienced people and even members of your family. Problems may arise that can be easily and effectively solved at the initial stages. For example, if the extension has swallowed up the original front door, a cat hole may be needed for the cat to escape. At the stage before the start of masonry, you can easily make a special block with a move. Its curvature and slight slope will not interfere with cat passages at all. At the same time, the premises in this place will be protected from weather surprises without additional equipment.
You also need to take into account the temporary need for a kind of construction site. It will be needed either for storing materials and finished blocks, or for organizing their production. An emergency, chaotic choice of location threatens to lead to the destruction of the mother-in-law’s favorite garden bed or to the need to walk tens of meters behind each block.
Careful development of each point allows you to create some kind of informal, but high-quality technical task for yourself. The result will be the necessary sketches and a compiled list of necessary materials. This will be quite enough to do all the work yourself. But in some cases there is a need to formalize and register it even before the start of work. There is no point in analyzing this procedure, since registration legislation is variable and differs in different regions. You just need to take into account that this process may take several months.
Construction stages
The actual construction work on constructing an extension from foam blocks is simple. The result depends on high-quality preliminary calculations and their conscientious, consistent implementation.
Foundation
The correct selection and production of the foundation for an extension is more important than for a separate building. Theoretically it can
use any of the classic types:
- tape,
- columnar,
- pile-screw.
The choice does not depend on the type of foundation already existing in the house, but mainly on the mass of the proposed structure and the characteristics of the soil. Structures such as a bathhouse with a heavy stove may require the manufacture of a strip base. Please note that this requires a lot of concrete and at least a month to manufacture. The pile-screw foundation is almost universal, but requires the involvement of specialists with the appropriate equipment. In most cases, a columnar foundation is sufficient to erect a structure made of foam blocks. Two people will do it in a few days.
Initially, it is necessary to clear and level the area and allow it to compact. The height of the pillars practically does not depend on the total load and is about 1 m. The weight of the building determines their number and location. It is advisable not only to make calculations, but also to discuss their results with specialists or with people who already have practical experience.
The process itself is simple and is performed in stages for all pillars at once:
- A hole is dug to a depth of 1 m.
- A sand or small stone cushion is installed.
- Waterproofing is provided. The most practical material for this is roofing material.
- The fittings are being installed.
- Covered with stones.
- Filled with concrete mortar.
Adjusting the height of foundation pillars
usually made with bricks. You can use logs to tie the pillars together, but it is more forward-thinking to make it out of concrete by making the simplest formwork. The result will be a reliable encircling foundation.
In each case, the hygroscopicity of foam concrete must be taken into account. A waterproofing roofing felt substrate must be laid on top of any foundation.
Wall masonry
Like any masonry, foam block masonry starts from the corner. The first layer is decisive for the geometry of the structure, so it is leveled especially carefully. It is advisable to use a laser level gauge. It will help you easily maintain the evenness of the surface in all dimensions.
Due to the hygroscopicity of foam concrete, the blocks of the lower row are treated with a waterproofing solution. The upper part of each next laid layer is moistened with water and coated with special glue. The thickness of the seam should be within 1 mm. It is recommended to cut a groove in every fourth row and lay reinforcement in it. This will prevent possible cracking of the wall.
Jumpers are installed to install windows and doors.
For this, traditional concrete structures or lightweight U-shaped analogues made of foam concrete are used.
To increase strength, a reinforced belt is mounted on top of the inner wall. Finished walls to eliminate cracks are fastened to the walls of the main building with reinforcing brackets. If necessary, plumbing connections are provided from below. The softness of the walls will allow you to drill niches for electrical wiring in subsequent stages.
Floor construction
To construct the floor, wooden logs are installed on the foundation. If necessary, voids are filled with expanded clay. This should be done without blocking the air passage.
The floor, determined by the nature of the room, is laid on the logs. If necessary, they can be heated. Considering that foam concrete does not shrink, there are no installation features in such rooms.
Construction of floors and roofs
The extension ceiling supports a lightweight roof in the absence of an attic. In this regard, it is advisable not to complicate or make the design heavier. In addition to wooden ones, it is convenient to install foam concrete slabs.
Roof installation is typical for any extension. Their common feature is sloping. As a result, there is practically no free space under the roof. To prevent the accumulation of condensation, do not overuse fillers. For the same reason, it is advisable to choose soft roofing materials.
Installation of windows and doors
Installation of windows and doors in foam concrete walls with
openings less than 1.7 m also does not have any special features. A larger distance must be supported by reinforced jumpers.
Depending on its purpose, any building has its own characteristics already at the construction stage. Filling and finishing are decided individually. Foam concrete provides great opportunities for construction creativity. By consistently performing the main steps outlined, it will be easy and interesting to independently build any extension from foam blocks and almost immediately enjoy the results of your work.
Making an extension to a wooden house is not at all as difficult as it seems at first glance, but before you begin to carry out your plans, you need to decide on the material from which the extension will be made. Foam blocks are considered the most popular building material for building extensions.
Adding to your home is one of the easiest and most efficient ways to expand your living space.
Geology
Projects for extensions are developed based on the results of surveys on construction geology and an audit of the existing building, even if the house is standard. On-site surveys are not a cheap undertaking, but the extension will be reliable and will not reduce the reliability of the house if and only if, unlike a new building, the soil underneath is homogeneous and its basic properties are as close as possible to those under the house. To determine whether it is even possible to build an extension in a given place, in the area for the extension, soil samples are taken in advance with a garden drill from the same depth within 1-1.5 m in an envelope - in the corners and in the center. The time for sampling is a really warm spring, when the soil above dries out; in mid-latitudes – early May. There should be no rain for at least 3-4 days before sampling. Before sampling, wells are thoroughly cleaned of soil that has crumbled from above. Each sample is immediately poured into a glass jar with a tight-fitting lid; plastic bags are no good!
First, we evaluate the heaving, subsidence and load-bearing properties of the soil by visual inspection of samples; under the house and the extension they must match to within a class. For example, a house on dry, non-heaving and low-subsidence sandy loam with a bearing capacity less than normal 1.7 kgf/sq. cm. And 2 m from the wall, i.e. under the proposed extension there is also non-heaving, but completely non-sagging cartilage or gravel with a load-bearing capacity that is obviously greater than normal. You can't fit in. Or, let’s say, instead of cartilage, dry silty sand, not heaving, but more subsident and weakly load-bearing; The result is the same.
If no visible differences are found in the samples that impede construction, we evaluate the homogeneity of the basic properties of the soil, including its water content and plasticity, in a comprehensive manner, based on relative humidity. For this:
- We weigh the enameled steel vessel and write down its weight Vp.
- Pour part of the sample into the container, immediately weigh it, and record the initial gross weight Ext.
- We heat the container with the sample over low heat until the soil crumbles into dust, i.e. will not dry completely.
- We also immediately weigh the container with the sample and record the final gross weight Vk.
- We calculate the initial and final net weights of the sample Рн = Вн – Вп; Rk = Vk – Vp.
- We calculate the relative humidity of the sample as H = 1 – (Rk/Rn).
For example, the initial net weight of the sample is 440 g, and the final net weight is 365 g. Its relative humidity will be 1 - (365/440) = 1 - 0.83 = 0.17 or 17%. The H values for all samples must coincide to within 10 percentage points (percentage of percent), if self-construction is planned, or up to 20 percentage points, if the project is developed by specialists and approved as expected. Let's say all samples gave moisture values of 17%, 18.7%, 16%, 16.5% and 19%. The deviation is calculated from the smallest value and its permissible value will be 1.6% for self-construction, and 3.2% for project construction. In this case, self-construction is impossible; geology must be ordered and a project developed.
Advantages and disadvantages of concrete blocks
The advantages of using foam concrete blocks: a high level of thermal protection, good sound insulation and fire resistance, lightness compared to other building materials, strength, ease of installation, simplicity and low cost of finishing after the construction of the building. In general, the technology for constructing an extension from foam blocks is similar to brickwork. However, an extension made of foam blocks in most cases is cheaper than one made of brick: firstly, due to the lower cost of the material and lightness, which allows you to save on building a foundation without sacrificing safety; and secondly, thanks to a simpler construction technology than brickwork. Installation of foam blocks does not require special skills; less time and effort is required to lay the blocks. Also, foam blocks are environmentally friendly, safe for humans, have low thermal conductivity, are not flammable and practically do not shrink.
But the foam block has one significant drawback: it is prone to freezing in areas with harsh climates due to its high hygroscopicity. However, this is a solvable problem; during construction it will be necessary to take more careful care of the waterproofing and thermal insulation.
Features of the construction of the extension
Before starting construction, it is necessary to conduct an examination of the wooden building. At the same time, the walls are checked and rotten logs are replaced during the process. They also find out the depth of the existing foundation and its dimensions.
Before installing the foundation of the extension, a small trench is dug next to the existing foundation, and reinforcing bars are inserted into the foundation itself to fasten the future foundation to the present one.
Construction of the foundation and walls of the extension
The first step is laying the foundation.
Foam blocks are a relatively lightweight building material, which allows you to build a simpler foundation.
Depending on the height of the extension, a strip or monolithic type of foundation is chosen. But it is important that the design of the foundation of the extension is similar to the foundation of the main building. The depth and shrinkage values of the foundations must be the same. Before laying the concrete solution, formwork is arranged, which is removed only after the composition has hardened (about three days). The waterproofing on the surface of the foundation must be tripled (for example, a layer of sealing mastic with insulation and a bitumen layer). Then a roofing material layer is laid. To connect the foundation with load-bearing walls, reinforcement pins with a diameter of at least 12 are most often used.
It is best to start building walls a year after finishing the foundation - this will reduce the inevitable subsidence of the foundation
.
The construction of the walls of the extension is carried out similarly to brickwork. A cement-sand mortar or a special glue is used as a binder, which is selected depending on the construction season. To avoid the occurrence of cold bridges, the thickness of the seam between the blocks should not exceed 3 mm. Laying is done layer by layer, starting from the end. If the annex is planned to be converted into a boiler room in the future, then the walls must be insulated; polystyrene foam or mineral wool can be used as insulation.
Foam blocks are environmentally friendly, cost-effective and efficient in construction.
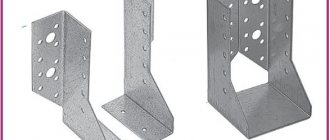
The key point of construction is the connection of the extension with the outer walls of the wooden house. Most often, reinforcing bars with a diameter of 10 and above are used for this. Every three rows, holes with a diameter of 60 mm and a depth of 50 mm are cut at the ends of the building. Then a hole for the reinforcement is knocked out, which is filled with glue. Thus, the extension made of foam blocks will be connected to the wooden building. If you wish, you can not connect the walls at all - it is enough to lay a gap between them with mineral wool or any other insulation or foam, and close the space itself with a plank or beams that are placed on the walls of the house on both sides of the extension. A few years after the construction of the extension, the connections are made rigid using metal fasteners.
Video description
And the next video shows the first part of the work on the reconstruction of the same house, which talks about the preparation - laying the foundation. The interesting thing here is that the extension is larger than the main building:
There is a third way - connecting the facade and the wall of the extension with brackets. To thermally insulate the joint, tape insulation is placed in it and covered with a flashing. After the end of the active phase of shrinkage (at least a year), the stripping and staples are removed, the joint is caulked again, the staples are driven in again and again covered with the stripping.
Construction of floors and roofs, façade decoration
To construct additional floors, you can use both slab floors and wooden beam floors. It is best to use aerated concrete slabs or hollow concrete slabs. For beam floors, the best solution would be pine timber, which must be treated with an antiseptic and fire-fighting impregnation - this way the timber floor will last much longer. To construct the ceiling, a lining is made of plywood sheets, light boards and chipboard.
After completing the construction of the extension, you can begin insulating and decorating the external walls. Most often, expanded polystyrene panels are used for this, and siding, lining, decorative stone with preliminary plastering of the walls are used to decorate the facade.
It is better to make the roof of the extension not continuous. The covering of the extension is carried out 20-30 mm below the roof of a wooden building, with an overlap that will not allow snow and rain to penetrate under the roof. As a roofing material, it is best to choose lightweight metal tiles or profiled sheets, so as not to overload the load-bearing walls. As a constructive solution, a simple pitched roof is chosen, which will be easy to construct and will not require significant costs for design and construction. In this case, a mauerlat is laid on the top layer of blocks, which is fixed to the walls. Then rafters and diagonal rafter legs are installed on the Mauerlat, on top of which the sheathing is secured. The selected roofing material is placed on the sheathing. It is best to secure the rafters using slides rather than metal corners. This will prevent the roof from moving when the building inevitably settles.
An extension to a house made of foam block is one of the simplest and most rational ways to expand your living space.
Obviously, making an extension from foam blocks is not as difficult as it seems at first glance. The main thing is to choose the right foundation design and follow the masonry construction technology. Then there should be no problems during operation and the extension will serve for many years together with the main wooden building.
Sooner or later, every homeowner begins to think about increasing the living space of their home. An extension is most often built to create a bathroom, a garage, an additional bedroom or a more spacious kitchen. At the same time, many questions arise with the choice of materials, arrangement of the foundation, connection of the old and new buildings.
Even before its construction, special requirements are imposed on the extension:
- The speed of construction should be such that the main work is completed in one season, otherwise there may be trouble with conservation for the winter.
- The cost should be acceptable for the family budget.
- Materials should be selected so that the building, either during construction or during operation, does not have a destructive effect on the main structure.
- It is advisable to make do with a lightweight building in order to lay a shallow foundation. This minimizes the risk of damage or displacement of the old foundation.
The project will meet all these requirements if you choose foam block as the material. This material has many advantages:
Among the disadvantages, it is worth mentioning the high hygroscopicity of the foam block and fragility. To combat the first, high-quality waterproofing is used, and a reliable monolithic foundation saves from the second.
Watch our video collection on the topic:
Important points when laying the foundation
An extension to a house made of foam blocks must rest on a strong, rigid foundation. In this case, it is advisable to give preference to shallow structures in order to minimally disturb the soil near the old building.
The most important question is should the old and new foundations be connected? The answer depends on the laying conditions and soil properties.
Dressing is permissible only if the following conditions are met:
- the soil on the site is not heaving;
- laying is carried out below the soil freezing level;
- the strength of the dressing allows it to withstand predicted tensile and bending loads.
The last point is the most difficult when implementing a project independently, since it is difficult to perform all the calculations, especially without having the results of a soil study in hand. Therefore, it is reasonable to choose the option without dressing.
For an extension from a foam block, you can make almost any type of foundation, only when using pillars or piles you need to make a rigid frame.
It is also important to create a compensating joint from roofing felt or any other elastic, hydrophobic, moisture- and mechanical pressure-resistant material at the junction of the old and new foundations. It is also important to carefully treat this place with waterproofing to completely prevent water from entering the seam.
Wall joints
Another very important place is the junction of the old and new walls. If you use foam concrete, the task is simplified, since this material practically does not shrink. However, there will still be movement due to subsidence of the foundation. The support of the extension will actively shrink during the first few years of operation. You will have to come to terms with the appearance of a gap in the joint.
It is worth refusing to carry out communications - electrical wiring, pipelines - in the first year after laying the walls. Or, provide for the possibility of displacement, create special bridges, expansion joints. For example, a corrugated pipe is placed in a groove for an electrical cable at the joint and the wiring is pulled through it.
Also, when performing further work, you should adhere to the following rules:
In general, building an extension from foam concrete blocks creates much less hassle than using more traditional materials.